
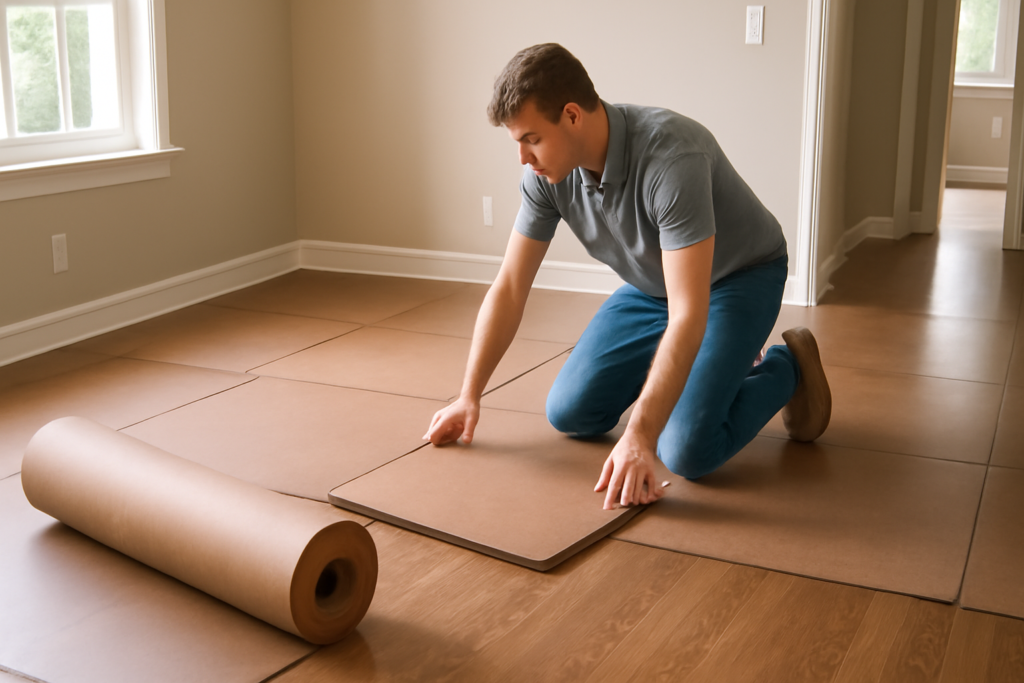
When a renovation is underway and you have new hardwood, tile, or polished concrete to protect from foot traffic, dropped tools, and rolling carts, masonite floor protection is the contractor’s standard answer. Masonite, a brand name that has become a generic term for hardboard, is a dense, smooth wood-fiber panel laid over finished floors to shield them during construction.
It is inexpensive, reusable, and tough enough to take serious abuse. Here is how it works, when to use it, and how to install it without damaging the very floor you are trying to protect.
What Masonite Actually Is
Masonite is a type of hardboard, an engineered panel made from wood fibers compressed under heat and pressure into a dense, rigid sheet. It typically comes in 4-by-8-foot panels around 1/8 to 1/4 inch thick, with one smooth face and one slightly textured back. The material is dense enough to spread impact loads and resist punctures, yet thin and flexible enough to lay flat over a floor.
In construction, it serves as temporary protection. Crews roll it out over a freshly finished floor so that subsequent trades, painters, cabinet installers, movers, can work without scratching, denting, or staining the surface below. When the job wraps, the panels lift out and can often be reused on the next project.
Why Use Masonite Over Other Options
Several floor-protection products exist, from rosin paper to ram board to plastic film. Masonite earns its place for a few specific reasons.
- Impact resistance: The rigid panel spreads the force of dropped tools and heavy carts, protecting against dents that thin papers cannot stop.
- Hard, smooth surface: It creates a stable walking and rolling surface, ideal under scaffolding, ladders, and dollies.
- Reusable: Unlike single-use papers, hardboard panels survive multiple jobs.
- Affordable: Hardboard is among the cheaper rigid protection materials per square foot.
- Heavy-duty coverage: Excellent for high-traffic protection during long construction phases.
For light, short-term protection, paper or breathable film may suffice. For serious construction traffic over a valuable finished floor, masonite is the workhorse.
Where It Works Best
Hardboard protection shines in heavy-duty, longer-duration situations. It is the right call when finished hardwood needs to survive months of trades working overhead, when polished concrete must stay scratch-free under foot traffic, or when you are moving appliances and cabinets across a tile floor.
It is less ideal for floors that need to breathe immediately after finishing. Freshly applied floor finishes and some coatings need to cure and off-gas, and covering them too soon or with a non-breathable layer can trap solvents and cause cloudiness or adhesion problems. Always confirm the floor finish has cured per the manufacturer before laying solid protection over it.
How to Install It Correctly
Done wrong, floor protection causes the damage it is meant to prevent. Follow these steps for a safe install.
- Let the finish cure first. Confirm hardwood finish or floor coating has fully cured per the manufacturer before covering it.
- Add a breathable underlayment. Lay a layer of rosin paper or a breathable protective paper under the masonite, especially on hardwood, so the floor can breathe and the hard panel does not sit directly on the finish.
- Lay panels smooth side up. Position panels with the smooth face up for a clean walking surface, and butt them tightly together.
- Tape the seams, not the floor. Tape the joints between panels with a contractor-grade tape to keep dust and debris from sliding underneath. Never tape directly to a finished floor; adhesive can lift or stain the finish.
- Check periodically. Lift a corner now and then to confirm no grit has worked underneath that could scratch the floor as people walk over it.
The cardinal rule: keep grit out from under the panels. A single piece of sand trapped beneath hardboard becomes a grinding tool every time someone steps on it.
Common Mistakes to Avoid
A few errors turn protection into damage. Taping directly to the finished floor is the most common, since removing tape later can pull up finish or leave residue. Skipping the breathable underlayment on hardwood is another, because trapped moisture or solvents can cloud or damage the finish.
Covering a floor before the finish has cured can ruin a fresh coating. Letting debris collect under the panels causes scratches. And leaving hardboard down for an extremely long time on a not-fully-cured floor can trap moisture. Avoid those, follow the floor finish manufacturer’s guidance on when and how the floor may be covered, and the protection does its job.
What It Costs
Hardboard is inexpensive, which is part of its appeal. As an estimate, a standard 4-by-8-foot masonite or hardboard panel often runs in the range of roughly $10 to $25 per sheet at home centers, with thicker or higher-grade panels costing more. Because each sheet covers 32 square feet and the panels are reusable, the per-square-foot cost over a project is low, frequently under a dollar per square foot for a single use and less when reused.
Add the cost of rosin paper underlayment and contractor tape. Compared with refinishing or replacing a scratched hardwood floor, the protection is cheap insurance. These figures are general estimates; prices vary by region, brand, and panel thickness.
Storage and reuse stretch the value further. After a job, sweep the panels clean, check for cracks or delamination, and stack them flat in a dry spot so they do not warp. Hardboard that gets wet swells and loses its smooth face, so keep stored panels off damp concrete. Handled this way, a set of panels can protect floors across several projects before it needs replacing.
Is Masonite the Right Choice for You?
For heavy-duty, longer-term protection of a valuable finished floor during construction, masonite floor protection is hard to beat on durability and value. It guards against the impacts and abrasion that thin papers cannot, and its reusability stretches your dollar across multiple projects.
Just remember the fundamentals: let the floor finish cure, use a breathable underlayment, never tape to the floor itself, and keep grit out from underneath. Handle it that way and the panels protect your investment reliably from the first day of demolition to the final cleanup.
Prefer to explore on your own?
See how new flooring looks in your actual room in seconds — free, no signup.
Try the free Floor Studio →

