Nothing sours a finished remodel faster than a scratched floor you just paid to install. Floor protection film is the thin, self-adhesive plastic sheeting contractors roll out to shield finished surfaces during construction, painting, moving, and cleanup, and it is one of the cheapest forms of insurance in any project. Whether you are refinishing a whole house or just protecting the hallway while a new appliance comes through, understanding how these films work will save you from grinding grit into a brand-new surface.
Protection film is not the same as a drop cloth or ram board. It is a temporary adhesive membrane, usually polyethylene, that clings to the floor and stays put, so it will not shift underfoot the way a tarp does or need taping down at every seam. It creates a physical and often waterproof barrier against paint drips, dropped tools, dragged furniture, plaster dust, and muddy boots, then peels up cleanly when the job is done.
Common Types of Floor Protection Film
Films are engineered for specific surfaces, and using the wrong one is the biggest source of trouble. The three broad categories cover most home projects.
- Hard-surface film is a self-adhesive polyethylene made for finished hardwood, tile, vinyl, and sealed concrete. It sticks to smooth flooring, resists moisture, and typically peels away without residue within the manufacturer’s time window.
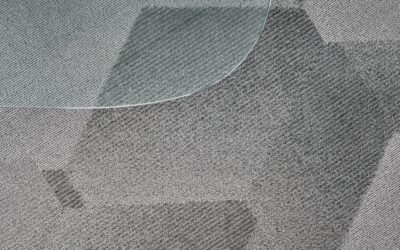
- Carpet protection film uses a stronger adhesive tuned to grip carpet fibers without pulling them, protecting against foot traffic, spills, and dust during painting or a move.
- Adhesive-free films and reverse-wound rolls rely on a textured or cling surface instead of glue and suit delicate or freshly finished floors where any adhesive is a risk.
There are also heavier options, like ram board and corrugated protection, used where impact resistance matters more than a thin film, such as under scaffolding or heavy rolling loads. For most homeowner projects, though, a self-adhesive film hits the balance of protection and easy cleanup.
Matching Film to Your Floor
The single most important rule is to match the film to the surface and to respect its time limit. Hard-surface films are made to stay down for a stated period, often about 30 to 45 days, and leaving them longer risks the adhesive curing onto the finish and lifting it or leaving residue when you remove it. This is especially true on freshly finished hardwood.
Freshly refinished or newly installed hardwood deserves particular caution. A polyurethane or oil finish needs time to fully cure, and applying an aggressive adhesive film too soon can pull the finish or trap solvents. If you must protect a newly finished floor, wait for the manufacturer’s cure time, choose a film rated for hardwood, and test a small hidden area first. On tile and sealed concrete, films are more forgiving, but you should still confirm the product is rated for that surface.
Where Floor Protection Film Earns Its Keep
Homeowners and pros reach for protection film in a predictable set of situations. During interior painting, it catches roller spatter and drips that a drop cloth misses at the edges. During a move, carpet film keeps traffic paths clean and stops movers from tracking mud across light carpet. In a full remodel, it shields finished floors in rooms that are done while work continues elsewhere. It also protects surfaces during drywall sanding, when fine dust settles everywhere, and during appliance or furniture deliveries where dragging is a risk.
The film’s waterproof quality is an underrated benefit. Spilled paint, joint compound slurry, and tracked-in rain bead on the surface instead of soaking into wood or grout, so a quick wipe or a peel-and-toss keeps the underlying floor pristine.
How to Apply Floor Protection Film
Application is simple, but a clean surface and careful edges make the difference between film that stays put and film that curls up within a day. The floor must be clean and dry before you start, because dust and moisture underneath ruin adhesion and can trap grit against the finish.
- Sweep and vacuum thoroughly, then wipe up any moisture and let the floor dry completely.
- Start along one wall, peel back a few inches of the leading edge, and press it down, then unroll slowly while smoothing as you go to avoid air bubbles.
- Overlap seams by a couple of inches so no gaps expose the floor, and press the overlaps firmly.
- Run a putty knife, a floor roller, or a firm hand over the whole surface to seat the adhesive.
- Trim edges around cabinets and thresholds with a utility knife for a snug fit.
For carpet film, apply it in the traffic direction and press it into the pile with a roller so it grips. In doorways and high-pivot spots, add an extra strip, since those are the first places film wears through.
Removing It Without Residue
Clean removal comes down to timing and technique. Peel the film up within its rated window, and remove it slowly at a low angle, pulling back on itself rather than straight up. Fast, steep pulls can stretch the film and leave adhesive behind. If any residue does remain on a hard surface, a mild adhesive remover or a little rubbing alcohol on a cloth usually lifts it, but always test first on an inconspicuous spot, especially on finished wood.
If a film has been down too long and the adhesive has begun to set, warming it gently with a hair dryer softens the glue and helps it release. The lesson most pros learn once is to never exceed the manufacturer’s stated time on the roll, because a film that would have peeled cleanly at four weeks can become a scraping nightmare at eight.
Is It Worth It?
For the cost, floor protection film is one of the highest-value materials in any renovation. A roll runs a small fraction of what it costs to refinish a scratched hardwood floor or replace stained carpet, and it turns cleanup from a chore into a peel-and-toss. Match the film to your surface, respect the time limit, apply it to a clean dry floor, and it will protect your investment quietly through the messiest phases of a project, then disappear without a trace when the work is done.
Prefer to explore on your own?
See how new flooring looks in your actual room in seconds — free, no signup.
Try the free Floor Studio →