The shower is the centerpiece of any master bathroom, and the tile you choose sets the entire tone of the room. After years of building and remodeling master showers, I have learned that the best master bathroom shower tile ideas balance beauty with the practical realities of a wet, daily-use space. A shower has to look like a spa and perform like a workhorse — resist water, grip wet feet, and stay easy to clean — and the right tile choices deliver all three at once.
In this guide I will walk through the design directions I return to again and again: classic subway, dramatic large-format, marble-look porcelain, accent niches, vertical stacked layouts, floor-to-ceiling coverage, mosaic shower floors, grout strategy, mixing tiles, and curbless designs. Along the way I will fold in the practical notes — slip resistance, maintenance, and slope — that keep a gorgeous shower from becoming a headache.
Classic Subway, Reimagined
Subway tile earns its perennial popularity because it is clean, timeless, and affordable, but in a master shower I like to push it beyond the expected. The standard 3×6 white subway in a running bond is a safe classic, but swapping to a larger 4×12 or 4×16 subway gives a more current, elongated look with fewer grout lines. Laying it in a vertical stack or herringbone instead of the traditional offset instantly makes it feel intentional and modern.
Color and finish change the whole feeling too. A soft sage, warm greige, or deep navy subway reads far more custom than plain white, and a handmade or zellige-look subway with subtle surface variation catches light beautifully in a shower. Pairing a colored or textured subway on the walls with a simple contrasting grout turns an inexpensive tile into a designer feature.
For a master shower specifically, I often run subway on the main walls and reserve a richer material for an accent, getting the timeless durability and value of subway while still delivering a wow moment. It is a strategy that ages gracefully and keeps the budget where it belongs.
Large-Format and Marble-Look Porcelain
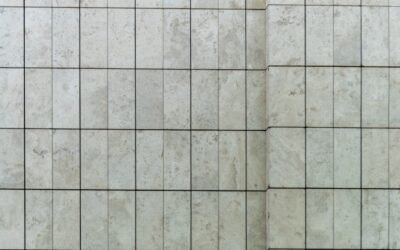
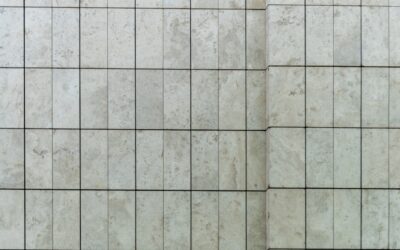
If you want that seamless, high-end spa look, large-format porcelain is the move. Big tiles — 12×24, 24×24, or larger slabs — cover shower walls with minimal grout lines, giving broad, calm planes that read as luxury and are far easier to keep clean than a busy small-tile grid. Fewer joints mean less grout to scrub and seal, a real advantage in a wet space.
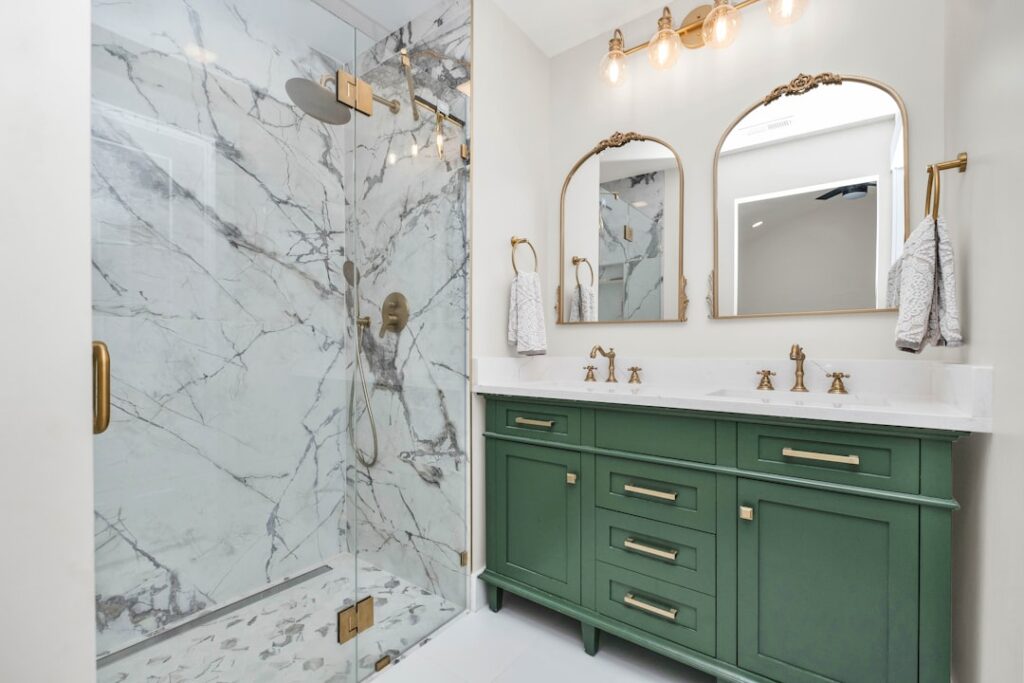
Marble-look porcelain is my favorite way to get the drama of natural stone without its maintenance. Real marble in a shower is porous, stain-prone, and needs regular sealing; marble-look porcelain gives you the same dramatic veining and depth with the toughness and near-zero water absorption of porcelain. Large-format marble-look slabs running up the walls create that book-matched, stone-clad feel that anchors a master bathroom.
The practical caveat with large format is flatness — big tiles demand a very flat substrate and large-format medium-bed mortar to avoid lippage, and glossy versions need attention to slip resistance on any surface you stand on. Keep the polished marble-look on the walls and choose a matte or textured tile for the floor, and you get the luxury look safely.
Niches, Benches, and Accent Details
A well-designed shower niche is where function meets style. Every master shower needs a place to set shampoo and soap, and a recessed niche keeps the walls clean and clutter-free. Beyond utility, the niche is a natural spot for an accent — lining the back of the niche with a contrasting mosaic, a marble-look slab, or a metallic tile turns a storage cubby into a jewel-box focal point.
I like to align the niche with the grout lines of the surrounding field tile so it looks built-in rather than punched-in, and to place it at a comfortable reaching height, generally around chest level. A built-in bench, clad in the same accent or a slip-resistant surface, adds luxury and practicality for shaving or simply sitting under the water, and it is a must for accessible, age-in-place designs.
Accent bands and feature walls are other easy ways to add personality. A single wall of bold tile behind the shower fixtures, or a horizontal band of mosaic at eye level, breaks up an expanse of field tile without overwhelming the space. The key is restraint — one strong accent reads as designed, while three competing ones read as chaotic.
Vertical Stacks and Floor-to-Ceiling Coverage
Layout direction dramatically changes how a shower feels. A vertical stacked layout — tiles aligned in straight columns rather than offset — draws the eye upward and makes the ceiling feel taller, a great trick in a master bath with standard-height walls. Vertical stacking with a rectangular tile is one of the most current looks and gives a crisp, architectural rhythm.
Taking tile floor-to-ceiling, rather than stopping at a shower-head-height band, is another way to elevate a master shower. Full-height tile makes the shower feel like a continuous, enveloping space and reads as more custom and more expensive than a partially tiled surround. It also protects more wall area from moisture, which is a practical bonus in a heavily used master shower.
You can combine these ideas — a floor-to-ceiling feature wall in vertically stacked large-format tile behind the fixtures, with simpler tile on the side walls, concentrates the drama where it counts. When the whole room shares a tile family, running that tile up the shower and even across the bathroom floor creates the seamless, spa-like continuity that defines a high-end master bath.
Mosaic Shower Floors
The shower floor is where design meets safety most directly, and mosaic tile is the classic answer. Small mosaics — penny round, hex, or 1-to-2-inch squares on mesh-backed sheets — flex to follow the compound slope of the shower pan toward the drain, something a large tile cannot do. Just as important, all those grout lines create excellent slip resistance for wet bare feet, right where a slip is most likely.
Mosaic floors also let you play with contrast. A darker mosaic floor under lighter walls grounds the shower and hides soil between cleanings, while a marble-look or terrazzo mosaic ties the floor into a luxury wall scheme. Penny rounds bring a soft vintage character; sharp hexagons feel more tailored and modern. Either way, the dense grout grid is doing safety work while it looks good.
The trade-off is more grout to seal and maintain on the floor, so I recommend a high-performance or epoxy grout on shower floors for its water and stain resistance. Slope the pan to roughly 1/4 inch per foot toward the drain, use a proper waterproofing system beneath, and a mosaic floor gives you the grip and drainage a master shower needs for the long haul.
Grout Color and Mixing Tiles
Grout is not an afterthought — it is a design decision that can make or break a shower. A grout that closely matches the tile creates a seamless, monolithic look that lets large-format and marble-look tile read as continuous slabs. A contrasting grout, like a charcoal joint against white subway, emphasizes the pattern and gives a graphic, tailored effect. Both are valid; the choice depends on whether you want the tile shape to disappear or to stand out.
On a practical level, mid-tone grouts are the most forgiving in a master shower because they hide soap film and mineral staining better than bright white, which shows every bit of grime, or very dark, which can show hard-water haze. Whatever the color, use a quality grout and, for cement grouts, keep the joints sealed; many pros go straight to epoxy grout in showers to avoid ongoing sealing altogether.
Mixing tiles is where a master shower gets its personality, but it needs a plan. The reliable formula is one field tile, one accent, and a coordinated floor — for example, large-format marble-look walls, a mosaic floor, and a niche accent that picks up a color from the marble veining. Keeping the palette tight and letting one element be the star prevents the busy, mismatched look that comes from combining too many competing tiles.
Curbless Designs and Practical Maintenance
Curbless, or zero-threshold, showers are one of the strongest trends in master bathrooms, and for good reason. Eliminating the curb creates a clean, open, seamless transition from the bathroom floor into the shower, makes the room feel larger, and supports aging-in-place accessibility by removing a trip hazard and allowing walker or wheelchair access. Running the same floor tile straight into the shower reinforces that seamless, spacious effect.
Curbless design does demand careful execution. The bathroom floor must be sloped or recessed toward a linear or offset drain so water flows to the drain rather than out into the room, and the waterproofing has to extend well beyond the shower opening. A linear trench drain along one wall is a popular solution because it allows a single-direction slope, which pairs beautifully with large-format floor tile that can follow a simple slope. This is a job where getting the slope and waterproofing right is non-negotiable.
Whatever design you land on, keep maintenance in mind from the start. Choose porcelain over porous natural stone for easy care, pick slip-resistant textured or matte tile with an adequate DCOF for any floor surface, minimize grout with larger wall tiles where practical, and seal the grout you do have. A squeegee kept in the shower and a wipe-down after use will keep any of these master bathroom shower tile ideas looking new for years. Design for beauty, but build for the water — that balance is what makes a master shower you love living with.
Prefer to explore on your own?
See how new flooring looks in your actual room in seconds — free, no signup.
Try the free Floor Studio →