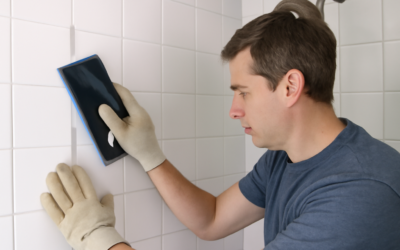
Most homeowners end up regrouting their floors twice. The first time fails within two years because they skipped the depth requirement, and the second time finally lasts. Regrouting tile floor is genuinely a DIY project, but only if you remove enough of the old grout to give the new material structural bite. This guide covers the exact tools, depth, and technique that separate a 10-year regrout from a wasted Saturday.
Part of our Tile & Grout guide — explore the full guide →
When to Regrout vs. Replace
Regrouting solves cosmetic and minor structural problems. Replace tile entirely when the issues run deeper.
- Regrout if: grout is cracked, stained, or missing in spots; tiles are sound and level
- Regrout if: grout has darkened or yellowed but is structurally intact
- Replace tile if: multiple tiles are loose or cracked, water has damaged the substrate, or the underlying mortar bed has failed
- Replace tile if: the grout is failing across more than 30 percent of the floor
Knock on individual tiles with a coin. A solid sound means good adhesion; a hollow click means the tile has separated from the substrate and needs full replacement.
Tools You Need
The tool list is short but quality matters.
- Oscillating multi-tool with carbide grout blade (Dremel, Fein, or Bosch)
- Manual grout saw as backup for tight corners
- Vacuum and stiff brush
- Grout float (rubber, not metal)
- Two large sponges and a clean bucket
- Knee pads (mandatory for floor work)
- Dust mask and safety glasses
- Painter’s tape
- Grout sealer and applicator
The oscillating multi-tool is the difference between a 4-hour job and a 14-hour job. Skip the manual scraper for anything beyond touch-ups.
Removing the Old Grout
This is the step everyone shortcuts and regrets. New grout needs at least 2/3 of the original grout depth removed to bond properly. For a typical 1/8 inch grout joint, that means removing the top 3/16 to 1/4 inch.
Set the oscillating tool to medium speed. Run the carbide blade down the center of each grout line, then make a second pass on each side to widen the channel. Keep the blade square to the joint to avoid chipping tile edges. Move slowly; rushing causes blade slippage and chipped tile faces.
Vacuum thoroughly between sections. Dust packed in the joint prevents new grout from bonding properly.
Choosing the Right Replacement Grout
Three categories of grout work for floor regrouting. Each has different applications.
- Sanded cement grout: for joints wider than 1/8 inch; most common floor choice. $15-$25 per 25-pound bag.
- Unsanded cement grout: for joints under 1/8 inch; less common on floors but used with polished stone.
- Epoxy grout: stain-proof and waterproof; best in kitchens and bathrooms. $50-$80 per kit. Harder to work with but never needs sealing.
For most homeowner regrouting jobs, a sanded cement grout from Mapei, Custom Building Products, or Laticrete is the right call. Epoxy is the gold standard but adds cost and demands fast working speed.
Mixing and Application
Mix grout to the consistency of stiff peanut butter. Too wet and it cracks as it cures; too dry and it does not flow into joints. Let it slake (rest) for 5 to 10 minutes after initial mixing, then stir briefly before applying.
Hold the rubber float at a 45-degree angle and push grout diagonally across the joints. This forces material deep into the channel rather than skimming the surface. Work in 4-foot square sections. Once the grout starts to firm in the joint, usually 15 to 30 minutes after application, switch to cleanup mode.
Cleaning Without Pulling Grout Out
The cleanup step is delicate. Use a barely damp sponge in a circular motion to remove excess grout from tile faces. Rinse the sponge in clean water frequently. The first pass removes the bulk; a second pass after another 15 minutes refines the edges.
Avoid wet wiping the joint itself. Pulling water across fresh grout depresses the joint center and weakens the cure. Once the haze appears on the tile face (typically 1 to 4 hours later), buff with a dry microfiber to clear it.
Curing and Sealing
Sanded cement grout cures over 72 hours. Stay off the floor for 24 hours minimum, light foot traffic for 72 hours, and avoid wet mopping for 7 days. Apply a quality penetrating sealer like Aqua Mix Sealer’s Choice Gold or Miracle 511 Impregnator at the 7-day mark. Reapply annually.
Epoxy grout skips the sealing step entirely, which is why many contractors choose it for kitchens despite the higher cost.
Common Mistakes That Shorten the Lifespan
Skipping the depth removal is the top failure mode. New grout layered over old grout cracks within months. Mixing grout too wet is second; weak grout chips and crumbles within a year. Walking on the floor too soon is third, and reseal failure is fourth.
Color matching also matters. Existing grout in adjacent rooms shifts color over time. Buy a grout sample stick from the tile shop and match wet color, not dry; cement grout dries 1 to 2 shades lighter than the wet mix.
Time and Cost Estimate
For a 10×10 foot bathroom floor, expect:
- Old grout removal: 4 to 6 hours
- Cleaning and prep: 30 minutes
- New grout application: 1 hour
- Cleanup: 30 minutes
- Materials: $40 to $80 (grout, sealer, blades)
Pros charge $5 to $10 per sq ft for the same work, putting a 100 sq ft regrout at $500 to $1,000. DIY savings are substantial for anyone with a free Saturday.
Frequently Asked Questions
How often should I regrout a tile floor?
A properly sealed and maintained grout job lasts 10 to 15 years. If you are regrouting more often than every 8 years, the underlying issue is usually moisture infiltration or substrate movement, not the grout itself.
Can I regrout over old grout?
No, not reliably. New grout needs to bite into removed grout depth of at least 2/3 the joint depth. Skim coats over old grout fail within months.
What is the best grout for a kitchen floor?
Epoxy grout if you can manage the working time and higher cost. It resists food stains, wine spills, and grease without sealing. Sanded cement grout works well too with annual sealing.
How long before I can walk on regrouted tile?
24 hours for light foot traffic, 72 hours for normal use, 7 days before wet mopping or applying sealer.
Prefer to explore on your own?
See how new flooring looks in your actual room in seconds — free, no signup.
Try the free Floor Studio →