A metal stair railing does two jobs at once: it keeps people from falling and it sets the visual tone of an entire staircase. Swap a bulky wood balustrade for slim steel balusters and a stairwell instantly reads more open and modern. A well-built metal stair railing also outlasts almost everything else in the house, shrugging off decades of hands, moving furniture, and kids swinging on it. This guide covers the metals worth choosing, the code rules you cannot skip, real-world pricing, and how the pieces go together.
Part of our Stairs & Stair Flooring guide — explore the full guide →
Why Homeowners Choose Metal Over Wood
Metal wins on three fronts. It is strong, so balusters can be thin without feeling flimsy, which opens up sightlines on open-tread and floating stairs. It is durable, since powder-coated steel or aluminum resists dents and scratches that would mark softwood. And it is low maintenance, because there is no annual sanding, staining, or sealing the way there is with an oak railing.
The trade-off is that metal shows fingerprints on glossy finishes and, in the case of raw steel, will rust if the coating is breached. Choosing the right metal and finish up front solves both concerns.
Comparing the Main Metal Options
Not all metal railings behave the same. Match the material to your budget, location, and look:
- Wrought iron: Solid, heavy, and traditional. Excellent for scrollwork and ornate designs. Prone to surface rust if the finish chips, so it needs occasional touch-up. Heaviest and most labor-intensive to install.
- Mild steel (tube or bar): The workhorse of modern railings. Strong, weldable, and affordable. Almost always powder-coated black. The go-to for horizontal cable rails and minimalist picket designs.
- Stainless steel: Naturally rust-resistant, with a bright satin or polished finish. Ideal for coastal homes and contemporary looks. Costs noticeably more than mild steel.
- Aluminum: Lightweight, never rusts, and popular for exterior stairs and decks. Not as rigid as steel, so posts must be spaced closer. Comes in many powder-coat colors.
Code Requirements You Cannot Ignore
Railing dimensions are not a matter of taste; they are life-safety code, and an inspector will fail a job that misses them. Under the International Residential Code adopted across most of the US, the handrail height must sit between 34 and 38 inches, measured vertically from the tread nosing. Guardrails on open sides of stairs and landings more than 30 inches above the floor must be at least 36 inches tall for residential stairs, and 42 inches on landings in many jurisdictions.
The famous “4-inch sphere rule” governs baluster spacing: a 4-inch ball must not pass between any two balusters, which sets your maximum on-center picket spacing at roughly 4 inches minus the picket width. On the triangular opening at the base of the stair, a 6-inch sphere is allowed. Handrails must also be graspable, meaning a round profile between 1-1/4 and 2 inches in diameter, and the assembly has to resist a 200-pound concentrated load at any point. Always confirm your local amendments before ordering, since some cities modify these numbers.
What a Metal Stair Railing Costs
Pricing depends heavily on material and whether the work is DIY, prefab, or fully custom. As a planning range for US homeowners:
- Basic prefab steel picket railing, DIY: $30 to $70 per linear foot in materials
- Professionally installed powder-coated steel: $70 to $150 per linear foot
- Horizontal cable railing with steel posts: $150 to $250 per linear foot installed
- Custom welded wrought iron: $200 to $400 per linear foot
- Stainless steel with glass panels: $250 to $500 per linear foot
A typical straight staircase of 12 to 14 linear feet therefore lands anywhere from about $850 for a DIY steel picket setup to $5,000-plus for custom stainless and glass. Handrail brackets, mounting posts, and a powder-coat finish add to the base numbers, so budget an extra 10 to 15 percent for hardware.
Popular Design Styles
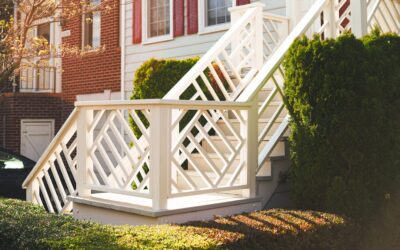
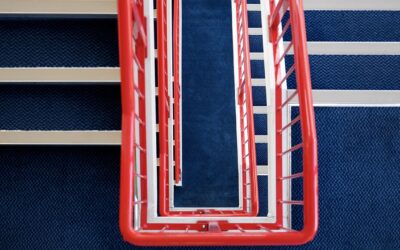
The design you pick shapes both cost and the feel of the stairwell. Vertical picket railings, using 1/2 inch square steel balusters, are the most common and the easiest to keep code-compliant. Horizontal bar and cable railings deliver a clean, contemporary look and unobstructed views, but they demand rigid posts and correct cable tension to stay taut. Ornamental wrought iron with scrolls and baskets suits traditional and Mediterranean homes. Combination railings, pairing metal balusters with a stained wood top rail, remain a favorite because the warm handrail is comfortable to grip while the metal keeps sightlines slim.
Installation Overview
Installing a metal railing follows a logical sequence, though the details vary by system. Start by locating and securing the newel or end posts, which carry the entire load. Surface-mounted posts bolt to the tread or floor with a base flange and lag screws or expansion anchors; core-mounted posts drop into a drilled pocket set in epoxy. Get these plumb and rock-solid before anything else.
Next, cut and set the top rail or handrail to the correct height and pitch, letting the stair angle dictate the rake. With the rail in place, measure and install balusters at even, code-legal spacing, using shoe covers or set screws to lock each one. For cable systems, run the cables through drilled or grommeted posts and tension them with the supplied fittings, then recheck the 4-inch spacing between cables under load. Finish by attaching wall-side handrail brackets every 4 feet or per manufacturer spec, making sure each bracket hits a stud or solid blocking.
Finishes and Rust Protection
Finish choice decides how long a metal stair railing looks new. Powder coating is the gold standard for steel and aluminum: the color is baked on at around 400 degrees Fahrenheit, creating a hard, even shell that resists chips far better than spray paint. For interior steel, a quality powder coat needs essentially no maintenance beyond dusting. Stainless steel needs only an occasional wipe with a stainless cleaner to remove fingerprints and keep its passive layer intact.
Raw or wrought iron requires more attention. Prime any bare metal with a rust-inhibiting primer, then top with two coats of enamel. Inspect it yearly, and touch up any nicks the moment you see them, since rust spreads under an intact finish once it takes hold. In coastal or high-humidity regions, favor stainless or aluminum from the start to avoid the maintenance cycle entirely.
DIY vs. Hiring a Fabricator
How much of this you can tackle yourself depends on the system. Prefab picket railing kits, sold with pre-cut components and mounting hardware, are within reach of a confident DIYer with a drill, a level, and basic tools. These kits handle straight runs well and can save 40 to 60 percent over a custom install. Cable railing kits are also DIY-friendly, though tensioning the cables correctly to pass the 4-inch spacing rule under load takes patience and the right fittings.
Custom welded railings are a different matter. Fitting a railing to a stair that is out of square, welding clean joints, and achieving a flawless powder-coat finish are jobs for a metal fabricator or an experienced railing contractor. The measuring alone is unforgiving, since a railing built off-site to wrong dimensions is expensive scrap. If your stairs are irregular, if you want ornamental ironwork, or if code compliance and inspection sign-off worry you, hire a pro who does this daily.
Whichever route you choose, always pull a permit where required and build to the height and spacing rules from the start. An inspector who fails a finished railing can force you to tear out and redo work that looked perfect, so confirming code before the first cut is the cheapest insurance you can buy on the whole project.
Chosen well and installed to code, a metal stair railing is close to a lifetime investment. Decide on the metal and finish based on where the stair lives and how much upkeep you want, respect the height and spacing rules, and you will end up with a railing that is as safe as it is striking.