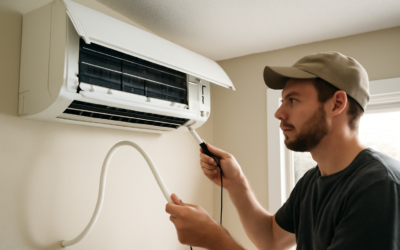
When a ductless head starts spitting water down the wall or dripping onto the floor, the culprit is almost always the same. A clogged mini split drain line backs up condensate until it overflows the pan and finds the path of least resistance, which is usually your drywall. The good news is that this is one of the most fixable problems on a ductless system, and a little routine maintenance keeps it from ever happening. Let me show you how the drain works and how to keep it clear.
How the Condensate Drain Actually Works
When your indoor head runs in cooling mode, the evaporator coil gets cold and pulls moisture out of the warm room air, the same way a glass of iced tea sweats on a summer afternoon. That water drips into a plastic drain pan under the coil, then flows by gravity through a flexible drain hose that runs inside the line set, out through the wall, and down to daylight or into a drain.
Notice the key word: gravity. Unlike a central AC that often uses a condensate pump, most wall-mounted mini splits rely entirely on slope. There’s no pressure pushing the water. If the hose sags, kinks, or picks up gunk, the water stalls and the pan overflows. A single head running hard on a humid day can shed a couple of gallons of water in 24 hours, so there’s plenty of volume to make a mess.
Why Drain Lines Clog
The inside of that hose is a dark, damp tube with a steady food supply of dust and organic matter blowing off the coil. That’s a perfect home for biofilm, the slimy algae-and-bacteria sludge that slowly narrows the pipe until it seals shut. Common causes of a clog include:
- Algae and biofilm buildup from months of continuous condensation with no flush
- Dust and dirt that skipped past dirty filters and washed into the pan
- Insects and spiders that crawl up the open outdoor end and nest
- A sagging or kinked hose that creates a low spot where water and debris collect
- Improper slope, often from a rushed install, that never let the line drain fully
Nine times out of ten it’s biofilm plus a bad slope working together. Fix both and the leak stops for good.
Getting the Slope Right
The drain line needs a continuous downhill run from the head to the outlet, ideally at least a quarter inch of drop per foot of horizontal travel. It should never rise, loop, or lie flat, even for a short stretch. Where the flexible hose exits the wall and connects to any rigid PVC, make sure the transition keeps heading downhill.
Two field mistakes cause most chronic leakers. First, the installer zip-tied the drain hose to the top of the line set instead of the bottom, so it snakes up and over the copper. Second, the outdoor end sits in a puddle or in tall grass, so water backs up from the bottom. Trim the end so it hangs free and clear, and support any long horizontal runs every few feet so they can’t sag into a belly.
How to Flush and Clean the Line
You can clear most clogs in under 30 minutes with basic supplies. Turn the unit off at the breaker before you start. Here’s the sequence I use:
- Find both ends. The outdoor end is where water normally drips out. The indoor access is the drain pan under the head, reached by lifting the front cover and, on some models, the bottom trim.
- Clear the outdoor end first. Push a length of weed-trimmer line or a small drain snake up the hose to break the clog loose. Insects and dried sludge often sit right at the tip.
- Apply suction. A wet/dry shop vac held tight against the outdoor end, sealed with a rag or your hand, will pull the clog and standing water right out. Run it for 60 seconds. This is the single most effective move.
- Flush from the top. Slowly pour a cup or two of water into the drain pan and confirm it runs freely out the bottom. Weak or no flow means the clog isn’t fully clear.
- Treat the biofilm. Once flowing, flush with a solution of distilled white vinegar or a diluted 1:16 bleach mix through the pan. Vinegar is gentler on the plastic and safe if the outlet drains near plants.
Never blow compressed air backward into an indoor head, and don’t force a large snake up a delicate flexible hose. You can crack the pan fitting and turn a $0 fix into a service call.
Routine Maintenance That Prevents Clogs
A little prevention beats every repair. Wash the reusable head filters every two to four weeks during heavy cooling season, since a clean filter keeps dust out of the pan in the first place. Twice a year, pour a vinegar flush through the drain to kill biofilm before it can build. Drop in an algae-inhibiting condensate tablet if your system stays wet for months at a stretch.
Once a season, glance at the outdoor end while the unit is cooling. You should see a steady drip or trickle. Bone dry on a humid 90°F afternoon means water is backing up somewhere and a clog is forming. Catching that early turns a wall-staining emergency into a two-minute shop-vac job.
Tools and Supplies to Keep on Hand
You don’t need a service tech’s van to handle a drain line. A short kit covers almost every situation, and most homeowners already own half of it:
- A wet/dry shop vac for suctioning clogs from the outdoor end, the single most useful tool for this job.
- Distilled white vinegar for routine biofilm flushing, gentle on the plastic pan and hose.
- A funnel or squeeze bottle to pour flush solution into the pan without spilling on the electronics.
- Weed-trimmer line or a small hand snake to physically break up a stubborn clog.
- Condensate treatment tablets or strips that slowly dissolve to inhibit algae all season.
- A drain-line brush sized to your hose diameter for scrubbing the accessible ends.
Total outlay is maybe $40 if you’re starting from scratch, and the shop vac earns its keep on a dozen other household jobs. Keep the vinegar and tablets under the sink so a seasonal flush never gets put off.
Line Sets, Wall Sleeves, and Hidden Trouble Spots
The drain hose spends most of its length bundled with the copper line set behind a plastic cover on the exterior wall, and that hidden stretch is where sneaky problems hide. If the installer wrapped everything too tightly, the flexible hose can pinch against the insulation and lose its slope. A wall sleeve packed with foam sealant, good for keeping out drafts and bugs, occasionally crushes the drain if it was overfilled.
When a line leaks and the ends are clear, gently open the line-set cover and check that the drain hose runs low and free the whole way, without a belly or a pinch point. On second-floor installs, that hidden run is also the most likely spot for a full internal freeze if the head ices up, so keeping the coil clean pays off here too. Reseal the cover when you’re done so the assembly stays weatherproof.
When It’s More Than a Clog
If you’ve flushed the line, confirmed good slope, and water still shows up inside, look further. A cracked or dislodged drain pan will leak no matter how clear the hose is. A pan sensor or float switch that failed can let the system keep running while water pools. And on installs that route the drain uphill to reach a fixture, a failing condensate pump is the real problem, not the line.
Keeping the mini split drain line clean is genuinely the highest-value 30 minutes of maintenance you can do on a ductless system. Flush it twice a year, keep the slope honest, and rinse the filters, and you’ll never come home to a soggy wall or a warped floorboard under that indoor head.