Few design moves transform a kitchen as dramatically as mirror on the backsplash wall, and few get recommended with as little honesty about the downsides. I have specified mirrored backsplashes in a handful of projects and talked clients out of them in twice as many, so consider this the full picture. A mirror backsplash kitchen can genuinely double the perceived light in a dark galley, make a six-foot-wide kitchenette feel twice its size, and deliver a glamour that tile simply cannot touch. It can also become a full-time smudge-management job behind a range, and it demands installation details most tile setters have never dealt with. Whether it belongs in your kitchen depends almost entirely on where the mirror goes and how you actually cook.
- Why Mirror Works So Well Behind a Counter
- The Caveats, In Order of Importance
- Smudges and Splatter Are the Daily Reality
- Heat Behind a Range
- Silvering Is Vulnerable to Moisture and Chemicals
- Everything Behind You Is Now On Display
- Installation: What a Good Job Looks Like
- Where Mirror Backsplashes Genuinely Shine
- Living With It: Cleaning and Care
Why Mirror Works So Well Behind a Counter
The case for mirror is optics, plain and simple. A backsplash occupies the wall zone between counter and upper cabinets — usually 18 inches tall — right at eye level when you stand at the counter. Mirror in that band reflects the room back at you, visually dissolving the wall. In a windowless galley kitchen or a basement kitchenette, a mirrored backsplash bounces whatever light exists, and the effect on perceived brightness is stronger than upgrading your bulbs. Designers have leaned on this trick since the 1930s, when mirrored bar backs and butler’s pantries were standard in upscale apartments, and the look reads as classic rather than trendy when it is done in the right finish.
The finish is where the design decisions live. You have three main families:
- Clear plate mirror — maximum reflection, maximum glamour, and maximum smudge visibility. This is the boldest and least forgiving choice.
- Antique or foxed mirror — mirror with deliberate distressing, cloudiness, and dark mottling in the silvering. This is the finish I specify most, because the patina camouflages water spots and fingerprints while keeping about 70 percent of the reflective payoff. Costs run higher, typically $25 to $60 per square foot for the glass alone.
- Tinted mirror — gray (smoke), bronze, or gold-tinted mirror. Bronze mirror behind a bar or coffee station is a warm, forgiving, genuinely beautiful surface. Gray mirror suits modern kitchens with cool palettes.
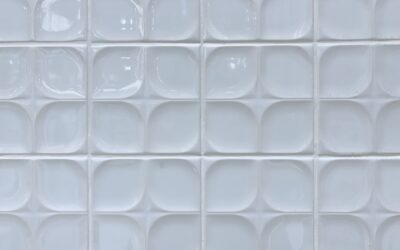
Format matters too. A single seamless panel of mirror, cut to fit and installed as one piece, is the high-end move — clean, uninterrupted reflection with no grout to maintain. Mirrored subway tile and beveled mirror tile give a more traditional rhythm and are far easier to DIY, but every grout joint is a place for grease to settle, and the beveled edges throw sparkle that can tip from glamorous to busy in a small space.
The Caveats, In Order of Importance
Smudges and Splatter Are the Daily Reality
Here is the conversation I have with every client: walk to your current backsplash after a normal week of cooking and look at it in raking light. Everything you see — the oil mist near the range, the water spots behind the faucet, the coffee splash by the machine — will be twice as visible on mirror, because mirror shows you the grime and its reflection. If you sauté daily, the zone behind the cooktop will need wiping after essentially every cooking session. A microfiber cloth and a spritz of glass cleaner takes ninety seconds, but it is a real, recurring commitment. People who run tidy kitchens shrug at this. People who cook hard and clean weekly grow to hate a clear mirror backsplash within months.
Heat Behind a Range
Standard mirror is float glass with a silver backing, and float glass does not love thermal shock. Behind a typical 30-inch residential range, actual wall-surface temperatures rarely exceed what glass tolerates, but a high-BTU gas rangetop or a wall zone that catches direct flame roll-up is another matter. Two safe paths: use tempered mirror behind the cooking zone — tempering raises thermal shock resistance dramatically and is what most codes and glass suppliers recommend within proximity to a heat source — or break the design at the range and run a stainless, tile, or stone panel behind the cooktop with mirror flanking it. Many manufacturers ask for a minimum clearance from the cooktop surface, and your glass fabricator will know the local requirement. Ask specifically; do not let a general contractor guess.
Silvering Is Vulnerable to Moisture and Chemicals
Mirror fails from the back. The reflective silver layer is protected by backing paint, and when moisture or aggressive adhesive solvents attack it, you get black spots and creeping edge corrosion — the same disease you have seen on old bathroom mirrors. In a kitchen, the risk zones are the bottom edge sitting on the counter, where cleaning water and countertop spills wick up, and any edge near the sink. The defenses: seal the counter-to-mirror joint with a quality neutral-cure silicone, keep the bottom edge of the glass an eighth inch off the deck on setting blocks, and insist your installer uses mirror-specific mastic — ordinary construction adhesives contain solvents that eat backing paint and produce black blotches within a year.
Everything Behind You Is Now On Display
An underrated caveat: a mirror backsplash kitchen reflects the room. If your kitchen faces a beautiful dining space or a window, wonderful. If it faces a cluttered open shelf, a hallway to the laundry, or the family command-center wall of papers and chargers, the mirror doubles that clutter. Stand at the counter and look at the wall; whatever is behind you is your new backsplash pattern.
Installation: What a Good Job Looks Like
For a seamless panel installation, the sequence I hold installers to looks like this:
- Template after counters are in. The fabricator makes a physical or digital template capturing every outlet, window stool, and out-of-square wall. Outlet cutouts in mirror must be fabricator-cut and polished; field-cutting mirror around a junction box is how panels crack.
- Flatten the wall. Mirror telegraphs every hump in the drywall as a funhouse distortion. Skim-coat and sand until a straightedge sits clean. This step is skipped constantly and it is the difference between luxury and regret.
- Use mirror mastic plus mechanical support. Dabs of mirror-safe adhesive on the back, with the panel resting on setting blocks or a cleat so gravity is never carried by adhesive alone.
- Tempered glass where required. Behind cooking appliances and anywhere the panel exceeds your fabricator’s size threshold for annealed glass.
- Silicone the perimeter, not grout. Glass-to-counter and glass-to-cabinet joints move; a fine bead of clear or color-matched neutral-cure silicone keeps water out of the silvering.
Expect a fabricated and installed seamless mirror backsplash to run $30 to $80 per square foot depending on finish — antique mirror at the top of that range — which puts a typical 30-square-foot kitchen backsplash at $900 to $2,400. Mirrored tile is far cheaper, often $8 to $20 per square foot in material, and installs like any glass tile with a white-adhesive method so the mastic does not shadow through.
Where Mirror Backsplashes Genuinely Shine
| Location | Verdict | Why |
|---|---|---|
| Bar / beverage station | Ideal | Classic look, no grease, low splatter |
| Butler’s pantry | Ideal | Light amplification, light use |
| Kitchenette / ADU kitchen | Excellent | Space-doubling effect, light cooking |
| Perimeter runs away from range | Good | Glamour without daily grease |
| Directly behind a daily-use gas range | Think hard | Smudge duty, heat detailing required |
My favorite compromise, and the one I recommend most: antique mirror on the perimeter and behind the sink, with a different material — honed stone, stainless, or a tile that picks up the palette — behind the range. You keep 90 percent of the glamour and shed 90 percent of the maintenance grief.
Living With It: Cleaning and Care
Daily care is a dry microfiber wipe; weekly care is glass cleaner or a 1:1 vinegar-water mix sprayed onto the cloth, never onto the glass — overspray running into the bottom edge is exactly how moisture reaches the silvering. Skip abrasive pads entirely, degrease the range-adjacent zone with a drop of dish soap in warm water when film builds up, and re-check the perimeter silicone once a year, cutting out and re-running any section that has pulled loose. Grouted mirror tile wants a penetrating sealer on the grout lines twice a year, because grease-stained grout against sparkling mirror is a bad look.
If you go in with clear eyes — antique or tinted finish, tempered or substituted material at the range, mirror-safe adhesive, silicone at the counter, and an honest assessment of your cooking style — a mirrored backsplash is one of the few genuinely transformative moves available in a kitchen remodel. Just decide before the glass is cut whether you are buying a showpiece or signing up for a chore, because with clear mirror behind a busy range, it is quietly both.