
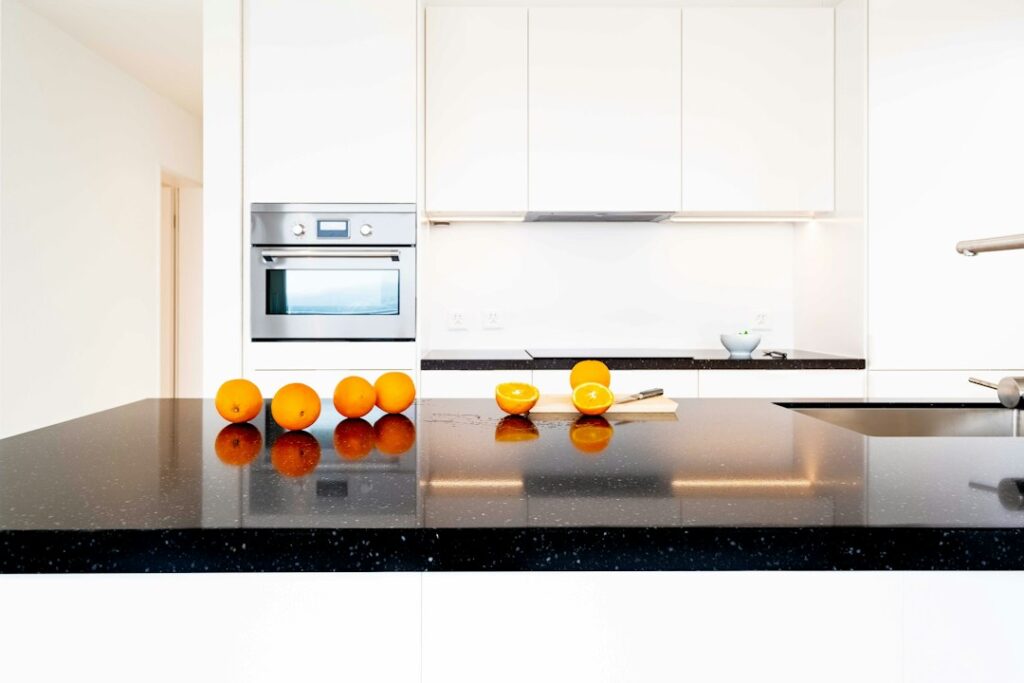
Walk through any high-end showroom and the islands that stop people in their tracks usually have a chunky, monolithic front edge that looks like a solid block of stone. Most of them are not solid at all. A mitered edge countertop uses a standard 2 or 3 centimeter slab and glues a matching strip to the front at a 45-degree angle, so the veining wraps over the corner and the edge reads as 2, 3 or even 4 inches thick. You get the heavy, architectural look without hauling a slab that weighs twice as much or paying for extra-thick material.
Part of our Countertops guide — explore the full guide →
The short answer for most kitchens: a mitered edge works beautifully on engineered quartz, porcelain and sintered stone, and it can work on granite and quartzite when the fabricator is skilled at matching the pattern. The trade-off is a visible glue line along the corner, a corner that can chip if it is struck hard, and higher fabrication labor than a simple eased or bullnose edge. When the joint is cut cleanly and filled with color-matched adhesive, most people standing at the island will never notice it.
Most of the decision comes down to three things: how the joint is built, which materials hide it best and what to check before you sign off on the template.
How a Mitered Edge Countertop Is Built
The process starts with a full-size slab, usually 2 centimeters (about 3/4 inch) or 3 centimeters (about 1 1/4 inch) thick. The fabricator cuts the top piece to the finished shape, then rips a strip from the same slab for the apron, the vertical face that will hang down at the front. Both mating edges get cut at exactly 45 degrees on a bridge saw so that, when pressed together, they form a crisp 90-degree outside corner.
The two pieces are bonded with a two-part adhesive, typically an epoxy or a knife-grade polyester or acrylic, tinted to match the background color of the stone. Clamps or vacuum cups hold the joint tight while the adhesive cures. After that, the shop flattens any lip, polishes the joint and eases the sharp corner very slightly so it is less prone to chipping. A drop of 1 1/2 inches to 4 inches is common, though some designers go deeper for a dramatic island.
Because the apron comes from the same slab, the veining or speckle on the top can flow over the edge and continue down the face. That continuity is what separates a true mitered joint from a laminated or stacked edge, where a second strip is glued flat under the top and the layered seam shows on the front face.
Mitered vs. laminated edges
- Mitered: 45-degree joint at the corner, pattern wraps over, glue line sits right on the arris (the corner line).
- Laminated or stacked: strip glued flat under the top, then the face is profiled; the seam runs horizontally across the front.
- Solid thick slab: no joint at all, but heavier, costlier and limited in available colors.
Which Materials Suit a Mitered Profile
Not every surface handles a miter equally well. The best candidates have a consistent body color, accept a tight joint and are available in thinner slabs that benefit from the added visual mass.
Engineered quartz
Quartz is the most common choice. Its background color is uniform, so tinted adhesive blends easily, and the veining on marble-look patterns can be lined up across the corner. Ask whether the slab has through-body veining or surface-printed pattern, because a surface-only design may show a plain band where the cut exposes the core.
Porcelain and sintered stone
These ultra-compact surfaces usually come in thin slabs, often 12 millimeters or 20 millimeters, so a mitered apron is almost standard practice for giving them a substantial look. Porcelain countertop edges are tricky because many porcelain slabs carry the pattern only on the surface with a different colored body underneath. A miter hides that body color completely, which is exactly why fabricators favor it. The material is very hard and brittle, so the cut has to be precise and the corner needs a small protective ease.
Granite, quartzite and marble
Natural stone can be mitered, and a dramatic quartzite with long veins looks stunning when the veins fold over the edge. The challenge is matching: every slab varies, so the strip must be cut from an adjacent area of the same slab, and the fabricator needs to plan the layout before cutting. Marble is softer and etches, so the corner is more vulnerable to damage over time.
Poor candidates
Laminate, butcher block and most solid surface tops use their own edge methods. Solid surface can be built up with invisible seams using its own adhesive, so a miter offers little advantage there.
Common Thicknesses and Design Choices
A 2 inch mitered edge countertop is the most requested size because it reads noticeably thicker than a standard 1 1/4 inch slab without overwhelming cabinets. Three-inch aprons suit large islands with seating overhangs, and 4 inches or more is usually reserved for statement islands or waterfall designs where the stone also runs down the sides to the floor.
- 1 1/2 to 2 inches: subtle upgrade, works on perimeter counters and islands alike.
- 2 1/2 to 3 inches: bold, best on islands and peninsulas.
- 4 inches and up: dramatic, may affect drawer clearance and knee room.
Check the drawer fronts and dishwasher door before choosing a deep apron. A thick front edge can interfere with appliance doors or top drawers, and a fabricator may need to notch or shorten the drop at those locations. You will also hear the term mitred edge countertop, which is simply the British spelling of the same detail.
Seam Visibility and Chip Risk
The glue line is the main weakness of any mitered edge. On a busy or speckled stone it nearly disappears. On a solid white quartz or a stone with strong directional veins, a careless joint stands out as a thin dark line or a mismatched vein that jogs at the corner.
Chipping is the other concern. The corner where the two 45-degree cuts meet is thinner than the body of the slab, and a hard blow from a cast iron pan or a bar stool can knock out a sliver. Most fabricators ease the arris by about 1/16 inch to reduce that risk. If you have young kids or a busy cooking area, ask for a slightly larger ease or a tiny radius at the corner.
What to inspect at installation
- Run a fingertip along the corner. It should feel smooth with no lip between top and apron.
- Look at the joint in raking light from a window. A tight joint shows as a hairline, not a groove.
- Check that veins or patterns line up across the corner within about 1/8 inch.
- Confirm the adhesive color matches the background, especially on white and cream stones.
- Look at outside corners where two mitered aprons meet. These compound joints are the hardest to execute.
Fabrication Safety and Why It Is a Pro Job
Cutting quartz, granite, quartzite, porcelain or sintered stone releases fine respirable crystalline silica dust, which can cause serious lung disease. Engineered quartz is especially high in silica. Professional shops use wet cutting, water-fed tools and dust extraction, and workers wear fitted respirators. If you ever trim, drill or polish stone at home, use wet methods, wear an N95 or better yet a P100 respirator, protect your eyes and clean up with a HEPA vacuum rather than sweeping.
Beyond the dust, a mitered edge countertop is not a realistic DIY project. Getting a true 45-degree cut requires a bridge saw or a precision rail saw, and the joint must be clamped perfectly flat. Slabs are heavy and fragile; a 9-foot island top can weigh several hundred pounds and crack if carried flat or flexed. Installation usually involves a crew of two to four with A-frames and carts.
Costs and Value
Expect a mitered edge to be priced per linear foot on top of the base countertop cost. General ranges run from roughly $30 to $100 or more per linear foot depending on material, apron depth and region, with porcelain and sintered stone at the higher end because they are harder to cut and polish. Complex outside corners, waterfall returns and vein matching add labor.
Compared with buying a genuinely thick slab, mitering often saves money and broadens your color options, since most patterns are only produced in standard thicknesses. It also keeps the total weight lower, which matters for older cabinets and upper-floor installations.
Caring for the edge
Daily care matches the rest of the top: warm water, a little mild dish soap and a soft cloth. A dedicated stone-safe countertop cleaner and polish keeps quartz and sealed stone looking bright. Avoid abrasive pads on the joint. If a small chip appears, a fabricator can fill it with tinted resin and polish it back, and a quality countertop edge polishing pad set lets a pro restore the sheen afterward.
When to Call a Licensed Professional
Hire an experienced stone fabricator for any mitered work, and confirm they have done the specific material before. Ask to see photos of their mitered corners, especially on solid-color or heavily veined slabs. If the project includes moving a sink, cooktop or outlets, use a licensed plumber or electrician and pull any permits your area requires. Kitchen countertop outlets need GFCI protection, and any new circuit belongs to a licensed electrician.
Frequently Asked Questions
Is a mitered edge countertop strong enough for daily use?
Yes. A properly bonded joint is very strong, and the adhesive often holds better than the stone itself. The weak point is the thin corner, which can chip under a hard impact, so a slight ease is recommended.
Can you see the seam on a mitered edge?
On busy or speckled material it is nearly invisible. On solid colors or strongly veined slabs you may notice a hairline at the corner, which is why fabricator skill and color-matched adhesive matter so much.
What thickness is most popular for a mitered edge?
Two inches is the most common choice because it looks substantial without crowding drawers. Islands often go to 3 inches for more presence.
Does a mitered edge cost more than a standard edge?
Yes. It is usually priced per linear foot as an upgrade, roughly $30 to $100 or more depending on material and depth, because it requires extra cutting, gluing and polishing.
Can porcelain countertops have a mitered edge?
Yes, and it is the preferred method for porcelain because it hides the body color under the surface pattern. The cut must be precise since porcelain is hard and brittle.


