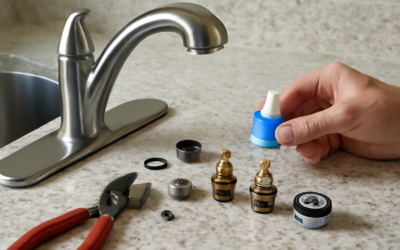
A pull-down sprayer that dribbles, sticks, or refuses to retract does not mean your whole faucet is shot. In most cases a moen kitchen faucet head replacement solves the problem for $20 to $50 and about 20 minutes of work, far cheaper than a new faucet or a plumber’s visit. The one thing that trips people up is matching the replacement head to their exact Moen model, so this guide walks through identifying your faucet, sourcing the right spray head, and swapping it cleanly.
Part of our Kitchen Remodeling guide — explore the full guide →
Why the Spray Head Fails
Spray heads take more abuse than any other part of a faucet. They get yanked, dropped against the sink, and coated in mineral scale from hard water. Common symptoms that point to a bad head rather than a deeper faucet issue include a weak or split spray pattern, a head that will not switch between stream and spray, a magnetic dock that no longer holds the head up, or a hose weight and head that will not retract. If the water pressure at the head is fine but the spray is erratic, the head is the culprit.
Before replacing, rule out a clogged aerator. Mineral buildup on the internal screen mimics a failing head. Unscrew or pop out the aerator or spray face, soak it in white vinegar for an hour, and reinstall; if that restores a clean spray, you have saved yourself the replacement entirely.
Identifying Your Moen Model
This is the make-or-break step, because Moen has sold dozens of pull-down and pull-out designs with different hose connections and head shapes. A head from the wrong series will not thread on or dock correctly.
- Check for a model number on the original packaging, the installation manual, or a sticker on the supply lines under the sink.
- Look under the sink for a small tag or engraving on the faucet body.
- Match the head shape and connection by comparing photos on Moen’s parts site or on the replacement listing.
- Note pull-down vs. pull-out: pull-down faucets have a tall gooseneck and a head that pulls straight down; pull-out faucets have a lower spout and a head that pulls out toward you.
If you cannot find a model number, Moen’s website has a faucet identification tool, and their customer service will identify the part from a clear photo. Getting this right the first time saves a frustrating return.
OEM vs. Aftermarket Heads
You have two sourcing options, and each has a place. Genuine Moen replacement heads (OEM) are guaranteed to fit your model, match the finish exactly, and often ship free under Moen’s lifetime limited warranty if your faucet is registered or you can show proof of purchase. Many homeowners do not realize Moen will send a free replacement part for a defective component, so it is always worth calling before buying.
Aftermarket universal heads cost less and can work, but the fit and finish are hit-or-miss. The hose threads may not match, and the finish rarely blends perfectly with your existing spout. For a clean, lasting result, OEM is the safer bet, and the warranty route can make it free. Reserve aftermarket heads for older, discontinued faucets where no OEM part exists.
Tools and Prep
This is a low-tool job. Gather a pair of pliers or an adjustable wrench, a towel, and possibly a strap wrench if the connection is corroded. You usually do not need to shut off the water because the connection is on the sprayer hose, not the pressurized supply, but turning off the faucet and having a towel ready keeps things tidy. Clear out the under-sink cabinet so you have room to work and can see the hose.
Step-by-Step Replacement
With the right head in hand, the swap is quick. Follow these steps for a leak-free result.
- Pull the head down and out of the spout to expose the hose connection. On pull-down models you may need to reach under the sink to feed slack.
- Unthread the old head from the hose by hand, or grip the coupling with pliers wrapped in a cloth if it is tight. Turn counterclockwise.
- Check the hose weight and washer: make sure the rubber washer or gasket inside the connection is present and intact. A missing washer causes leaks.
- Thread on the new head clockwise by hand until snug, then a slight extra turn with pliers. Do not overtighten and crack the plastic threads.
- Feed the hose back and seat the head in the spout or on the magnetic dock.
Run the faucet and cycle through stream and spray modes to confirm the head works and the connection is dry. Check under the sink for any drip at the coupling; a small leak usually means the washer is missing or the connection needs another quarter turn.
Troubleshooting After the Swap
If the new head leaks at the hose connection, disassemble and confirm the washer is seated, then retighten. If the spray is weak, the aerator screen in the new head may have shipping debris; unscrew and rinse it. If a magnetic-dock head will not stay up, verify you bought the magnetic version and that the docking magnet in the spout is intact. And if the head still will not switch between modes after replacement, the problem may be low water pressure or a partially closed shutoff valve rather than the head.
Occasionally the real issue is the hose, not the head. A cracked or kinked pull-down hose causes leaks under the sink and poor retraction. Moen sells replacement hoses too, and they connect the same way. If your new head does not solve the problem, inspect the hose next.
When to Replace the Whole Faucet Instead
A head replacement is the right call for spray, docking, and retraction problems. But if the faucet body leaks at the base, the handle is loose and worn, or the finish is peeling across the whole spout, you are better off replacing the entire faucet. At that point you are chasing multiple failing parts, and a mid-grade Moen pull-down runs $150 to $300 installed. For an isolated spray-head issue, though, a targeted moen kitchen faucet head replacement is one of the easiest, cheapest kitchen fixes there is, and Moen’s warranty may make it free. Identify your model, source the matching head, and you will have your sprayer working like new in under half an hour.
Using Moen’s Lifetime Warranty
Moen backs its residential faucets with a limited lifetime warranty covering defects in materials and finish for the original homeowner, and many people leave money on the table by not using it. If your spray head is failing due to a defect rather than obvious abuse, call Moen customer service or file a claim online. You will typically need the faucet model number and, in some cases, proof of purchase, though Moen is often generous even without a receipt. They will ship the replacement part directly to you, frequently at no charge. It is genuinely worth a ten-minute phone call before you buy anything, especially since an OEM head that would cost $40 in the store may arrive free under warranty.
Extending the Life of Your New Head
A few habits keep the replacement working longer than the original. In hard-water homes, wipe mineral buildup off the spray face regularly and periodically soak the head in white vinegar to dissolve scale before it clogs the nozzles. Avoid yanking the head to the very end of the hose, which stresses the connection and the internal hose over time; pull it out smoothly instead. If your model has a magnetic dock, keep the magnet and its contact point clean so the head seats firmly and does not droop. And do not overtighten the head when installing; hand-snug plus a slight nudge protects the plastic threads that a wrench can easily strip. Treated gently and kept free of scale, a quality replacement head should last as long as the faucet itself.