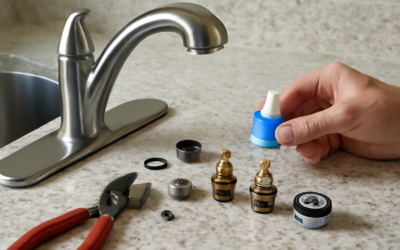
When a Moen faucet starts dripping or the handle feels loose, the fix is almost always a small, inexpensive replacement part rather than a whole new faucet. Understanding Moen bathroom faucet parts — what each component does, how to identify your specific model, and which piece is likely causing your problem — turns an intimidating plumbing chore into a quick, cheap repair. Moen also backs its parts with one of the industry’s best warranties, which often means free replacements. This guide breaks down the key parts and how to service them.
Part of our Bathroom Remodeling & Flooring guide — explore the full guide →
The Anatomy of a Moen Faucet
Whether you have a single-handle or two-handle Moen faucet, the same core parts appear in most models. Knowing them helps you diagnose issues and order correctly.
- Cartridge: The heart of the faucet. It controls water flow and temperature. Most drips and temperature problems trace here.
- Handle: The lever or knob you operate, attached by a set screw or a screw hidden under a decorative cap.
- Aerator: The screen at the tip of the spout that mixes air into the stream and controls flow. Clogs cause low or spitting flow.
- O-rings and seals: Rubber rings that prevent leaks around the spout base and cartridge. They harden and crack over time.
- Escutcheon and deck plate: The cover plate that hides the mounting holes.
- Handle mechanism and set screw: Small hardware that secures the handle and can loosen.
- Drain assembly and pop-up: The lift rod and stopper that open and close the drain.
Moen’s Cartridge System
The cartridge is the part you will most often replace, so it deserves special attention. Moen uses several cartridge families depending on the faucet type and age. The most common bathroom cartridges include the 1224 (for two-handle faucets) and the 1255 (a widely used single-handle Duralast cartridge). Kitchen and shower models use others like the 1200 or 1225.
Using the correct cartridge is critical — an incorrect one will not seat properly and will leak. The good news is that Moen cartridges are keyed and standardized within each family, and the model number is usually printed on the packaging of the original or listed in your faucet’s documentation.
How to Identify Your Moen Model
Ordering the right part starts with identifying your faucet. There are several ways to do this:
- Check the original paperwork or box if you still have it; the model number is printed there.
- Look for a model number stamped on the faucet body, often underneath or on the escutcheon.
- Use Moen’s online tool. Moen’s website lets you browse faucets by style and collection to match yours visually and find its parts diagram.
- Remove and photograph the cartridge if all else fails; you can match it to Moen’s cartridge chart by appearance and dimensions.
- Contact Moen support with a photo — their customer service can identify the model and often ships warranty parts free.
The Lifetime Warranty Advantage
One reason to stick with genuine Moen parts is the company’s limited lifetime warranty, which covers the original residential consumer against leaks, drips, and finish defects. In practice, this means that if your cartridge fails, you can often call Moen, describe the issue, and receive a free replacement cartridge shipped to your door. Always try this before buying — it can save $15 to $50 per part. Keep your proof of purchase when possible, though Moen frequently honors claims without it for residential customers.
Diagnosing Common Problems
Matching the symptom to the part makes repairs fast:
- Dripping spout: Almost always a worn cartridge; occasionally the seals.
- Low or sputtering water flow: A clogged aerator full of mineral scale.
- Leak around the base of the spout: Worn O-rings.
- Loose or wobbly handle: A loose set screw or handle mechanism.
- Hard-to-turn handle: A cartridge that needs lubrication or replacement.
- Water temperature issues: A failing cartridge or, on some models, a misadjusted temperature limit stop.
Replacing a Moen Cartridge
Swapping a cartridge is the most common Moen repair and is very DIY-friendly. Moen sells an inexpensive cartridge-puller tool that makes it even easier.
- Shut off the water at the under-sink valves and open the faucet to relieve pressure.
- Remove the handle by loosening the set screw (often under a decorative cap or on the underside).
- Remove the retaining clip or nut holding the cartridge in place. Needle-nose pliers work for the clip.
- Pull the old cartridge straight out, using Moen’s puller tool if it is stuck from mineral buildup.
- Note the orientation of the old cartridge so you install the new one aligned the same way — this keeps hot and cold correct.
- Insert the new cartridge, replace the clip and handle, restore water, and test.
Cleaning and Replacing an Aerator
If your only issue is weak flow, start with the aerator before anything else. Unscrew it from the spout tip by hand or with pliers wrapped in tape to protect the finish. Rinse out the screen, and soak it in white vinegar for 30 to 60 minutes to dissolve hard-water scale. If it is damaged or heavily clogged, a replacement aerator costs just a few dollars. Reinstall it snugly, and your flow should return to normal.
Replacing O-Rings and Seals
When water leaks from the base of the spout rather than dripping from the tip, worn O-rings are almost always the cause, and replacing them is an easy, inexpensive fix. O-rings are small rubber rings that seal the joint where the spout meets the faucet body. Over years of use, they harden, flatten, and crack, allowing water to seep out around the base. A Moen O-ring repair kit costs just a few dollars and contains the correct sizes for your faucet family.
To replace them, shut off the water, remove the handle and spout, slip off the old O-rings, and roll new ones into place. A thin coat of plumber’s silicone grease on the new O-rings helps them seat and extends their life. This 20-minute job stops base leaks that, if ignored, can rot the vanity top and cabinet below.
Genuine vs. Aftermarket Parts
You will find both genuine Moen parts and cheaper aftermarket substitutes online, and it is worth understanding the trade-off. Genuine Moen cartridges, O-rings, and aerators are engineered to exact tolerances for your faucet and are covered by Moen’s warranty, which often makes them free anyway. Aftermarket parts can cost less up front but sometimes fit imperfectly, wear out faster, or leak because the tolerances differ slightly. Given that Moen frequently ships warranty replacement cartridges at no charge, and that a poorly fitting cartridge means redoing the repair, sticking with genuine parts is usually the smarter and cheaper choice in the long run. Reserve aftermarket parts for older discontinued models where genuine components are no longer available.
Frequently Asked Questions
Are Moen faucet cartridges universal?
No. Moen uses several cartridge families (such as the 1224 and 1255) matched to specific faucet types. You must use the cartridge designed for your model; an incorrect one will leak or fail to seat.
Does Moen replace parts for free?
Often, yes. Moen’s limited lifetime warranty for the original residential owner covers defective parts like cartridges. Contacting Moen support with your model info frequently results in a free replacement shipped to you.
How do I find my Moen faucet model number?
Check the original packaging or paperwork, look for a number stamped on the faucet body or escutcheon, or use Moen’s online collection browser to match your faucet visually. Customer service can also identify it from a photo.
Knowing your Moen bathroom faucet parts turns most faucet troubles into simple, low-cost fixes. Identify your model, match the correct cartridge or aerator, and take advantage of Moen’s lifetime warranty for free replacements. With a few basic tools and the right part, you can keep a Moen faucet running like new for decades.