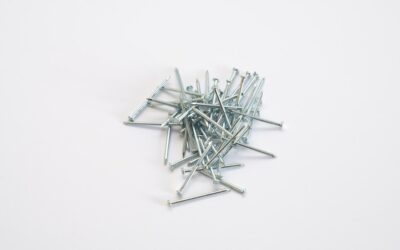
A solid wood floor lives or dies by how well it is fastened, and most squeaks and gaps trace straight back to bad nailing. Done right, nailing hardwood flooring locks each board to the subfloor through the tongue so the fasteners vanish and the floor stays tight for decades. Done wrong, you get popping seams, movement, and visible holes. This guide walks through cleats versus staples, picking the right nailer, blind-nailing the tongue, correct spacing, and how to handle the first and last rows where the machine cannot reach.
Cleats vs Staples: Which Fastener to Use
The two main fasteners for solid strip and plank flooring are cleats and staples, and each has a following.
- Cleats: L-shaped or T-shaped barbed nails that grip the subfloor while allowing the wood a little natural seasonal movement. Many pros prefer cleats for solid hardwood because they hold firmly yet flex with humidity swings, reducing cracked tongues.
- Staples: Two-pronged fasteners that bite hard and pull boards down tightly during install. They offer excellent initial hold but less give, so very dense or wide boards can crack at the tongue if the wood moves.
For most 3/4-inch solid oak over a plywood subfloor, 2-inch cleats are a safe, forgiving choice. Always defer to the flooring manufacturer’s fastener and length recommendation, since it ties into the warranty.
Choosing a Flooring Nailer
The right tool makes nailing fast and consistent. A dedicated flooring nailer sets the fastener at the correct angle through the tongue every time. Manual or “mallet-actuated” nailers fire when you strike the plunger with a rubber mallet, which gives you control and seats the board in one motion. Pneumatic models reduce fatigue on big jobs. Match the nailer to your flooring thickness — a standard tool is built for 3/4-inch solid, while thinner engineered or 5/16-inch products need a specific nailer or adapter base plate. Renting a quality nailer for a weekend is far cheaper than buying, and it shoots straighter than trying to hand-nail an entire floor.
Blind-Nailing Through the Tongue
The trick that hides every fastener is blind-nailing, sometimes called secret nailing. Instead of driving nails through the visible face of the board, you fire them at an angle through the tongue — the protruding lip along one edge. The next plank’s groove slides over that tongue and conceals the fastener completely. A flooring nailer is designed to deliver the fastener at the correct angle, roughly 45 to 50 degrees, right at the base of the tongue without splitting it. Seat each board snugly against the previous row before you fire, so the seam stays tight when the fastener pulls it down.
Fastener Spacing That Prevents Movement
Spacing is where rushed jobs go wrong. The standard is to drive a fastener every 6 to 8 inches along each board, and to place one within 1 to 3 inches of each end so the board ends cannot lift or cup. Wider planks and denser species call for the tighter end of that range — closer to every 6 inches — because they exert more force as they move. Stagger your end joints between rows by at least 6 inches for strength and appearance. Consistent spacing is what keeps the floor flat and quiet over the years; skimping on fasteners is a leading cause of squeaks.
Starting and Finishing Rows by Hand
The flooring nailer cannot reach the first row against the wall or the final row at the opposite side, so those get face-nailed. For the starter row, snap a straight chalk line, leave the proper expansion gap at the wall, and predrill, then drive finish nails through the face near the wall edge where baseboard or shoe molding will hide them. Also blind-nail the tongue of that first row by hand where possible. The last few rows, where the nailer base no longer fits, are face-nailed the same way and the holes filled with matching wood putty. Predrilling near board ends prevents splitting, especially in hard species.
Subfloor Prep and Layout
Good nailing starts before the first fastener. The subfloor must be clean, dry, flat to within about 3/16 inch over 10 feet, and securely screwed down to kill existing squeaks. Lay a vapor-retarding underlayment such as rosin or felt paper if the manufacturer calls for it. Plan your layout so the boards run perpendicular to the floor joists for maximum holding strength, and dry-lay a few rows to check color mix and your finish-wall margin. A flat, solid base is what lets every fastener do its job.
Common Nailing Mistakes to Avoid
A handful of errors account for most floor failures. Watch for these when nailing hardwood flooring:
- Over- or under-driving fasteners: Adjust the nailer’s air pressure and depth so the cleat seats flush in the tongue, not buried or proud.
- Too few fasteners: Stretching past 8-inch spacing invites squeaks and movement.
- Skipping the expansion gap: Solid wood needs room to grow; nailing tight to the wall causes buckling.
- Not predrilling face nails: Hard species split at the ends without a pilot hole.
- Ignoring acclimation: Even perfect nailing cannot save boards installed at the wrong moisture content.
The Bottom Line
Tight, quiet hardwood comes down to the fundamentals: pick the right fastener for your product, use a nailer matched to the thickness, blind-nail through the tongue at a clean 45 to 50 degrees, hold 6 to 8 inch spacing with fasteners near every board end, and face-nail the first and last rows where the machine cannot reach. Prep a flat, dry subfloor and respect the expansion gap. Get those steps right and you will have a floor that stays flat, silent, and beautiful long after the tools are put away.
Nailing vs Other Installation Methods
Nailing is the traditional method for 3/4-inch solid hardwood over a wood subfloor, and it remains the gold standard for that scenario because the mechanical hold is strong and forgiving of seasonal movement. But it is not the only option, and the subfloor decides a lot. Over concrete, you cannot nail, so solid wood is glued down with a flooring adhesive or installed over a plywood subfloor first. Engineered hardwood can be nailed, glued, or floated depending on the product. Floating and glue-down methods suit slabs, basements, and radiant heat better than nailing. Knowing which method your situation calls for prevents the common mistake of trying to nail into a surface that will not hold a fastener, or nailing a product engineered to float.
Prefer to explore on your own?
See how new flooring looks in your actual room in seconds — free, no signup.
Try the free Floor Studio →