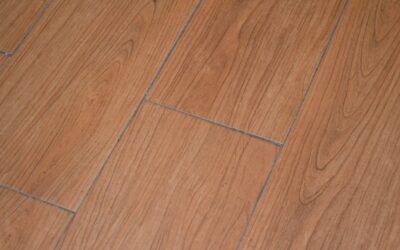
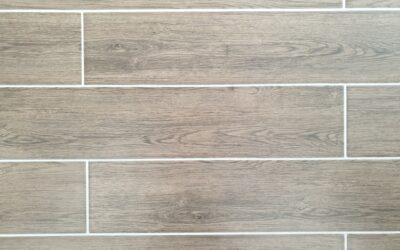
Grout lines are most people’s least favorite part of tile. They stain, they harbor mold, they need scrubbing, and they break up an otherwise seamless surface. No wonder so many homeowners go searching for no grout tile options that skip the dirty lines altogether. Here is the honest truth up front: traditional ceramic and porcelain tile almost always needs at least a thin grout joint, and butting tiles tightly together without any gap usually leads to cracking and a failed installation. But there are real ways to get the clean, minimal-grout look you want. Let us separate the myths from the workable solutions.
Part of our Tile & Grout guide — explore the full guide →
Can You Really Install Tile Without Grout?
For standard rigid tile, the short answer is no, and you should not try to. Grout does important structural work. It accommodates the tiny dimensional differences between tiles, absorbs the natural movement and expansion of the floor or wall, and locks the tiles together so edges do not chip. If you push ceramic or porcelain tiles tightly together with no joint, the slightest movement or thermal expansion forces them against each other, and they crack, chip, or pop loose. So a true zero-grout install of conventional tile is a recipe for failure.
That said, the goal most people actually have is a near-seamless look with minimal visible grout. That is very achievable with the right approach. It helps to remember why grout exists in the first place: tile is a fired clay product, and even tiles from the same box vary by a hair in length and squareness. Grout swallows those tolerances. Take it away and every minor variation telegraphs straight to the surface as an uneven, lippage-prone field. The grout joint is also the only sacrificial element in a tile assembly. When the floor moves, the joint flexes and the tile stays whole. Eliminate the joint and the tile itself becomes the thing that has to give, which it does by cracking.
Rectified Tile: The Closest to Seamless
If you want the tightest possible grout lines, rectified tile is your best friend. Rectified tiles are mechanically cut and ground after firing so every edge is perfectly straight and every tile is exactly the same size. This precision lets installers set them with very thin grout joints, sometimes as small as 1/16 inch, for an almost continuous surface.
You still use grout, but the line nearly disappears, especially when you match the grout color closely to the tile. Pair rectified large-format tiles with a tight, color-matched joint and you get the seamless, modern look people chase, without sacrificing the structural safety that grout provides. This is the solution most tile pros recommend. One caution worth knowing: even with rectified tile, most industry standards advise against joints narrower than 1/16 inch, and many manufacturers will void their warranty if you go tighter than the minimum they specify. The grout simply cannot pack into a joint thinner than its own sand particles, so an ultra-tight line that looks flawless on day one can starve, weaken, and fail. Use unsanded grout for these very thin joints, hold the spacing consistent, and resist the urge to crowd the tiles tighter than the maker allows.
Minimal Grout Strategies That Work
Beyond rectified tile, a few techniques get you the low-grout look safely.
- Color-matched grout: Choosing a grout that blends with the tile makes existing joints visually recede, so the lines barely register even at standard width.
- Large-format tiles: Bigger tiles mean fewer grout lines across the whole surface, so the floor or wall reads cleaner.
- Epoxy grout: Non-porous and stain-proof, it eliminates the maintenance headaches even if the line is still there.
- Thin, uniform joints: A skilled installer using rectified tile and tight spacers minimizes the visual impact.
True No-Grout Products
There are products specifically designed to go without traditional grout, and they have their place.
Peel-and-Stick Tile
Vinyl peel-and-stick tiles and some self-adhesive options install edge to edge with no grout. They are inexpensive, DIY-friendly, and great for backsplashes and low-moisture walls. The trade-off is durability and a less premium feel than real tile, and they are not suited to heavy floor traffic or constant water exposure.
Interlocking and Groutless Wall Panels
Some manufacturers make groutless wall panels and interlocking tiles with tongue-and-groove edges that fit together without grout joints. These work well for showers and feature walls where a seamless surface is the goal. Follow the manufacturer’s installation system exactly.
Large-Format Slabs
Big porcelain slabs or solid-surface panels cover large areas with few or no seams, giving a genuinely grout-free expanse on a shower wall or countertop.
The Risks of Forcing Grout-Free Tile
If you ignore the advice and butt rigid tiles together with no joint, expect problems. Without room to move, tiles grind against each other and chip along the edges. Floors that expand and contract with temperature have nowhere to go and crack. Water finds its way into the tight seams and gets trapped with no proper grout barrier. And without grout locking the field together, individual tiles can loosen and lift. The maintenance headache you tried to avoid turns into a far more expensive repair.
How to Get the Look You Want, Safely
- Choose rectified tile for the tightest, most uniform joints.
- Go large-format to reduce the number of grout lines overall.
- Match your grout color to the tile so the lines visually disappear.
- Use epoxy grout to kill the staining and mold maintenance entirely.
- Hire a skilled installer who can hold a consistent thin joint across the whole surface.
What About Grout-Free Floors in Wet Rooms?
The pressure to go grout-free is strongest in showers and wet rooms, where every joint feels like a place for mold to grow. It is worth being clear about how waterproofing actually works there, because the grout is not what keeps water out. In a properly built shower, the waterproofing happens behind the tile, either a sheet or liquid membrane or a foam board system, and the tile and grout are essentially a decorative, sheddable wear layer over that barrier. Grout is not the seal, so removing it does not make a shower more watertight; it just removes the buffer that lets the tile move without cracking. If a seamless wet-room surface is the real goal, the right answer is a large-format porcelain slab or a solid-surface panel set over a sound membrane, with caulk rather than grout at the corners and the floor-to-wall change of plane. That gives you a genuinely minimal-seam look while keeping the movement joints flexible where the structure needs them to be. Trying to butt small wet-area tiles together with no joint, by contrast, almost guarantees cracked tiles and trapped water within a season or two.
The Bottom Line
Truly groutless installation only works for purpose-built products like peel-and-stick tile, interlocking panels, and large slabs. For real ceramic and porcelain tile, grout is not optional, it is structural, and skipping it leads to cracks and chips. The good news is you can get that clean, seamless aesthetic the smart way: choose rectified large-format tile, set it with thin color-matched epoxy grout, and you will have a floor or wall that looks nearly grout-free and lasts for decades.
Prefer to explore on your own?
See how new flooring looks in your actual room in seconds — free, no signup.
Try the free Floor Studio →