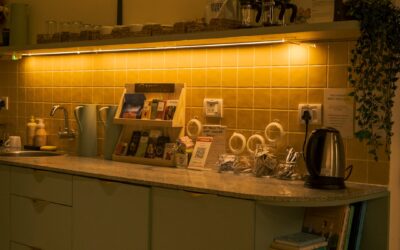
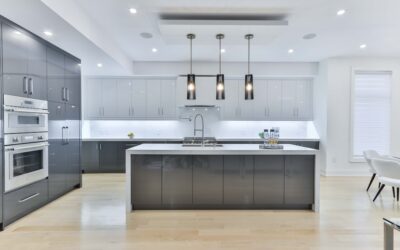
That dusty gap between the tops of your kitchen cabinets and the ceiling is one of the easiest places in the house to add dramatic light. Over cabinet lighting bounces a soft glow off the ceiling, makes a kitchen feel taller, and works as gentle night lighting when the main fixtures are off. Done well, you see the glow but never the fixture.
Part of our Kitchen Remodeling guide — explore the full guide →
The formula is simple. Use a continuous LED strip, not individual pucks, so the ceiling wash is even. Hide it behind the crown molding or a small lip at the front edge of the cabinet tops, set the strip back several inches so it throws light upward, and power it from an outlet on top of the cabinets that is controlled by a wall switch. If there is no outlet up there, plug-in or battery-powered options work while you decide whether to have an electrician add one.
- Planning Over Cabinet Lighting: Strip vs Puck
- Measure the Soffit Gap and Hiding Spot
- Tools and Materials
- How to Power Up-Lights Safely
- Fire Safety With LED Strips
- Ladder Safety on Cabinet Tops
- Step-by-Step Installation
- Troubleshooting
- Cost Ranges
- When to Call a Licensed Professional
- Frequently Asked Questions
This guide walks through choosing fixtures, reading your soffit gap, hiding the light, powering it safely, installation steps, troubleshooting and costs.
Planning Over Cabinet Lighting: Strip vs Puck
You will see both LED strips and puck lights sold for this job. For up-lighting, strips win almost every time.
LED strip lights
A continuous strip produces an unbroken line of light that spreads into an even wash across the ceiling. Choose an led strip light for above cabinets with high LED density, commonly 60 or more LEDs per foot, so no dots show if any reflection is visible. Warm white around 2700K to 3000K matches most kitchen lighting; tunable or color-changing strips add flexibility. Look for strips rated with a high color rendering index (CRI 90 or better) if the glow will spill onto countertops or cabinet faces.
Puck lights
Pucks create individual pools of light, which can look like a row of scallops on the ceiling. They make sense for accent-lighting a few decorative items on top of the cabinets rather than washing the whole ceiling. Battery powered cabinet lights are usually pucks or short bars, handy for renters or for trying the look before committing.
Overhead cabinet lighting vs under-cabinet task light
Up-lighting is ambient; it does little for chopping vegetables. Under-cabinet lights handle task work. Many kitchens use both, on separate switches, so you can choose a working mode or a relaxed evening glow. The same thinking applies to over cupboard lights in pantries, laundry rooms and bathrooms.
Measure the Soffit Gap and Hiding Spot
The space between the cabinet tops and ceiling decides how the light looks.
- 12 inches or more: ideal. The light has room to spread into a smooth gradient on the ceiling. Set the strip back 3 to 6 inches from the front edge.
- 6 to 12 inches: still good. Keep the strip closer to the back wall or angle it slightly toward the wall to avoid a hot line on the ceiling.
- Under 6 inches: the light will be intense near the fixture. Use a lower-output strip or a diffused channel, and consider mounting it on the back edge aimed at the wall.
- Cabinets to the ceiling or a closed soffit: no up-lighting possible; focus on under-cabinet or in-cabinet lighting instead.
Check the front edge too. Crown molding or a small lip usually rises 1 to 4 inches above the cabinet top, which is enough to hide a strip from normal viewing angles. Stand at the far side of the kitchen and in any adjacent room to confirm the fixture will be hidden. If the cabinet tops are flat with no lip, add a simple strip of matching trim or a painted 1×2 along the front edge to create one.
Tools and Materials
- LED strip light, sized to the run, with connectors and jumpers for corners
- UL-listed LED driver or plug-in power supply rated above the strip’s total wattage
- Aluminum channel with diffuser (optional but recommended for heat and a smoother wash)
- Mounting clips and short screws
- In-line or smart switch or remote, if not using a switched outlet
- Cable clips for tidy wire management
- Drill/driver, tape measure, scissors for cutting strips at marked points
- Stepladder with a working platform, plus a helper
- Vacuum and cleaner for decades of cabinet-top dust and grease
How to Power Up-Lights Safely
Power is where most planning goes wrong. You have three practical options.
- A switched outlet on top of the cabinets. The cleanest result. A receptacle hidden on the cabinet top, controlled by a wall switch, lets you turn the lights on with the rest of the kitchen. Many newer homes have one; older homes usually do not.
- A plug-in supply with a remote or smart switch. If there is an outlet nearby, run a low-voltage lead up the side of the cabinet or behind the refrigerator and control the strip by remote, app or voice.
- Battery or rechargeable fixtures. No wiring at all, at the cost of recharging and lower output.
Most strips run on 12 or 24 volts, which is low voltage and safe to handle on the strip side. The outlet and anything connected to your home’s wiring are line voltage, typically 120 volts. Adding a switched outlet above the cabinets, extending a circuit or hardwiring a driver into a junction box is electrical work that normally needs a permit and belongs with a licensed electrician. If you are only replacing an existing device, turn off the breaker and confirm power is off with a non-contact voltage tester before you touch anything.
Fire Safety With LED Strips
LEDs run cool compared with old halogen rope lights, but they still generate heat, and cabinet tops trap dust and grease. Keep these rules in mind:
- Use only UL-listed drivers and power supplies sized to the load, with headroom so they are not running at maximum.
- Never power a strip while it is still coiled on the reel, and do not bunch excess strip; cut it at the marked points instead.
- Do not cover strips with decorative items, greenery, fabric or stored boxes.
- Keep strips and drivers away from heat sources such as range hoods, recessed can trims and ceiling heaters.
- Place drivers where air can circulate, not buried under insulation or inside a sealed box.
- For rechargeable fixtures, charge on a nonflammable surface and retire any lithium battery that swells or overheats.
Ladder Safety on Cabinet Tops
Never stand on countertops or climb the cabinets. Use a stepladder that lets you reach the cabinet tops without standing on the top two steps, lock the spreaders and set it on a level floor clear of rugs. Keep your body centered between the rails, reposition rather than stretching, and have a helper pass up tools and strip sections. A ladder with a platform and tool tray makes long runs much safer.
Step-by-Step Installation
- Clean the cabinet tops. Vacuum, then degrease with warm soapy water or a kitchen degreaser. Adhesive and clips will not hold on grease film.
- Plan the layout. Measure each cabinet run, locate the outlet, and note corners, gaps between cabinets and the range hood.
- Mount channel or clips. Set the channel or clips 3 to 6 inches back from the front edge, parallel to the crown. Screw them down every 12 to 18 inches.
- Cut and lay the strip. Cut only at marked cut points. Bridge gaps and corners with connectors or jumper wires rather than bending the strip sharply.
- Route the cable. Run the low-voltage lead to the power supply, clip it neatly, and keep it away from the hood and any heat.
- Test before finishing. Power the system and check for dark sections, color mismatch or flicker. Then snap on diffusers.
- Check sightlines. Look from every doorway and seated position. Adjust setback or add a trim lip if any fixture is visible.
Troubleshooting
- Visible hot spots on the ceiling: the strip is too close to the front edge or too bright for the gap. Move it back or dim it.
- Far end dimmer or off-color: voltage drop on a long run. Feed power from the middle or both ends, or use 24-volt strip.
- Flickering when dimmed: the dimmer and driver are not compatible. Match the dimmer type to the driver.
- Lights visible from across the room: add a taller trim lip or move the strip toward the back wall.
- Adhesive letting go: heat and grease; switch to screwed clips or channel.
Cost Ranges
A plug-in strip kit for a typical kitchen falls in the low to moderate range, with aluminum channel and higher-quality drivers adding to the total. Battery puck sets are the cheapest way to test the look. The largest potential cost is electrical: having an electrician install a switched outlet above the cabinets involves a service call, labor and possibly a permit, and costs more if walls must be opened to run cable.
When to Call a Licensed Professional
Bring in a licensed electrician for any new outlet, new switch, circuit extension or hardwired driver. Local codes typically require permits for this work, and kitchens often have specific circuit and protection requirements that an electrician will know. Also call a pro if you find old or damaged wiring on top of the cabinets, or if the soffit above the cabinets hides ductwork or framing you would need to alter. Once power is in place, the rest of your over cabinet lighting project is a straightforward weekend job, and an upgrade that changes how the whole kitchen feels at night.
Frequently Asked Questions
Are LED strips or puck lights better for over cabinet lighting?
LED strips are better for washing the ceiling with even light. Puck lights create separate pools of light and work best for accenting individual decorative items on top of the cabinets.
How far back from the edge should the LED strip go?
About 3 to 6 inches behind the front edge works for most kitchens. Move it farther back in shallow gaps to avoid a bright line on the ceiling.
How do I power lights on top of kitchen cabinets without an outlet?
Use a plug-in power supply from a nearby outlet with a remote or smart switch, or use battery-powered fixtures. For a permanent switched outlet above the cabinets, hire a licensed electrician.
What color temperature works best above cabinets?
Warm white in the 2700K to 3000K range blends with most kitchens. Choose a high-CRI strip so the light looks natural on the ceiling and cabinet finishes.
Is it safe to leave LED strips on above cabinets for hours?
Yes, if you use a UL-listed power supply sized to the load, keep the strip uncovered and away from heat sources, and avoid bunching or coiling excess strip.