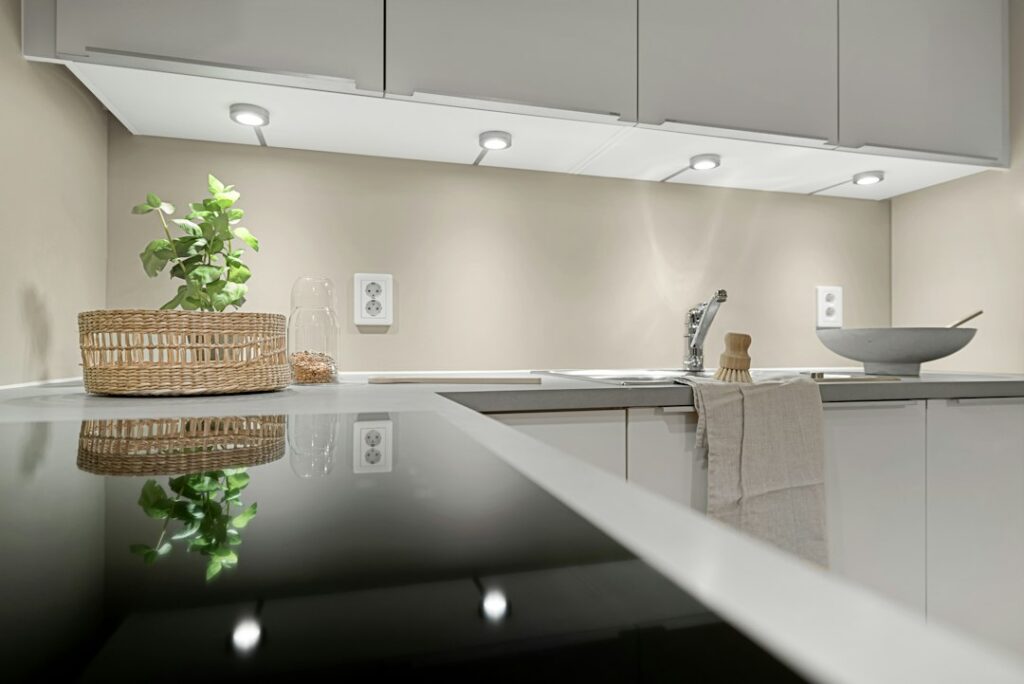
The single biggest complaint about kitchen lighting is the shadow that falls right across the countertop where you actually do the work. Recessed under cabinet lighting solves that by tucking the light source up into the bottom of the wall cabinets, throwing an even wash down onto the counter with no visible fixture and no glare. Done well, recessed under cabinet lighting makes a kitchen look designer-built, eliminates the harsh line of surface-mounted strips, and turns meal prep from a squint-fest into something genuinely pleasant. Here is exactly how to plan, buy, and install it.
Part of our Kitchen Remodeling guide — explore the full guide →
- Recessed vs. Surface-Mounted: What’s the Difference
- Puck Lights vs. Linear LED Strips
- Color Temperature and Brightness
- Planning the Layout and Power
- Step-by-Step Installation
- Cost Breakdown
- Troubleshooting and Pro Tips
- Hardwired vs. Plug-In Systems
- Warm Dim and Tunable White Features
- Maintenance and Longevity
Recessed vs. Surface-Mounted: What’s the Difference
Standard under cabinet lights simply screw to the underside of the cabinet. They work, but the fixture body hangs down where you can see it from a seated position, and the light often reflects off glossy counters. Recessed fixtures sit in a routed groove or a shallow pocket cut into the cabinet bottom, so the lens is flush and the source hides from view.
The payoff is a cleaner look and softer light, since the recess acts as a small reflector. The tradeoff is more work up front, because you have to cut into the cabinet or plan the grooves during installation. If you have frameless cabinets with a recessed bottom panel already, you may have a natural channel to work with. For a full remodel, recessed is worth the extra hour. For a quick weekend upgrade, surface strips may be the pragmatic call.
Puck Lights vs. Linear LED Strips
You have two main light forms, and the choice shapes the whole look.
- Puck lights: round fixtures about 2.5 to 3 inches across that create pools of light. Recessed pucks give a subtle spotlight effect, nice over a decorative counter or a stone backsplash. Expect visible scallops between pucks unless you space them tightly.
- Linear LED strips and bars: continuous runs that wash the counter evenly with no hot spots. This is the modern standard for task lighting and the look most people want. Recessed linear channels give the cleanest wall-of-light effect.
- Tape light in an aluminum channel: the most flexible option, letting you cut runs to length and set them into a slim milled groove for a fully recessed, professional result.
For most kitchens, the better choice is recessed linear LED bars or tape in a channel. Reserve pucks for accent spots, glass-front cabinets, or a bar area where the pool-of-light effect is a feature, not a flaw.
Color Temperature and Brightness
Color temperature, measured in Kelvin, decides whether your kitchen feels warm or clinical. For task lighting on a counter, 2700K to 3000K reads warm and inviting and flatters wood tones. Around 3500K is a crisp neutral. Above 4000K starts to look cold and commercial, which some people like for serious cooking but most find harsh at home.
For brightness, aim for roughly 200 to 300 lumens per linear foot of counter for solid task light. Look for a color rendering index, or CRI, of 90 or higher so your food and countertops show true colors. Many quality strips now offer selectable or tunable white, letting you dial anywhere from 2700K to 5000K with a small switch, which is a smart hedge if you are unsure.
Planning the Layout and Power
Measure the total linear feet of cabinet run you want lit, then subtract the gaps over the stove and sink where there is usually no upper cabinet. Add up the wattage of your chosen strips and pick a driver, or transformer, rated at least 20 percent above that total so it never runs at full capacity. A typical 12-foot kitchen might draw 40 to 60 watts, so a 60- or 75-watt LED driver covers it comfortably.
Decide how it switches. A hardwired system tied to a wall switch and dimmer is the cleanest and adds resale value. A plug-in transformer that runs to a nearby outlet is a legitimate no-electrician option, and many kits include an in-line dimmer or a wireless remote. If you dim, buy an LED-compatible dimmer such as a Lutron Diva LED model, because standard dimmers cause flicker and buzz with low-voltage LEDs.
Step-by-Step Installation
Recessing tape light in a channel is the cleanest DIY approach and needs only basic tools.
- Route the groove. Using a router with a straight bit sized to your aluminum channel, cut a shallow recess along the front underside of each cabinet, about 1 to 1.5 inches back from the front edge so the light hides from view.
- Mount the channel. Screw or adhere the aluminum channel into the groove. Cut it to length with a hacksaw at the gaps.
- Cut and stick the tape. LED tape has marked cut points every 1 to 2 inches. Cut to fit, peel the backing, and press it into the channel. Use snap connectors or solder to jump across cabinet gaps.
- Run the low-voltage wire. Drill small pass-through holes at cabinet ends and route the wire back to the driver, hidden above the cabinets or inside a corner.
- Connect the driver. Wire the driver to your switched circuit, or plug it in, then snap on the frosted lens covers to diffuse the diodes into a smooth line.
Always shut off the breaker before touching any hardwired connection, and if you are not comfortable in the junction box, an electrician will make the final connection for $100 to $200.
Cost Breakdown
A DIY recessed system runs $80 to $300 in parts for an average kitchen, depending on strip quality, channel, and driver. A quality tunable-white tape kit with channel is around $120 to $200. Professional installation, including routing and wiring, typically adds $200 to $600 in labor. Compared to the visual upgrade it delivers, recessed under cabinet lighting is one of the highest-return improvements in the whole kitchen.
Troubleshooting and Pro Tips
If your lights flicker, the culprit is almost always an incompatible dimmer or an overloaded driver, so swap in an LED-rated dimmer first. Uneven brightness across a long run usually means voltage drop, fixed by feeding power to both ends of the strip instead of one. And if you see the individual diodes as dots rather than a smooth line, your lens is either missing or set too close to the tape; a frosted diffuser and a channel at least 0.4 inches deep smooths it out. Plan for a warm color, a high CRI, and a clean recess, and your counters will never live in shadow again.
Hardwired vs. Plug-In Systems
How you power the lights shapes both the look and the difficulty of the job. A hardwired system connects to your home wiring and a wall switch, giving the cleanest result with no visible cords and the option of a dimmer that controls everything from the wall. It adds resale value and is what most remodels use, but it requires running wire inside the wall and making a connection in a junction box, which many homeowners hand to an electrician for the final tie-in.
A plug-in system runs a low-voltage cord to a nearby outlet, often the one already inside a cabinet or behind an appliance. It is the true no-electrician route and perfectly legitimate, especially for renters or quick upgrades. The tradeoff is finding a discreet path for the cord to an outlet and, sometimes, a small in-line switch or remote instead of wall control. For a clean permanent install choose hardwired; for a fast, reversible upgrade, plug-in wins.
Warm Dim and Tunable White Features
Higher-end LED strips now offer features worth knowing about. Tunable white lets you shift the color temperature anywhere from a warm 2700K to a cool 5000K with a switch or app, so the same lights can be cozy for evening ambiance and crisp for detailed prep. In an open-plan kitchen that flows into a living space, that flexibility keeps the light appropriate to the moment.
Warm-dim strips take it further, mimicking the way an incandescent bulb glows warmer as it dims, dropping toward a candle-like 2200K at the low end. That effect makes late-night under-cabinet lighting feel especially relaxing. These features cost a little more, but in a kitchen where you spend hours each day, the ability to tune the mood is a genuine quality-of-life upgrade rather than a gimmick.
Maintenance and Longevity
One of the joys of LED under-cabinet lighting is how little it asks of you. Quality strips last 25,000 to 50,000 hours, or roughly 15 to 20 years at normal use, with no bulbs to replace. The main upkeep is an occasional wipe of the diffuser lens to remove kitchen grease, which can dim the output over time if it builds up. A soft cloth with a little mild cleaner keeps the light bright.
If a section fails, the modular nature of tape light means you can often replace just the affected run rather than the whole system, using snap connectors to splice in a new segment. Keep a note of your strip’s model, voltage, and color temperature so replacements match. Installed in a proper channel with an adequately sized driver, recessed under cabinet lighting is close to a set-and-forget upgrade that keeps your counters beautifully lit for the better part of two decades.