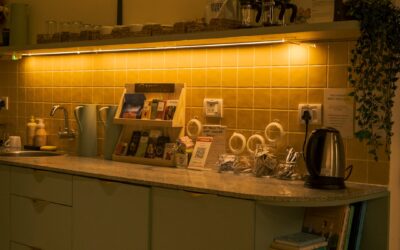
Hardwiring task lighting into a finished kitchen can mean opening drywall, fishing cable, and paying an electrician $150 to $400 for a single run. That is exactly why battery under cabinet lighting has become the go-to upgrade for renters and homeowners who want bright countertops without a remodel. Modern LED units stick or screw to the underside of your upper cabinets in minutes, throw 100 to 500 lumens onto the work surface, and run for months on a charge. The catch is that not all of them are worth buying. Some dim to uselessness in weeks, and others eat AAA batteries so fast you will regret the purchase by Thanksgiving.
Part of our Kitchen Remodeling guide — explore the full guide →
- How Battery-Powered Under Cabinet Lights Work
- Main Types: Puck Lights, Light Bars, and Strip Lights
- Rechargeable vs. Replaceable Batteries
- Brightness, Color Temperature, and Beam Quality
- Installation: Placement Tips That Prevent Regrets
- Runtime Expectations in Real Use
- Battery Power vs. Hardwired and Plug-In Alternatives
- What to Buy: A Practical Shortlist
How Battery-Powered Under Cabinet Lights Work
Every unit in this category pairs an LED array with either replaceable alkaline cells or a built-in rechargeable lithium-ion pack. LEDs are the reason the whole product class exists: a typical 200-lumen light bar draws only 2 to 3 watts, so a modest battery can push usable light for 20 to 100 hours of actual on-time. Older fluorescent and xenon under cabinet fixtures could never do that on batteries.
Most models mount with 3M adhesive strips, magnetic plates, or two small screws driven into the cabinet’s bottom rail. The magnetic option is worth seeking out even on wood cabinets, because manufacturers include a screw-on steel plate. You mount the plate once, then pull the light off its magnet whenever it needs charging at a USB port. That single design choice separates the lights people actually keep charged from the ones that die and stay dead.
Controls range from a simple on/off tap switch to motion sensors, remote controls, and app-based dimming. Motion activation matters more than it sounds. A sensor that wakes the light when your hand enters the counter zone, then shuts it off 30 to 60 seconds later, can stretch a charge from two weeks to three months in real household use.
Main Types: Puck Lights, Light Bars, and Strip Lights
Puck lights are round, hockey-puck-shaped units roughly 3 inches across. They cast focused pools of light, which looks dramatic over a decorative backsplash but leaves dark gaps between pucks on a long counter. Plan on one puck every 8 to 12 inches for even task lighting. They usually run on three AAA cells and are the cheapest way into this category, often $15 to $25 for a three-pack with a remote.
Light bars are the workhorses. A 12-inch rechargeable bar with 150 to 300 lumens covers a standard cabinet section, and most kitchens need three to five bars total. Expect to pay $12 to $30 per quality bar. Because the diodes sit behind a frosted diffuser spanning the full length, you get a smooth wash of light instead of hot spots on the counter.
- Puck lights: accent lighting, display cabinets, closets; cheapest entry point
- Light bars: best all-around choice for kitchen task lighting
- Battery strip lights: flexible tape-style LEDs for curved or narrow spots, though battery versions are dimmer than plug-in tape
- Motion sensor wedges: compact triangular units ideal for hallways, pantries, and stair cabinets
Rechargeable vs. Replaceable Batteries
Rechargeable lithium-ion models have largely taken over, and for good reason. A built-in 1,500 to 2,500 mAh pack recharges over USB-C in two to four hours and delivers steady brightness until it is nearly empty. Over three years, a kitchen running five AAA-powered bars can easily burn through $60 to $100 in alkaline cells, which erases any upfront savings several times over.
Replaceable-battery units still make sense in two situations. First, in spots where removing the light to charge it is a hassle, like a fixture screwed above a workbench pegboard; swapping three AAAs takes ten seconds. Second, in unheated spaces. Lithium-ion packs should not be charged below 32°F, so a detached garage in Minnesota is friendlier to alkaline or lithium primary cells. If you go the replaceable route, buy low-self-discharge NiMH rechargeables such as Eneloops and rotate two sets.
Brightness, Color Temperature, and Beam Quality
For genuine task lighting where you chop vegetables and read recipes, aim for 200 to 400 lumens per 12-inch section of counter. Under 100 lumens is accent light only. Manufacturers love to advertise the lumen figure at maximum brightness, which drains the battery fastest, so check the runtime at the setting you will actually use.
Color temperature changes the feel of the whole kitchen. Warm white at 2700K to 3000K flatters wood tones and matches most residential ambient lighting. Neutral 4000K reads crisp and shows food color accurately, which many cooks prefer. Avoid anything at 6000K or higher unless you like the operating-room look. Several better models, including options from BLS, Wobane, and EZVALO, offer three selectable temperatures on one unit, which lets you match existing fixtures instead of guessing.
Also glance at the CRI, or color rendering index, when it is published. A CRI of 90 or higher makes tomatoes look red and raw chicken look correctly pale. Cheap diodes in the CRI 70 range make everything slightly gray.
Installation: Placement Tips That Prevent Regrets
Mount lights toward the front edge of the cabinet underside, roughly 2 inches back from the face frame, not against the wall. Front placement pushes light onto the counter where you work and hides the fixture behind the cabinet’s bottom lip. Rear placement mostly illuminates your backsplash and leaves your hands in shadow.
- Clean the mounting surface with rubbing alcohol and let it dry; adhesive strips fail on greasy cabinet undersides.
- Hold each light in place temporarily with painter’s tape at night and check the coverage before committing.
- Use the included screws or steel plates on textured or thermofoil cabinets, where adhesive reliability drops sharply in kitchen heat and humidity.
- Keep lights at least 12 inches horizontally from the range so grease vapor does not coat the diffuser.
If your cabinets have a recessed underside with a lip, the fixture stays invisible from standing height. Flat-bottom cabinets may need a slim bar under 0.5 inches thick, or a small wooden valance strip, to hide the hardware from view at the kitchen table.
Runtime Expectations in Real Use
Manufacturer runtime claims assume the lowest brightness setting. In practice, a 2,000 mAh rechargeable bar at medium brightness delivers about 8 to 15 hours of continuous light. That sounds short until you remember the motion-sensor math: if the light only runs 30 minutes a day during meal prep, that is a month between charges. Households that leave bars on all evening as ambient light should expect to charge weekly.
Cold weather cuts runtime noticeably. At 40°F in a pantry against an exterior wall, expect roughly 20 to 30 percent less capacity than the same unit at room temperature. Batteries also fade with age; after 300 to 500 charge cycles, a lithium pack typically holds around 80 percent of its original capacity, which is why buying units with replaceable packs or at least USB charging, rather than proprietary cradles, pays off in year three.
Battery Power vs. Hardwired and Plug-In Alternatives
Be honest about the tradeoffs before committing an entire kitchen to battery power. Hardwired LED under cabinet systems cost $200 to $600 installed but never need charging, integrate with wall dimmers, and add mild resale appeal. Plug-in light bars split the difference when an outlet hides above the counter, though the visible cord annoys some homeowners.
Battery under cabinet lighting wins decisively for renters, for finished kitchens where fishing wire means drywall repair, and for spots with no outlet within reach, such as interior pantries, china hutches, and closets. It is also the only sensible choice for quick projects: a full kitchen can be lit in under an hour for $50 to $120. If you cook two hours a night and hate maintenance, though, the recharging routine will eventually wear on you, and a hardwired retrofit deserves a look.
What to Buy: A Practical Shortlist
Match the product to the job rather than buying the brightest thing on the page. For most kitchens, three to five rechargeable magnetic light bars in the 200 to 300 lumen range, with motion sensing and selectable color temperature, hit the sweet spot at roughly $15 to $30 each.
- Whole-kitchen task lighting: 12-inch rechargeable bars with motion sensors and 4000K option
- Display cabinets and shelves: dimmable puck lights with a single remote controlling the group
- Pantry and closets: motion-sensor wedge lights that shut off automatically after 30 seconds
- Rental units: adhesive-plus-magnet mounting so you leave zero holes at move-out
Buy all units from the same product line so the color temperature matches across the room; a 3000K bar next to a 5000K puck looks like a mistake every time you flip them on. Charge everything fully before mounting, mark your calendar for the first recharge, and you will quickly learn the real interval your household needs. Done right, this is the rare home upgrade that costs less than a dinner out and improves the kitchen every single day.