
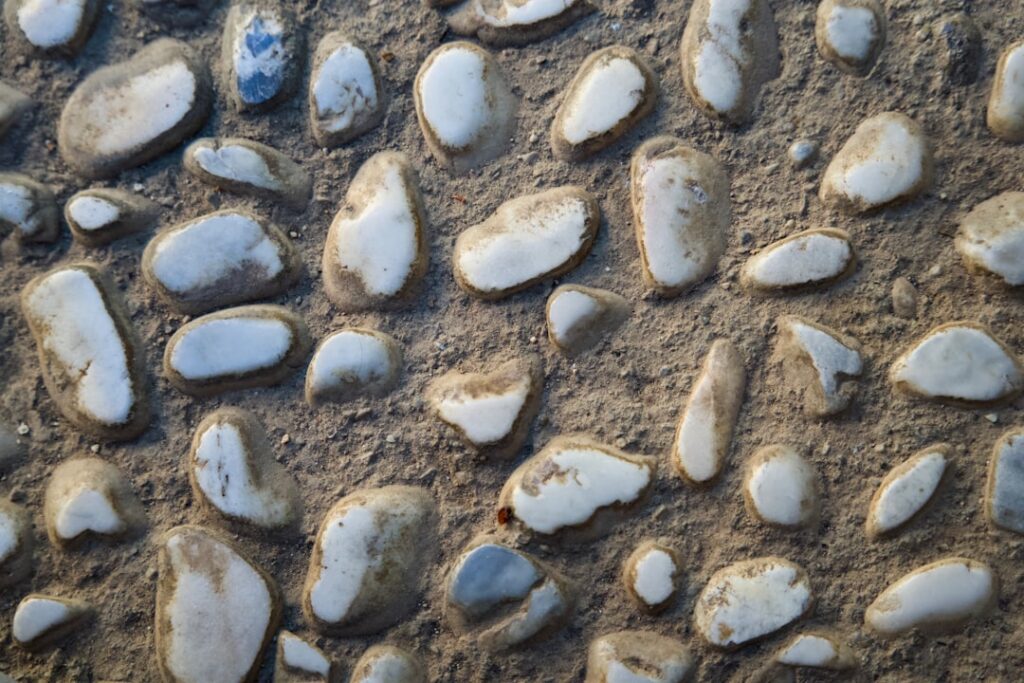
When homeowners start collecting pictures of natural stone flooring, they quickly realize that no two floors look alike. Every slab of marble, travertine, slate, or limestone comes out of the earth with its own veining, color drift, and surface texture. That variation is exactly what makes stone so desirable, and it is also what makes shopping from photos a little tricky. A picture shows you one tile, one lighting condition, one grout color, but the floor you install will carry natural movement across dozens of pieces. Learning to read those images the way an installer does helps you translate inspiration into a floor that actually works in your home.
After twenty years of setting stone, I can tell you that the photos people love most usually share a few traits: honest lighting, a grout joint that flatters the stone, and a finish that suits the room. In this guide I will walk through the major stone types you will see in flooring galleries, explain what each finish and color really means underfoot, and point out the practical details that photos never mention, like cost, maintenance, and slip resistance. By the end you will look at those inspiration shots with a builder’s eye instead of just a decorator’s.
- Why Natural Stone Photographs So Well
- Marble Flooring: Classic Veined Elegance
- Travertine and Limestone: Warm, Earthy Tones
- Slate: Textured, Multicolor Character
- Granite and Quartzite: Hard and Durable
- Finishes: Polished, Honed, Tumbled, and Brushed
- Grout, Layout, and Tile Size in the Photos
- Turning Inspiration Photos Into a Real Floor
Why Natural Stone Photographs So Well
Stone has depth that manufactured products struggle to imitate. Light does not just bounce off the surface, it penetrates slightly into crystalline materials like marble and quartzite, which is why a polished marble floor seems to glow in professional photos. That translucence is real, not a camera trick, and it is one reason a well-lit stone floor reads as luxurious even in a small phone snapshot. When you browse galleries, notice how the same tile looks warmer under incandescent light and cooler under daylight; the stone has not changed, only the light has.
The other thing photos capture is movement. Veining in marble, the layered banding in slate, and the pitting in travertine all create visual rhythm across a floor. A single tile might look busy in a close-up, but spread across a room that same pattern relaxes into an organic, calming surface. This is why I always tell clients to look at wide room shots, not just tight product images. A macro photo of a dramatic vein can scare you off a stone that would look perfectly balanced once it covers 200 square feet.
Keep in mind that many catalog pictures are styled with premium sealers and freshly buffed surfaces. Real floors develop a patina, especially softer stones. That is not a flaw, it is character, but you should set your expectations accordingly. The showroom shine is the starting point, not the permanent condition.
Marble Flooring: Classic Veined Elegance
Marble is the stone most people picture first, and for good reason. Carrara and Calacatta marbles, with their white-to-gray fields and gray or gold veining, dominate luxury flooring galleries. In photos, polished marble looks glossy and reflective, while honed marble appears soft and matte with a satin depth. Honed is my recommendation for floors because polished marble becomes dangerously slick when wet and shows scratches from foot traffic more readily. The matte look also photographs beautifully in a subtler, more livable way.
Marble runs roughly $10 to $20 per square foot for the material, with installation pushing an installed price toward $20 to $40 per square foot depending on tile size and layout complexity. It is a calcium-based stone, meaning acids like vinegar, wine, and citrus will etch it, leaving dull spots. Those etch marks rarely show in inspiration photos, so budget for regular sealing every six to twelve months and be realistic about kitchen use. In a formal entry or a powder room, marble is stunning and stays that way with modest care.
Travertine and Limestone: Warm, Earthy Tones
If your saved pictures lean toward beige, cream, walnut, and soft gold tones, you are probably drawn to travertine or limestone. Travertine is a sedimentary stone full of natural voids; in filled-and-honed form it presents a smooth, warm surface, while in tumbled form it has rounded edges and a rustic, old-world look that suits Mediterranean and Tuscan interiors. Limestone is similar in palette but tends to be more uniform, with a fine, dense grain that reads as calm and contemporary.
Both stones cost roughly $5 to $15 per square foot for material, making them more affordable than marble while still delivering genuine stone character. Installed, expect $15 to $30 per square foot. Because they are softer and more porous, sealing matters even more, and tumbled travertine in particular hides wear well, which is why it shows up so often in high-traffic entryways and outdoor-adjacent spaces. In photographs, look closely at whether the voids are filled; unfilled travertine collects debris in those pits and needs periodic grout-like filling over its life.
Slate: Textured, Multicolor Character
Slate is the workhorse of natural stone floors and a favorite for mudrooms, kitchens, and covered patios. In pictures it stands out with a cleft, slightly uneven surface and a color range from charcoal and green to rust, copper, and multicolor blends that shift across every tile. That natural texture gives slate excellent slip resistance, which is why you see it in wet areas where polished stones would be a hazard.
Material cost sits around $4 to $10 per square foot, with installed prices near $15 to $25 per square foot. Slate is durable and forgiving, but the cleft surface can be uneven enough that furniture wobbles and mopping takes more effort. Some slates also shed fine flakes early in their life, a process called spalling that settles down after the first cleaning cycles. If your inspiration photos feature dramatic, dark, textured floors, slate is likely what you are admiring, and it is one of the most practical stones on this list.
Granite and Quartzite: Hard and Durable
Granite floors appear less often in residential galleries than on countertops, but they make a bombproof floor. Granite is extremely hard, resists scratching and etching, and comes in speckled patterns from near-black to pink, gold, and blue-gray. Quartzite, often confused with marble in photos because of its similar veining, is harder than granite and increasingly popular for people who want a marble look without the etching worry.
These stones cost more to fabricate and install, often $15 to $40 per square foot installed, but they reward the investment with decades of hard service. In pictures, a polished granite floor reads as formal and reflective, while a leathered or honed finish looks more understated. If you are drawn to a marble-look photo but worry about maintenance in a busy household, showing that image to a supplier and asking for a quartzite equivalent is one of the smartest moves you can make.
Finishes: Polished, Honed, Tumbled, and Brushed
The single biggest reason a floor in a photo looks different from the sample in your hand is finish. A polished finish is glossy and reflective, maximizing color and vein but also maximizing slipperiness and visible scratches. A honed finish is smooth but matte, the most practical choice for most stone floors. Tumbled stone has soft, rounded edges and a worn, textured face ideal for rustic designs. Brushed or leathered finishes add subtle texture and a low-sheen look that hides fingerprints and water spots.
When you save pictures of natural stone flooring, try to note the finish in the caption, because the same Carrara marble can look glossy and formal or soft and casual depending only on how it was surfaced. If a gallery does not specify, judge by the reflections: sharp mirror-like reflections mean polished, soft glow means honed, and no reflection with visible texture means tumbled or brushed. Matching the finish to the room’s function will do more for your satisfaction than any other single decision.
Grout, Layout, and Tile Size in the Photos
Two floors of identical stone can look completely different because of grout and layout. A tight joint with color-matched grout lets the stone read as a continuous field, which is the look most luxury photos are going for. A contrasting grout, by contrast, emphasizes each tile as a distinct unit and creates a more traditional, gridded appearance. When you love a picture, study the grout line width and color as carefully as the stone itself, because that is a choice you control at installation.
Tile size and pattern also drive the mood. Large-format tiles, say 18 by 18 inches or bigger, feel modern and expansive with fewer joints, while smaller tiles or classic patterns like Versailles, herringbone, and basketweave feel traditional and detailed. A single stone can appear in all of these formats, so if a photo appeals to you, identify whether it is the stone, the pattern, or the grout that you are actually responding to. That clarity keeps you from ordering the wrong product.
Turning Inspiration Photos Into a Real Floor
The gap between a saved photo and a finished floor is bridged by samples and a clear head about maintenance. Always order full-size samples of any stone you are serious about, and lay them on your actual floor in your actual light for several days. The stone that looked perfect in a bright studio photo may read too cool or too busy in your north-facing living room. Wet the sample to preview how it looks freshly mopped, and drag a key across a hidden corner to gauge scratch resistance for softer stones.
Finally, match your choice to how you live. A polished marble entry photographs like a magazine but demands careful maintenance, while honed slate or tumbled travertine shrug off the daily reality of pets, kids, and wet boots. The best floor is the one that still looks like your inspiration photo three years from now, not just on installation day. Use the pictures to find your palette and your finish, then let real samples and honest expectations carry you the rest of the way to a stone floor you will love living on.
Prefer to explore on your own?
See how new flooring looks in your actual room in seconds — free, no signup.
Try the free Floor Studio →

