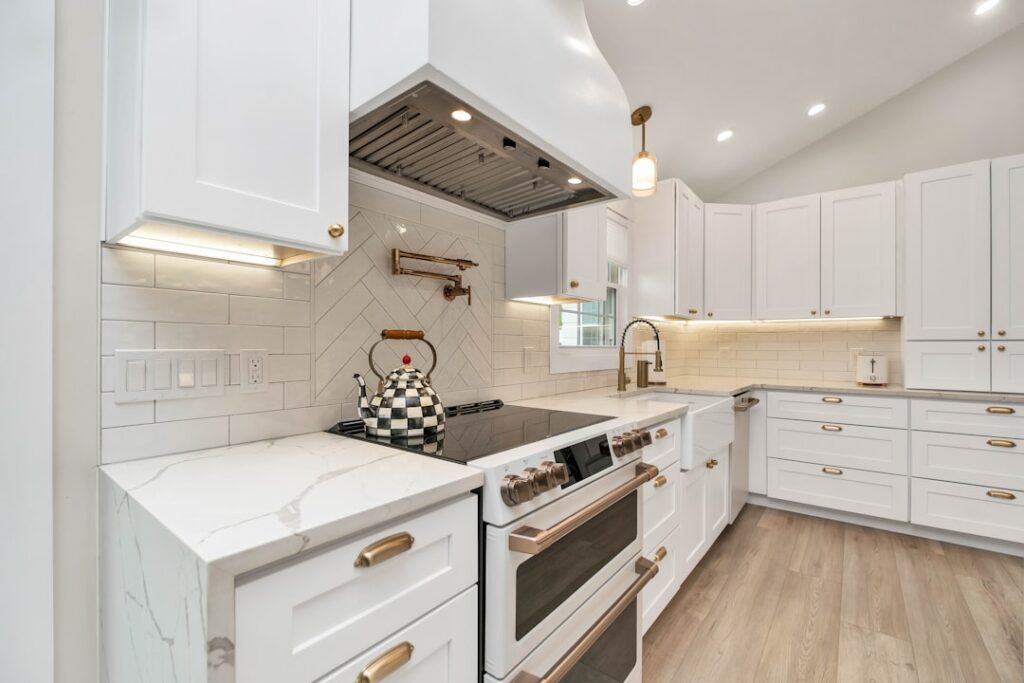
When a kitchen wall needs protection and personality but the budget is tight, a plastic backsplash often does the job that tile once monopolized. Modern PVC and thermoplastic panels have come a long way from the flimsy sheets of the past, now convincingly mimicking subway tile, tin, marble, and even brick at a fraction of the cost and installation time. For renters, first-time homeowners, and anyone who dreads mixing thinset and grout, these panels are a genuinely practical option. This guide walks through the panel types, honest pros and cons, real pricing, and exactly how to install one yourself in an afternoon.
- What Counts as a Plastic Backsplash
- The Real Pros and Cons
- How Much a Plastic Backsplash Costs
- Installing Rigid and Thermoplastic Panels
- Installing Peel-and-Stick Panels
- Cleaning and Long-Term Care
- Plastic Versus Other Backsplash Materials
- Design Styles That Work in Plastic
- Is a Plastic Backsplash Right for You
What Counts as a Plastic Backsplash
The term covers several different products that share a plastic base, and knowing them apart helps you shop smart. Most fall into three broad families, each with its own look and price.
- Rigid PVC panels: Stiff 4-by-8-foot or smaller sheets that screw or glue to the wall, often molded to imitate tin ceiling patterns or beadboard.
- Thermoplastic tile panels: Flexible faux-tin or 3D-textured panels that trim easily with scissors and glue up in interlocking sections, common brands include Fasade and Aspect.
- Peel-and-stick vinyl: Thin adhesive-backed tiles or sheets that press directly onto a clean wall, the easiest and cheapest to install.
All three are lightweight, waterproof on the surface, and cut with basic hand tools, which is precisely why they appeal to DIYers who want to skip the wet saw.
The Real Pros and Cons
Marketing loves to oversell these panels, so here is the balanced view from actually living with them. The advantages are real, but so are the limits.
Advantages
- Cost far less than ceramic or stone, often $5 to $15 per square foot installed by yourself
- Install in a few hours with no grout, mortar, or curing time
- Lightweight and easy to cut with a utility knife or scissors
- Waterproof face wipes clean of grease and splatter in seconds
- Renter-friendly peel-and-stick options remove without wall damage
Drawbacks
- Less heat-resistant than tile, so panels near a gas range or toaster can warp or scorch
- Can look less premium up close than genuine ceramic or stone
- Adhesive-backed versions may peel over time in humid or greasy kitchens
- Not as durable against knocks, gouges, and sharp objects
The heat issue is the one that catches people out. Keep any plastic backsplash at least a few inches clear of open flame, and check the manufacturer’s temperature rating before installing behind a cooktop.
How Much a Plastic Backsplash Costs
Budget is usually the whole reason homeowners consider plastic, and the savings are substantial. Material pricing spans a wide band depending on the product tier.
- Basic peel-and-stick vinyl tiles: $4 to $8 per square foot
- Mid-range Fasade or Aspect thermoplastic panels: $10 to $20 per square foot
- Premium 3D or faux-tin PVC panels: $18 to $30 per square foot
- Adhesive and trim pieces: $20 to $60 total for an average kitchen
A standard kitchen backsplash covers about 30 square feet. That puts a full DIY project in the $150 to $500 range for materials, compared with $1,000 to $2,500 for professionally installed tile. Because installation needs no special tools or pro labor, the plastic route can cut total project cost by 70 percent or more.
Installing Rigid and Thermoplastic Panels
Panel systems go up fast, but a clean result still depends on prep and careful cutting. Measure your wall area and buy 10 percent extra to cover mistakes and future repairs.
- Clean the wall thoroughly with a degreaser so adhesive bonds properly, then let it dry.
- Measure and dry-fit panels, marking cutouts for outlets and switches.
- Cut panels to size with tin snips, a utility knife, or sharp scissors depending on thickness.
- Apply a bead of construction adhesive or panel adhesive in a zigzag across the back.
- Press each panel firmly to the wall, sliding interlocking edges together as you go.
- Finish edges and corners with matching trim strips, and caulk the seam at the countertop.
Turn off power before working around outlets, and pull each receptacle forward so the panel tucks neatly behind the cover plate. A color-matched silicone caulk along the counter and any inside corners keeps water out and gives a tidy, finished edge.
Installing Peel-and-Stick Panels
Adhesive-backed products are the fastest path from bare wall to finished backsplash, and no glue is involved. Success depends almost entirely on surface prep, since the adhesive only grips a clean, smooth, dry surface.
Start at a bottom corner and work upward, peeling the backing gradually rather than all at once so you can align each tile before it sticks. Overlap or butt the edges as the product specifies, smoothing out air bubbles with a plastic squeegee or a credit card. Cut around outlets with a sharp utility knife. On textured or freshly painted walls, adhesion suffers, so skim-coat rough plaster smooth and let new paint cure a full two weeks before applying peel-and-stick tile.
Cleaning and Long-Term Care
Easy upkeep is a genuine selling point here. A plastic backsplash needs nothing more than a wipe with warm soapy water or a general kitchen spray to remove grease and food splatter. Skip abrasive scrubbers and harsh solvents, which can dull or scratch the printed surface.
For longevity, watch the joints. Reseal the caulk line at the countertop if it shrinks or discolors, and press any lifting peel-and-stick corners back down promptly before grease works underneath. Treated well, a quality panel backsplash easily lasts 8 to 12 years, and because it is inexpensive, swapping it for a fresh style down the road is painless rather than a major renovation.
Plastic Versus Other Backsplash Materials
Seeing where plastic lands against the alternatives helps set expectations. Ceramic and porcelain tile win on durability, heat resistance, and resale value, but cost several times more and take days to install and cure. Glass and stone push cost and difficulty higher still. Stainless steel and tempered glass panels resist heat well but carry premium prices.
- Ceramic tile: $10 to $30 per square foot installed, most durable, best resale value
- Plastic panels: $5 to $30 per square foot DIY, fastest and cheapest, moderate durability
- Stainless steel: $20 to $40 per square foot, heat-proof but pricey and shows fingerprints
- Glass tile: $25 to $50 per square foot, striking but demanding to install
The honest takeaway is that plastic trades some longevity and prestige for enormous savings in money and effort. For a temporary space or a tight budget, that trade is often the smart one.
Design Styles That Work in Plastic
Because these panels are printed and molded, they cover a surprising range of looks convincingly. Faux-tin PVC panels nail a farmhouse or vintage kitchen, and their raised pattern reads as genuine metal from a few feet away. Subway-tile peel-and-stick sheets suit a clean, modern space and are nearly indistinguishable from real tile in photos.
Marble-look and stone-pattern vinyl bring a luxe appearance to a rental without any commitment. Brick-look panels warm up an industrial kitchen. The key to selling any of these is the finishing details: tight seams, color-matched trim, and a clean caulk line at the counter. Sloppy edges are what give a plastic backsplash away, not the panel itself.
Is a Plastic Backsplash Right for You
Choose plastic when speed, budget, and easy removal matter more than ultimate longevity. It is ideal for rentals, starter homes, laundry rooms, and quick refreshes before selling. If you are building a forever kitchen and want the resale credibility of real tile or stone, invest there instead. But for a fast, affordable, genuinely good-looking update that most guests will never guess is plastic, these panels deliver far more than their price suggests.