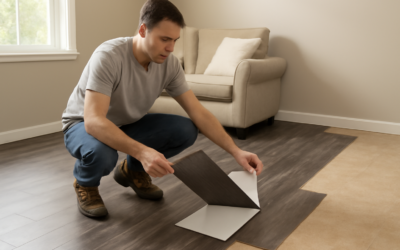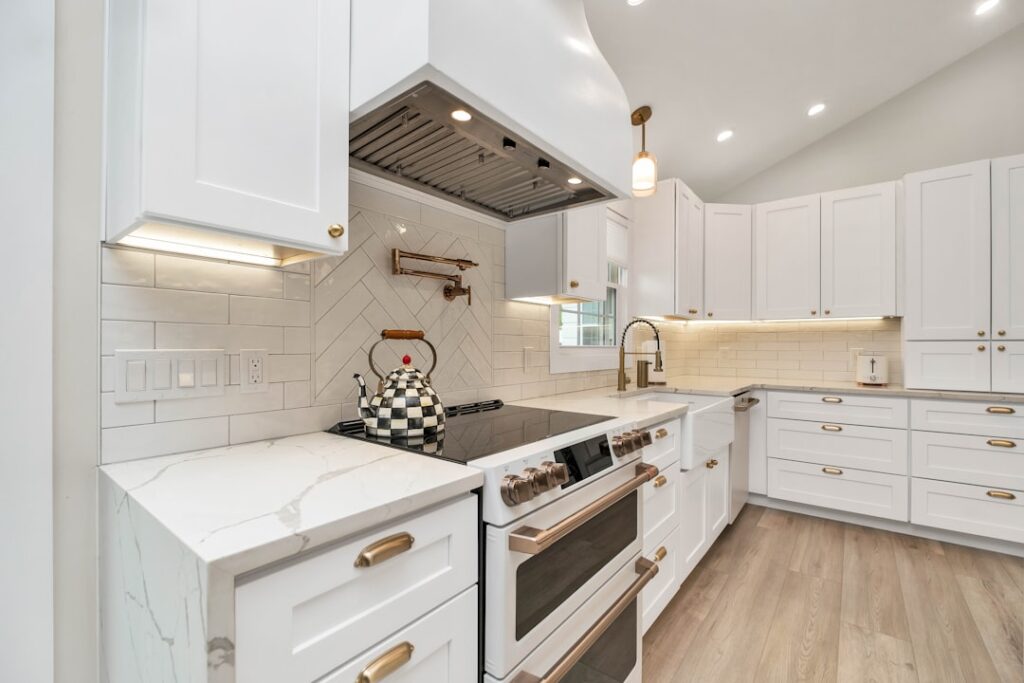
A self stick backsplash lets you transform the wall behind your sink or stove in a single afternoon, no mortar, no grout float, and no contractor invoice. These peel-and-stick panels arrive with a pressure-sensitive adhesive already bonded to the back, so you cut the sheet, pull the liner, and press it into place. Over fifteen years of remodels, I have watched the quality of a self stick backsplash climb from cheap novelty to a legitimate finish that renters and busy homeowners reach for first.
Part of our Kitchen Remodeling guide — explore the full guide →
What a Self Stick Backsplash Actually Is
Peel-and-stick backsplash is a thin surfacing product, usually a flexible sheet or a semi-rigid panel, printed or molded to mimic subway tile, marble mosaic, hexagon, or metal. The face is what you see; the back carries an acrylic adhesive protected by a release film. Because the whole assembly is roughly 1/16 to 1/8 inch thick, it sits nearly flush against the wall and tucks under a countertop lip without looking bulky.
Unlike real ceramic, nothing here cures. The bond is instant and mechanical, which is exactly why the format is forgiving for first-timers. It also means the wall behind it matters: a clean, flat, non-porous surface holds far better than fresh drywall dust or a greasy painted wall.
Common Materials and Styles
Not all peel-and-stick is the same, and the material drives both price and durability. Here are the categories you will see at the home center and online.
- Vinyl/PVC gel sheets: Soft, dimensional, and cheapest. They mimic mosaic grids well but scorch near an open flame, so keep them away from gas ranges.
- Aluminum composite panels: A thin metal skin over a resin core. Heat-tolerant, wipeable, and the closest look to real tile from three feet away.
- Gel/epoxy-topped tiles: Individual squares with a raised, glossy resin face that reads as glass mosaic. Great for a partial accent strip.
- Stone-look and marble laminate: Rigid boards printed with veining, ideal for a full wall behind a range.
For a busy cooking zone, I steer clients toward aluminum or a thicker gel tile. For a bar area, laundry, or rental you plan to reverse later, lightweight vinyl sheets do the job at the lowest cost.
Design and Color Considerations
Because you commit so little money, people get bold, and that is half the appeal. Still, a few rules keep the result looking intentional rather than temporary. Match the backsplash undertone to your countertop, not your cabinets, since counters and walls sit in the same sightline. Cool gray counters pair with white or marble-look sheets; warm butcher block loves a soft beige or terracotta mosaic.
Watch the repeat. Cheap sheets print an obvious pattern that tiles every 10 to 12 inches, and the eye catches the seam. Buy one sheet first, tape it up, and step back before you order the whole kitchen. Glossy faces bounce light and make small kitchens feel larger, while matte finishes hide fingerprints and wall imperfections.
Buying Considerations
Measure your run in square feet, then add 10 to 15 percent for trim cuts and mistakes. A standard backsplash gap between counter and upper cabinets is 18 inches, so a 10-foot counter run needs roughly 15 square feet of coverage. Check these specs before you buy.
- Heat rating: Confirm the product is rated for behind-range use if it will sit near burners.
- Sheet size: Larger sheets mean fewer seams but harder handling. Around 10 by 10 inches is beginner-friendly.
- Thickness: Thicker panels hide wall texture better and feel less flimsy.
- Adhesive strength: Read reviews for peeling reports in humid or hot kitchens.
How to Install a Self Stick Backsplash
This is the fun part, and honestly the whole reason the category exists. Give yourself two to three hours for an average kitchen and work in good light.
- Prep the wall. Wipe it down with a degreaser, then rubbing alcohol. Any grease under the adhesive guarantees future peeling. Let it dry fully.
- Find your start line. Snap a level chalk line above the counter. Never trust the countertop itself as level; measure up and mark.
- Dry-fit. Lay out sheets on the counter to plan seams and outlet cuts before removing any liner.
- Cut. Use a sharp utility knife and a metal straightedge for vinyl, or tin snips for aluminum. Score outlets with the plate removed and the breaker off.
- Peel and press. Remove the liner a few inches at a time, align to your line, and smooth from the center outward with a felt block to push out air.
- Roll the seams. Press every edge and overlap firmly. Warm the corners with a hair dryer if the material fights you.
Reinstall outlet covers with slightly longer screws to reach through the added thickness, and you are done.
Common Mistakes to Avoid
Most failures I get called about trace back to prep, not the product. Skipping the degrease step is the big one; invisible cooking grease sits between the adhesive and the wall and the sheet slowly slides off within weeks. Starting from the countertop instead of a snapped level line is the second, because counters are rarely perfectly level and the error compounds across the run into a visibly crooked top edge.
Two more traps catch beginners. Applying over textured or flat-finish paint gives the adhesive almost nothing to grip, so scuff-sand and prime first. And pressing a whole sheet down before checking alignment leaves you fighting a bond you cannot reposition, so peel the liner gradually and confirm placement as you go.
Care and Maintenance
Daily cleanup is the whole point of this finish. Wipe splatter with a damp cloth and a mild dish soap; skip abrasive pads and bleach, which dull the printed face and can lift edges over time. Dry any water that pools along the bottom seam near the sink, since standing moisture is the number one cause of lifting corners.
If an edge does peel after a year, a dab of clear silicone or a strip of double-sided mounting tape tucks it back down in seconds. Treated gently, a quality sheet holds five to eight years indoors.
Pros and Cons
No finish is perfect. Weigh these before committing your whole kitchen versus a small accent zone.
- Pros: Fast install, low cost, renter-friendly and removable, no special tools, huge style range, and no grout to scrub.
- Cons: Shorter lifespan than tile, can peel in heat or humidity, visible seams on cheap products, and not a value-add buyers recognize at resale.
What It Costs
Price is the headline advantage. Expect to spend far less than a tiled wall, which runs $15 to $40 per square foot installed. Peel-and-stick breaks down roughly like this.
- Vinyl gel sheets: $4 to $8 per square foot.
- Gel/epoxy accent tiles: $8 to $12 per square foot.
- Aluminum composite panels: $10 to $18 per square foot.
- Tools and prep: $20 to $40 for a knife, level, degreaser, and roller.
A typical 15-square-foot kitchen run lands between $80 and $250 in materials, finished in an afternoon with zero labor cost.
Frequently Asked Questions
Can it go over existing tile?
Yes, if the tile is clean and the grout lines are shallow. Fill deep grout joints with a skim coat first so the sheet does not telegraph the lines.
Is it safe behind a stove?
Only if the product is heat-rated. Keep any peel-and-stick a few inches clear of open gas flames, and choose aluminum near high heat.
Will it damage my wall when removed?
Peel slowly and warm the adhesive with a hair dryer. On sound paint it usually comes off cleanly; fresh or flat paint may need touch-up.
How long does it last?
Five to eight years for a decent product in a normal kitchen, longer in low-moisture spots like a bar or laundry backsplash.