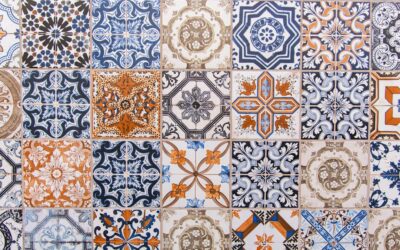
Self stick floor tiles, often called peel-and-stick tiles, are one of the easiest ways to transform a floor without hiring a contractor or renting heavy tools. You peel off a backing, press the tile down, and the adhesive does the rest. For renters, weekend DIYers, and anyone on a budget, they offer a fast, affordable refresh.
Part of our Tile & Grout guide — explore the full guide →
This guide covers the types available, where they work best, how to install them for a result that lasts, realistic costs, and the maintenance habits that keep them looking sharp.
What Are Self Stick Floor Tiles?
These tiles come with a pressure-sensitive adhesive already applied to the back, protected by a peel-off paper. Once you remove the backing and press the tile onto a clean, flat surface, the glue bonds to the subfloor. There is no separate adhesive to spread, no mortar, and no grout in most cases.
Most peel-and-stick tiles are made from vinyl, which is durable, water-resistant, and available in a huge range of looks, from wood-grain planks to stone and ceramic-tile imitations. The format makes them approachable for first-time installers.
Types and Styles Available
The category has grown well beyond the thin, flimsy squares of decades past. Today you will find:
- Vinyl squares: the classic 12-by-12-inch format, simple to lay in a grid.
- Vinyl planks: longer pieces that mimic hardwood flooring.
- Stone and ceramic look: tiles printed and textured to resemble natural materials.
- Groutable peel-and-stick: thicker tiles designed to accept real grout for a more authentic tiled look.
Thickness and quality vary widely. Thicker, higher-grade tiles feel more substantial underfoot, resist denting, and tend to bond and wear better than the cheapest options.
Where They Work Best
Self stick tiles shine in lower-stakes spaces and quick makeovers. They are popular in kitchens, bathrooms, laundry rooms, entryways, and basements. Renters love them for updating a dated floor with minimal commitment, though you should confirm with your landlord and choose a removable-friendly product.
They are less ideal for rooms with heavy moisture exposure, like a shower floor, or areas with extreme temperature swings that can affect the adhesive. For those tougher conditions, a fully waterproof, professionally installed floor is the safer call.
Preparing the Subfloor
Preparation determines whether your floor lasts five months or fifteen years. The adhesive needs a clean, dry, smooth, and flat surface to grip. Skipping prep is the number one reason peel-and-stick floors fail.
Follow these prep steps:
- Remove the old flooring or confirm the existing surface is firmly bonded and flat.
- Clean thoroughly, removing all dust, grease, and residue.
- Fill low spots, cracks, and seams with a floor patch or leveling compound.
- Sand down high spots so the surface is even.
- Let everything dry completely, and let the tiles acclimate in the room for the time the manufacturer specifies.
Any bump or debris under the tile will telegraph through and can break the adhesive bond over time.
How to Install Self Stick Floor Tiles
Once prep is done, installation is genuinely straightforward. Here is the general approach:
- Find the center of the room by snapping chalk lines between the midpoints of opposite walls.
- Dry-lay a row in each direction to plan the layout and avoid thin slivers at the walls.
- Peel the backing off the first tile and press it down at the center, aligned to your chalk lines.
- Work outward tile by tile, butting edges tightly without gaps.
- Cut border tiles with a utility knife and a straightedge to fit along walls and around obstacles.
- Roll the finished floor with a flooring roller, or press firmly, to seat the adhesive.
Take your time aligning the first few tiles, since everything keys off them. Press each tile firmly, because good contact is what activates the bond.
Cost and Value
Affordability is a major draw. Self stick floor tiles typically run about 0.50 to 3 dollars per square foot for the tiles themselves, with premium groutable and thicker products at the higher end. Because you can install them yourself, you skip the labor cost entirely, which is often the largest expense in any flooring job.
For a small bathroom or laundry room, the materials might total well under 100 dollars. That low barrier makes peel-and-stick a sensible choice for budget makeovers, rentals, or test-driving a look before a bigger investment. Treat these figures as estimates that vary by brand and region.
Durability and Maintenance
With good prep and a quality product, these floors can last many years, though they generally will not match the lifespan of glued-down sheet vinyl or rigid-core plank flooring. Higher-traffic areas wear faster, and direct sunlight can fade some tiles over time.
Keep them looking good with simple care:
- Sweep or vacuum regularly to keep grit from scratching the surface.
- Damp mop with a mild cleaner; avoid soaking the seams.
- Use felt pads under furniture to prevent gouges and lifting.
- Wipe spills promptly so moisture does not seep under edges.
If a tile lifts at a corner, press it back down or replace that single piece, one of the format’s real conveniences.
Pros and Cons at a Glance
Like any flooring, peel-and-stick tiles involve trade-offs worth weighing before you commit. On the plus side, they are inexpensive, fast to install without special tools, easy to replace one piece at a time, and available in a huge range of looks. For renters and budget makeovers, those advantages are hard to beat.
The downsides are real too: they are not as durable as glued sheet vinyl or rigid-core plank, the adhesive can fail if prep is rushed, and seams may lift in high-moisture or high-heat conditions. They also generally add little resale value. If you understand these limits and prep the subfloor properly, the format delivers genuine value for the right project.
Removing Self Stick Tiles
One overlooked advantage is how relatively manageable removal can be, which matters for renters. Warming a tile with a hair dryer or heat gun softens the adhesive so you can peel it up, working a putty knife under one corner. Pull slowly to keep the tile intact and minimize residue.
Leftover adhesive usually comes off with an adhesive remover or a bit of warm soapy water and a scraper. Work in a ventilated space and follow any product instructions. Because removal is doable, peel-and-stick is a low-risk way to test a look before committing to permanent flooring.
Final Thoughts
Self stick floor tiles deliver an easy, low-cost way to upgrade a floor on your own schedule. The secret to a lasting result is not the tile you buy but the prep you do underneath it. Clean, level, and dry the subfloor, plan your layout from the center, and press each tile firmly. Do that, and you will get a floor that looks great and holds up far better than the peel-and-stick reputation of years past.
Prefer to explore on your own?
See how new flooring looks in your actual room in seconds — free, no signup.
Try the free Floor Studio →