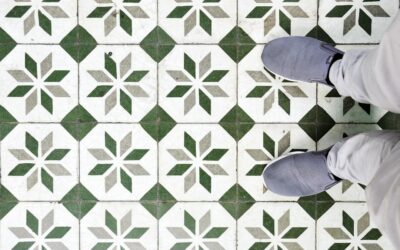
You can floor an entire bathroom in an afternoon with nothing but a utility knife and a level, and spend less than a dinner out. Self adhesive vinyl floor tiles, the peel-and-stick squares sold at every home center, are the fastest, cheapest way to change a floor without hiring anyone. The catch is that a rushed prep job leaves you with curling corners and lifting seams within a year. Here’s how to get the easy win without the common failure.
Part of our Tile & Grout guide — explore the full guide →
What Peel-and-Stick Tiles Actually Are
Each tile is a thin sheet of vinyl, usually 1/16 to 1/8 inch thick, with a factory-applied adhesive backing protected by a paper film. You peel the film, press the tile to a clean subfloor, and the pressure-sensitive glue grabs on contact. Standard sizes are 12×12 inches, with 18×18 and plank shapes also common. No mortar, no grout, no drying time, and you can walk on the floor immediately.
It helps to understand where peel-and-stick sits in the vinyl family, because the name causes confusion. This is the thinnest, cheapest tier of vinyl flooring. Above it sits glue-down luxury vinyl (thicker, tougher, bonded with a separately applied adhesive), and above that, rigid-core click-lock LVP and LVT with waterproof SPC or WPC cores. All are vinyl, but they perform in completely different leagues. Peel-and-stick trades durability and realism for the lowest possible price and the easiest possible installation. Knowing that distinction keeps your expectations grounded: you’re buying the quick, budget option, not the premium floor, and it excels precisely when speed and cost are what you need.
The Pros: Why People Love Them
- Rock-bottom cost: $0.50 to $2 per square foot, the cheapest flooring you can buy.
- Truly DIY: No special tools, no wet saw, no learning curve. A beginner can do it.
- Fast: A small bathroom takes an hour or two; no cure time before use.
- Renter-friendly: Some removable versions lift off without wrecking the original floor.
- Water-resistant: The vinyl itself shrugs off spills, good for kitchens and baths.
- Easy repairs: Damage one tile and you swap just that square.
The Cons: Where They Fall Short
Honesty matters here, because peel-and-stick has real limits. The adhesive is the weak point: it fails at seams if the subfloor is dirty, damp, or uneven, and edges lift over time in high-traffic and high-heat spots. Water can seep between seams and undermine the glue, so a full wet bathroom or basement is risky without extra sealing.
These tiles also read as budget. The thin profile and printed pattern don’t fool anyone up close the way rigid luxury vinyl does, and they add no resale value. Expect a realistic lifespan of 5 to 10 years in a moderate-traffic room, less in a busy entry. For a rental refresh or a temporary fix, that’s fine. For a forever floor, look at click-lock LVP instead.
Subfloor Prep Makes or Breaks It
Ninety percent of peel-and-stick failures trace back to bad prep. The adhesive needs a clean, dry, smooth, flat surface to bond, and it will not stick to dust, wax, or grease.
- Clean thoroughly: Sweep, then wash with a degreaser and let it dry completely. Any residue kills adhesion.
- Fix the surface: Fill gouges and low spots with floor patch and sand high spots flat. Texture and grout lines will telegraph through the thin tile.
- Never lay over textured or cushioned vinyl: The pattern shows and the glue won’t hold. Install luan plywood or a skim coat first.
- Check moisture: On concrete, tape a plastic sheet down overnight; condensation means you must address moisture before tiling.
For a longer-lasting bond in bathrooms, many pros add a thin coat of vinyl tile adhesive under peel-and-stick tiles rather than relying on the factory glue alone.
How to Install Self Adhesive Vinyl Tiles
Once the subfloor is prepped, installation is genuinely simple:
- Find the center: Snap two chalk lines between the midpoints of opposite walls to locate the room’s center. Starting from the center keeps cut tiles even at the walls.
- Dry-lay first: Set a full row of tiles along both chalk lines without peeling. Adjust so you don’t end with a sliver against any wall.
- Peel and press: Remove the backing, align the tile to your chalk line, and press it down firmly from the center outward to push out air.
- Work in quadrants: Lay one quarter of the room at a time, keeping tight seams butted together with no gaps.
- Cut the edges: Measure border pieces, score with a sharp utility knife against a straightedge, and snap. Warm a stubborn tile with a hair dryer to make it cut cleaner.
- Roll the floor: Go over the whole floor with a 75- to 100-pound floor roller, or a rolling pin in a pinch, to seat the adhesive.
Press the edges and seams extra hard, since that’s where lifting starts. Keep the room above 65°F for the first 48 hours so the adhesive cures properly.
Tips to Make Them Last
- Roll seams a second time a day after installation once the glue has grabbed.
- Use a clear silicone caulk along tub and wall edges in bathrooms to block water intrusion.
- Place felt pads under furniture; concentrated weight can shift tiles.
- Avoid wet-mopping for the first week, then clean with a damp mop, never a soaking one.
- Keep a few spare tiles from the same lot for future repairs.
Where They Work and Where They Don’t
Peel-and-stick tiles earn their keep in the right rooms. Laundry rooms, half baths, entryway nooks, closets, basements with dry sealed slabs, and rental kitchens are all good candidates, low-stakes spaces where speed and cost matter more than luxury. They’re also a smart choice for a quick flip or staging, where you need a floor to look fresh without a big investment.
Steer clear of a few situations. Full bathrooms and any space with standing water invite seam failures unless you caulk meticulously. Rooms with radiant floor heat or big temperature swings can loosen the adhesive. And any floor with a textured, cushioned, or heavily patterned existing surface needs a smooth underlayment first, otherwise the imperfections telegraph through and the glue won’t hold. Match the tile to a dry, stable, low-traffic room and it performs far better than its price suggests.
Removing Peel-and-Stick Tiles Later
Because these tiles are often used as a temporary fix, removal matters. Warm each tile with a hair dryer or heat gun to soften the adhesive, then lift a corner with a putty knife and peel slowly. The glue usually leaves residue behind, which you can dissolve with an adhesive remover, mineral spirits, or a citrus-based solvent, followed by a good scrub. On a subfloor you plan to reuse, work patiently so you don’t gouge it. Renters using removable versions should test a tile in an inconspicuous spot first to confirm it lifts cleanly before committing to the whole floor.
Are They Worth It?
For the price and the effort, self adhesive vinyl floor tiles are a smart choice in the right situation, rentals, laundry rooms, budget refreshes, and quick flips. They won’t rival luxury vinyl plank for looks or longevity, but no other flooring gives you a full new floor for under $2 a square foot in an afternoon. Prep the subfloor properly, seal the wet edges, and roll the seams, and you’ll get years of service out of a floor almost anyone can install.
If you find yourself constantly refreshing peel-and-stick tiles in a high-traffic room, that’s a signal you’ve outgrown the product and should step up to a rigid click-lock LVP, which costs more but lasts two to three times as long. But for the many spaces where a floor just needs to look clean and cost almost nothing, peel-and-stick remains one of the best-value upgrades in home improvement. Keep your expectations matched to the price, treat prep as the real work, and this humble tile will punch well above its weight.
Prefer to explore on your own?
See how new flooring looks in your actual room in seconds — free, no signup.
Try the free Floor Studio →