Peel-and-stick tile has earned a bad reputation it does not fully deserve, mostly because people install the wrong product in the worst possible room. Adhesive floor tiles for bathroom use can absolutely hold up for years, but only if you match the tile type to the moisture, prep the subfloor properly, and seal the seams where water actually gets in. Do those three things and a peel-and-stick floor survives daily showers; skip them and it curls at the edges within months.
Part of our Bathroom Remodeling & Flooring guide — explore the full guide →
This guide covers the real differences between the products sold as adhesive tile, which ones tolerate a wet bathroom, and the installation steps that separate a floor that lasts eight years from one that fails by spring.
What “Adhesive Floor Tile” Actually Means
The term covers three very different products. True peel-and-stick vinyl tiles are thin, flexible squares with a pressure-sensitive adhesive backing, usually 1.2 to 2 millimeters thick and priced around $0.70 to $2 per square foot. Self-adhesive luxury vinyl tile, or LVT, is thicker and more rigid at 2 to 5 millimeters, mimics stone or wood convincingly, and runs $2 to $5 per square foot. Then there are gel or resin-backed “stick-on” tiles, a decorative novelty product best kept off floors entirely.
For a bathroom floor, the thicker self-adhesive LVT is the better bet almost every time. Its rigidity resists the telegraphing of subfloor imperfections, and its wear layer, ideally 12 mil or greater, stands up to grit tracked in from bare feet. The cheapest thin vinyl squares can work in a low-traffic powder room, but they are the products most likely to curl once water finds an edge.
Do Adhesive Tiles Really Hold Up to Moisture?
The tiles themselves are usually waterproof; vinyl does not absorb water. The vulnerability is always the adhesive and the seams. Standing water and steam creep into the joints between tiles, work under the edges, and slowly break the bond. That is why the same product that lasts a decade in a bedroom can fail in two years on a bathroom floor if the seams are left open.
The fix is to treat the seams as the weak point they are. Choose tiles designed to butt tightly together, run a bead of clear silicone or seam sealer along the joints in wet zones near the tub and shower, and caulk the entire perimeter where the floor meets the wall, vanity, and toilet flange. A bathroom floor that is sealed at every edge behaves like a continuous waterproof membrane rather than a grid of separate tiles waiting to lift.
Subfloor Prep Makes or Breaks the Job
Adhesive tile is only as flat and clean as the surface under it, and it telegraphs every flaw. The substrate must be clean, dry, smooth, and structurally sound. On a wood subfloor, install a layer of 1/4-inch plywood or cement backer board and fill the seams and screw heads with patching compound. Over old vinyl or concrete, skim any low spots and dents with a floor-leveling compound and let it cure fully before tiling.
Cleanliness is not optional. Any dust, soap residue, or old adhesive prevents the pressure-sensitive backing from grabbing. Vacuum, then wipe the floor with a degreasing cleaner and let it dry completely. Just as important is temperature: acclimate the tiles in the bathroom for at least 48 hours at 65 to 85 degrees Fahrenheit so they reach room temperature before installation. Cold tile adhesive grabs poorly, and tile installed cold shrinks slightly as it warms, opening the seams you worked to close.
Step-by-Step Installation
Start by finding the center of the room. Snap two chalk lines that cross at the middle so you work outward in even quarters, which keeps cut tiles at the perimeter roughly equal in width and avoids an ugly sliver against one wall. Dry-lay a row in each direction first to confirm the layout before you peel a single backing.
- Peel the backing from the first tile, align it precisely to the chalk lines, and press it down firmly from the center outward to push out air.
- Butt each following tile tight against its neighbor with no gap, working out from the center along your lines.
- For edge and around-toilet cuts, warm the tile with a hair dryer to make it flexible, mark it, and score-and-snap with a utility knife.
- Roll the entire floor with a 75 to 100-pound flooring roller, or press hard with a rolling pin, to fully activate the adhesive.
- Run silicone along wet-zone seams and caulk the full perimeter last.
Give the floor 24 to 72 hours before heavy foot traffic or getting it wet, and avoid mopping for the first week so the bond fully cures. Rushing that cure window is the most common self-inflicted failure.
Cost, Lifespan, and When to Skip Peel-and-Stick
A small bathroom of 40 to 50 square feet can be tiled for roughly $60 to $250 in materials, making adhesive tile one of the cheapest floor updates available and an easy weekend DIY. Quality self-adhesive LVT with a thick wear layer, properly sealed, realistically lasts 8 to 12 years in a bathroom. Bargain thin vinyl in a heavily used family bath may only give you 3 to 5.
Be honest about when to skip it. A bathroom with a floor drain, a curbless shower, or a history of standing water is a job for sheet vinyl or grouted ceramic, both of which handle constant water far better. Adhesive tile shines in powder rooms, guest baths, and primary baths with a proper shower enclosure that keeps most water contained. Match the product to the reality of how wet the room gets, and it earns its place.
Maintenance and Repairs
Caring for an adhesive tile floor is refreshingly simple. Sweep or vacuum grit regularly, since sand acts like sandpaper on the wear layer, and damp-mop with a pH-neutral vinyl floor cleaner. Skip steam mops entirely; the heat softens the adhesive and drives moisture into the seams, undoing everything the silicone was meant to prevent. Wipe up standing water rather than letting it sit near joints.
Repairs are the hidden advantage of tile over sheet flooring. If a single tile lifts at a corner, warm it, apply a thin layer of vinyl flooring adhesive underneath, press it back, and weight it overnight. If one tile is damaged beyond saving, heat it to soften the glue, peel it out, scrape the old adhesive, and drop in a replacement from your leftover box. Always keep five to ten percent of the original tiles for this reason; a matching spare turns a floor-wide failure into a ten-minute fix.
Design Tricks That Hide a Small Budget
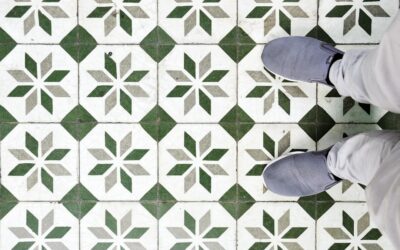
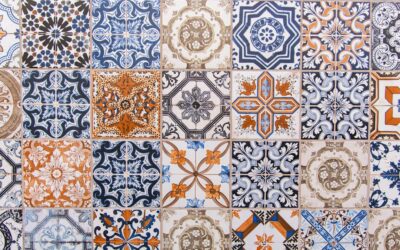
Adhesive tile has come a long way from the flat vinyl squares of decades past, and the right pattern makes a cheap floor read as expensive. Choose tiles with a beveled or grouted-look edge and pair them with a matching acrylic grout, applied after installation, to mimic real ceramic for a fraction of the cost. Wood-look plank-shaped LVT laid in a herringbone or staggered pattern gives a small bathroom visual length and disguises the fact that it is peel-and-stick.
Scale the pattern to the room. In a compact powder room, a large-format tile or a light, continuous pattern makes the floor feel bigger, while busy small hexagons can make a tight space feel cluttered. Running planks parallel to the longest wall stretches the room visually. Because the material is inexpensive, a bathroom floor is a low-risk place to try a bolder pattern you would hesitate to commit to in ceramic, and you can redo it in a weekend if you tire of it.
Common Mistakes to Avoid
Most peel-and-stick failures trace back to a handful of avoidable errors. The biggest is skipping the subfloor prep and tiling over a dirty, uneven, or damp surface, which guarantees poor adhesion and telegraphed bumps. The second is leaving seams and the perimeter unsealed in a wet room, which lets water undermine the edges. The third is installing cold tile that later shrinks and gaps.
Two more trip up beginners. Do not skip rolling the floor after installation; pressing each tile by hand is not enough to fully bond the pressure-sensitive adhesive, and unrolled tiles are the first to lift. And do not walk on or wet the floor too soon, since the adhesive needs its full cure window to reach maximum strength. Respect the prep, the seams, the temperature, the roller, and the cure, and adhesive tile will outlast the skepticism most people bring to it.
Prefer to explore on your own?
See how new flooring looks in your actual room in seconds — free, no signup.
Try the free Floor Studio →