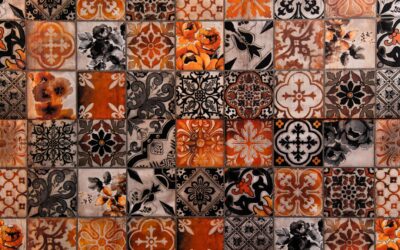
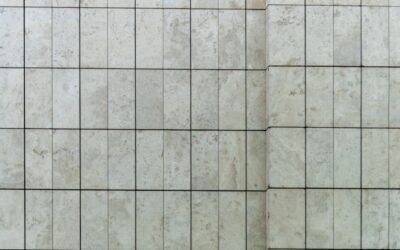
You can transform the look of a kitchen in a single afternoon without thinset, a wet saw, or a tile spacer in sight. That is the promise of peel-and-stick tile, and for renters and weekend updaters it delivers. A stick on tile backsplash uses adhesive-backed panels that press directly onto your wall, skipping the mess and skill of traditional tiling entirely. This guide covers the real types, how to install them so they last, and where they hold up against actual tile.
Part of our Kitchen Remodeling guide — explore the full guide →
What Stick on Tile Backsplash Means
The term covers a range of self-adhesive wall products designed to mimic a tiled backsplash. Some are thin vinyl sheets printed to look like subway tile or mosaic. Others are gel or epoxy-coated panels with real dimension and a glossy, grout-like finish. A few are genuine thin tiles backed with strong adhesive.
What unites them is the install: peel off the backing, line up the panel, and press it to the wall. No mortar, no grouting, no setting time, and in most cases no special tools beyond scissors or a utility knife.
Types Worth Knowing
Quality varies enormously across this category, so know what you are buying.
- Vinyl peel-and-stick sheets: The cheapest, often $5 to $10 per sheet. Flat printed designs; fine for low-budget refreshes but look least convincing up close.
- Gel/3D epoxy tiles: Raised, glossy panels that fake real grout lines and depth. The most popular type at roughly $8 to $15 per sheet.
- Metal and aluminum mosaics: Adhesive-backed real metal tiles with genuine texture, $10 to $20 per sheet.
- Thin stone and glass: Premium peel-and-stick using actual material, closest to the real thing and priced accordingly.
For a believable result that survives kitchen use, the gel or metal options are worth the small upcharge over flat vinyl.
Where It Works and Where It Doesn’t
Peel-and-stick excels above kitchen counters, behind a coffee station, and as a bathroom accent. It is ideal for rentals because most products peel off without damaging paint when you move out.
It struggles in two places: directly behind a cooktop where high heat can loosen adhesive, and in constantly wet zones like a shower surround. Keep panels a few inches from open flame and avoid full submersion areas. Behind a sink is fine as long as you seal the edges against splashing.
Surface Prep Is Everything
Adhesive lives or dies on the surface beneath it. Skip prep and the tiles peel within weeks. Do it right and they hold for years.
- Clean thoroughly. Wipe the wall with a degreaser to remove cooking grease, then a final pass with rubbing alcohol.
- Dry completely. Any moisture under the adhesive will cause lifting.
- Smooth the surface. Peel-and-stick needs a flat, semi-glossy or painted wall. It will not grip raw drywall, textured walls, or flat chalky paint well.
- Prime if needed. On porous or freshly painted walls, a coat of primer gives the adhesive something to bite.
How to Install a Stick on Tile Backsplash
Once the wall is prepped, the install moves fast. Work in good light and take your time on the first sheet.
- Plan your layout. Find the center of your main wall and work outward so cut pieces land at the ends and corners, not the middle.
- Mark a level line. Snap or pencil a level guide; counters are rarely perfectly flat, and you want the tile level, not the counter.
- Peel and place. Remove the backing, align the first sheet to your line, and press from the center outward to push out air bubbles.
- Overlap the seams. Most gel tiles are designed to interlock; align the pattern so seams disappear.
- Cut around outlets. Use a sharp utility knife and a straightedge to trim panels around switches, outlets, and the cabinet edges.
- Press the edges firmly, especially near the counter and corners where lifting starts.
Durability and Maintenance
A well-installed stick on tile backsplash holds up for several years in a normal kitchen. Clean it with a soft cloth and mild soap; skip abrasive scrubbers, which can dull the glossy coating. The gel and epoxy types wipe clean of grease easily, one of their better traits over flat paint. Watch the edges over time, as corners are the first to peel; a dab of clear caulk along the top and bottom edges seals them and extends the life considerably.
Removing Peel-and-Stick Tile
One of the quiet selling points is that the install reverses. When a lease ends or a design wears out its welcome, most panels come off without wrecking the wall, though the method matters. Cold adhesive grips harder, so warm it first. Run a hair dryer or heat gun on low across a section for 30 to 60 seconds until the panel softens, then lift a corner with a plastic putty knife and peel slowly at a shallow angle. Rushing it is what tears paint off the drywall.
Adhesive residue almost always stays behind. A rag dampened with rubbing alcohol or an orange-oil citrus cleaner breaks down the gum without gouging the wall; let it sit a minute before wiping. On painted drywall, expect to spot-prime and repaint the cleaned strip afterward, a $20 touch-up at most. Tiles that sat for several years in a hot kitchen fight back harder than fresh ones, so do not promise a landlord a flawless wall after a long stay.
Cost Compared to Real Tile
The math is where peel-and-stick really pulls ahead. A standard kitchen backsplash of roughly 30 square feet runs $100 to $300 in stick-on panels, and the labor is your own afternoon. The same wall in genuine ceramic or glass tile costs $15 to $35 per square foot installed once you add tile, thinset, grout, edge trim, and a tile setter’s time, landing most jobs between $600 and $1,200.
That gap buys real differences, not just a lower number. Ceramic set in mortar lasts decades, survives direct heat behind a range, adds resale value an appraiser will note, and never peels. Peel-and-stick buys speed, reversibility, and a fraction of the price, but it is a finish with a shelf life measured in years, not decades. Weigh the stay: in a forever home, the tile pays back; in a rental or a kitchen you plan to gut in five years, the stick-on version is the rational call.
Is It Worth It?
For the price and effort, peel-and-stick is one of the best value upgrades in a kitchen. You get a fresh, finished look for $100 to $300 in materials and a single afternoon of work, with no contractor and no demolition. It will never match the lifespan or resale value of real ceramic set in mortar, and it is not a forever solution. But as a renter-friendly refresh or a low-commitment way to test a design before committing to real tile, a stick on tile backsplash earns its place.
Prefer to explore on your own?
See how new flooring looks in your actual room in seconds — free, no signup.
Try the free Floor Studio →