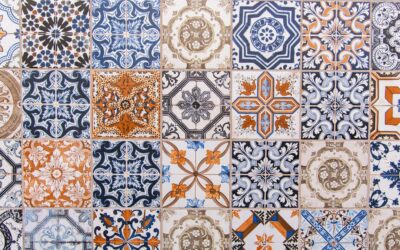
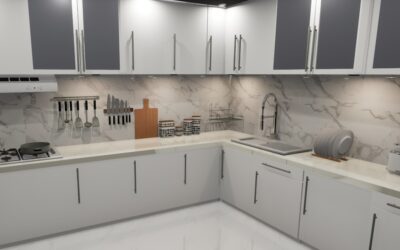
Peel-and-stick tile has come a long way from the flimsy squares of decades past. The best peel and stick tiles for kitchen projects now mimic subway tile, marble, and patterned cement convincingly, and they install in an afternoon with no grout, mortar, or special tools. They are not a forever solution, and they have real limits near heat and water, but for renters, budgets, and quick refreshes they are hard to beat. Here is how to choose the right type and install it so it lasts.
Part of our Kitchen Remodeling guide — explore the full guide →
Where Peel-and-Stick Tile Works in a Kitchen
The two main uses are backsplashes and floors, and they call for different products. Backsplash tiles are thin and decorative, designed for vertical walls between counter and cabinets. Floor tiles are thicker, rated for foot traffic, and built to handle being walked on. Using a wall product on the floor, or vice versa, leads to early failure, so always confirm the tile is rated for your application before buying.
The Main Types Compared
Not all peel-and-stick tiles are the same material, and the differences matter.
- Vinyl tiles: The most common and affordable. Thin, flexible, easy to cut with a utility knife, and available in endless patterns. Best for backsplashes and low-moisture floors.
- Gel (3D) tiles: A raised, epoxy-coated surface that mimics real glass or ceramic tile with depth and shine. They look the most realistic on a backsplash and resist water well, though they cost more.
- Metal tiles: Aluminum or stainless-faced tiles for a modern, industrial backsplash. Durable and heat-tolerant, but pricier and harder to cut.
- Stone-look composite: Thicker tiles engineered to resemble marble or travertine, often used on floors.
For most kitchen backsplashes, gel tiles offer the most realistic look while vinyl wins on price and ease.
How to Choose the Right Tile
Start with the location and the conditions it faces. For a backsplash behind a sink, prioritize true water resistance and sealable seams. For a floor, prioritize thickness and a wear rating that handles traffic. Then weigh the look you want against budget, and order one box first to test the adhesive and appearance before committing to the whole room.
Pay attention to the surface you are sticking to. These tiles bond best to smooth, clean, nonporous surfaces. Heavily textured walls, raw drywall, or glossy painted surfaces can all cause adhesion problems, so plan prep accordingly.
Heat Near the Stove: An Honest Caveat
This is the most important limitation to understand. Most peel-and-stick adhesives soften with heat, and the area directly behind and beside a stove or cooktop gets hot. Over time, heat can loosen the adhesive, warp vinyl, or discolor the tile. Many manufacturers explicitly warn against installing their tiles immediately adjacent to heat sources. If you want tile right behind a gas range, choose a heat-tolerant product like metal tile, leave clearance, or use real tile in that zone. Do not assume any peel-and-stick product is rated for direct stove heat; check the manufacturer’s guidance.
Surface Prep Makes or Breaks It
Adhesion is everything with peel-and-stick, and it depends almost entirely on prep.
- Clean the surface thoroughly to remove grease, soap, and dust. Kitchen surfaces hold cooking film that wrecks adhesion.
- Wipe with a degreaser, then a bit of rubbing alcohol, and let it dry completely.
- Repair holes and sand glossy paint to a matte finish so the adhesive can grip.
- Make sure the surface is fully dry and at room temperature; cold or damp walls weaken the bond.
Skipping the degrease step is the number one reason kitchen peel-and-stick tiles peel at the edges within months.
Installation Tips for a Clean Result
Plan your layout before peeling anything. Find the center of the wall and work outward so cut pieces land in less visible spots. Press each tile firmly from the center toward the edges to push out air, and use a small roller for stubborn corners. Cut tiles with a sharp utility knife and a straightedge, scoring and snapping for clean lines. For backsplashes, run a thin bead of clear silicone caulk along the countertop seam and any edge near water to seal out moisture.
Durability and Realistic Expectations
Be honest with yourself about lifespan. Quality peel-and-stick tile in a low-moisture, low-heat spot can look good for several years, while cheaper products or poorly prepped surfaces may lift sooner. They resist normal kitchen splashes when sealed, but standing water at seams, steam, and heat are their enemies. They are a smart choice for renters, fast makeovers, and tight budgets, not a permanent replacement for ceramic or porcelain in a heavy-use kitchen.
Peel-and-Stick on Floors
Floor applications demand more from the product than backsplashes do. Choose tiles specifically rated for floors, which are thicker and carry a wear layer that resists scuffs and foot traffic. Self-adhesive luxury vinyl tile, often sold as peel-and-stick LVT, is the most common choice and can look convincingly like wood or stone. For a more permanent floor result, some homeowners use grouted peel-and-stick tiles that accept a thin grout line, bridging the gap between true tile and a quick install.
Subfloor prep is even more critical on floors. The surface must be clean, flat, dry, and smooth, since any bump or dip telegraphs through the thin tile and can cause edges to lift under traffic. Existing vinyl, sealed concrete, and smooth underlayment all make good substrates when properly cleaned.
Cost and Value
Affordability is the main reason peel-and-stick tile is so popular. It typically costs far less per square foot than ceramic or porcelain, and because there is no mortar, grout, wet saw, or hired installer, the all-in cost stays low. That makes it ideal for a rental you cannot permanently alter, a starter home on a budget, or a quick refresh before selling. Just weigh the lower upfront cost against the shorter lifespan, since real tile installed once can outlast many rounds of peel-and-stick. For temporary or budget situations, the value is excellent; for a forever kitchen, traditional tile may cost less over the long run.
The Bottom Line
For a quick, affordable kitchen refresh, the best peel and stick tiles for your kitchen are the ones matched to the job: gel or vinyl for most backsplashes, thicker rated tiles for floors, and heat-tolerant options or real tile near the stove. Prep the surface obsessively, seal the seams near water, respect the heat limits, and you will get a great-looking result that holds up far better than the product’s reputation suggests.
Prefer to explore on your own?
See how new flooring looks in your actual room in seconds — free, no signup.
Try the free Floor Studio →