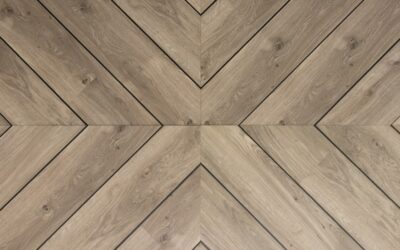
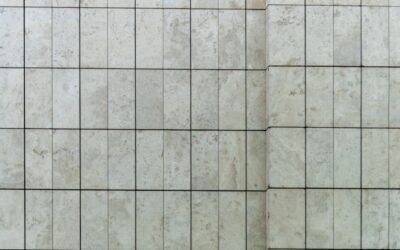
Peel-and-stick flooring looks like the perfect shortcut for a stained, cracked garage slab: no grout, no epoxy fumes, and a finished look in an afternoon. The reality is more nuanced. Peel and stick tile for garage floor use can work beautifully in the right spot, such as a workshop corner, a home gym bay, or a garage that never sees a car, and fail within months under hot tires in a parking stall. Knowing the difference before you buy saves you from scraping gummy adhesive off concrete next spring.
Part of our Epoxy, Concrete & Garage Floors guide — explore the full guide →
- What Peel and Stick Tile for Garage Floor Use Really Means
- Where Peel-and-Stick Works in a Garage
- Where It Usually Fails
- Comparing Garage Flooring Options
- Surface Preparation Makes or Breaks the Job
- Installation Tips for Better Results
- How to Choose a Garage-Worthy Tile
- What It Costs
- Is Peel and Stick Tile for Garage Floor Projects Worth It?
- Frequently Asked Questions
What Peel and Stick Tile for Garage Floor Use Really Means
Most self-adhesive tiles sold at home centers are vinyl composition or thin luxury vinyl tiles with a factory-applied pressure-sensitive adhesive on the back. They are usually 12 by 12 inches or 12 by 24 inches, about 1.2 to 2 millimeters thick, and designed for dry interior rooms like kitchens and laundry rooms. Garages are a harsher environment in four specific ways:
- Temperature swings: an unheated garage can range from below 20°F in winter to above 100°F in summer. Pressure-sensitive adhesives soften in heat and turn brittle in cold.
- Hot tire pickup: after a drive, tires can reach 140°F to 160°F. Parked on vinyl, they soften the adhesive and plasticizers, and the tile can lift or stain.
- Moisture vapor: most garage slabs sit directly on grade without a vapor barrier. Moisture migrating up through concrete breaks down adhesive bonds.
- Chemicals and grit: road salt, oil, antifreeze, and sand act on the surface and seams far more aggressively than anything in a kitchen.
Some manufacturers now make heavier-duty self-adhesive tiles specifically rated for garages or commercial use, with thicker wear layers and aggressive adhesives. Those perform noticeably better, but even they come with limits.
Where Peel-and-Stick Works in a Garage
The best use cases share one trait: no vehicle parks on them.
- Workshop and hobby areas: a 10 by 12 foot bench zone becomes easier to sweep and more comfortable to look at.
- Home gyms: vinyl tiles under a rubber mat area or around a treadmill look finished and clean up easily.
- Converted garages: climate-controlled garage offices, studios, or storage rooms behave like interior rooms, and standard peel-and-stick performs well.
- Entry paths and mudroom strips: a strip of tile along the door into the house keeps dirt contained.
- Storage bays: under shelving, bikes, or lawn equipment, where there is little heat or rolling load.
In these zones, a quality tile on well-prepared concrete can last 5 to 10 years.
Where It Usually Fails
Parking stalls are the problem area. The combination of hot tires, turning wheels, water dripping from snowy cars, and road salt is exactly what pressure-sensitive adhesive handles worst. Common failure patterns include tiles shifting where tires turn, corners curling at seams, yellow or brown tire marks from plasticizer migration, and whole rows lifting where meltwater pools.
Uneven or cracked slabs make everything worse. A thin vinyl tile telegraphs every crack and pit, and any spot where the tile bridges a void flexes under load until the bond breaks. Slabs that show white, powdery efflorescence or dark damp patches are signaling moisture problems that no adhesive will beat.
Comparing Garage Flooring Options
If you are trying to decide whether self-adhesive tile is the right tool, it helps to see it next to the alternatives most homeowners consider.
| Option | Installed Cost per Sq Ft | Handles Parking? |
|---|---|---|
| Peel-and-stick vinyl tile | $1-$4 DIY | Poorly |
| Interlocking PVC or polypropylene tile | $3-$7 DIY | Yes |
| Roll-out vinyl or rubber mat | $1-$3 DIY | Yes, with limits |
| Epoxy or polyaspartic coating | $3-$12 | Yes |
Interlocking tiles float on the slab rather than sticking to it, so hot tires and moisture have little effect, and damaged tiles pop out for replacement. Coatings bond chemically to the concrete itself. Both outperform peel-and-stick under vehicles, which is why many homeowners use self-adhesive tile only in the non-parking part of the garage and a coating or interlocking tile elsewhere.
Surface Preparation Makes or Breaks the Job
With peel-and-stick, the adhesive is only as good as the surface it grips. Prep takes longer than installation, and skipping it is the number one reason for failure.
- Test for moisture. Tape an 18 by 18 inch square of clear plastic sheeting to the slab on all four sides and leave it 24 to 48 hours. Condensation underneath or darkened concrete means too much moisture vapor for adhesive tile.
- Degrease. Scrub oil and fluid stains with a concrete degreaser and a stiff nylon brush, then rinse thoroughly. Adhesive will not bond to oily concrete.
- Fill cracks and pits. Use a cement-based patching compound or a flexible concrete crack filler. Grind or feather any ridges higher than 1/8 inch.
- Remove old sealers. Many garage floors have a glossy sealer. Adhesive grips poorly on it. Scuff it or grind it off.
- Prime. Apply the primer recommended by the tile maker. Concrete is porous and dusty, and a primer locks down dust and gives adhesive something to hold. This single step can double bond strength.
- Acclimate. Let tiles and the garage sit between 65°F and 85°F for at least 48 hours before and after installation.
Installation Tips for Better Results
Start from the center of the area and work outward, snapping chalk lines so rows stay square to the most visible wall. Leave the backing paper on until each tile is positioned, then press firmly from the center out. Go over every tile with a 100-pound floor roller, which you can rent for about $20 to $35 a day. Hand pressure alone is not enough to fully engage pressure-sensitive adhesive.
Cut tiles with a sharp utility knife, scoring the face and snapping cleanly. Keep a 1/4-inch gap at walls for seasonal movement. At the garage door, finish the edge with a metal or vinyl transition strip so the first row of tiles cannot catch and peel.
Wait 48 to 72 hours before putting heavy equipment on the tile. Wipe up spills promptly and avoid solvent-based cleaners, which can soften vinyl.
How to Choose a Garage-Worthy Tile
Not all self-adhesive tiles are equal, and the spec sheet tells you more than the box photo. Start with thickness and wear layer. Budget tiles around 1.2 millimeters with a 6-mil wear layer are built for low-traffic bedrooms and closets. For a garage workshop, look for at least 2 millimeters overall and a 12- to 20-mil wear layer, which resists dragged tools, dropped hardware, and grit far better.
Next, read the installation instructions for the words “concrete,” “below grade,” and “temperature range.” A product approved only for plywood or existing vinyl is a warning sign. Garage-rated tiles usually list an installation range and a service temperature range; the wider the service range, the better the adhesive will cope with seasonal swings. A textured or embossed surface adds slip resistance when boots come in wet, and a mid-tone gray or stone pattern hides tire dust and sawdust far better than white or black.
Finally, buy 10 percent extra from the same production lot. Color can shift slightly between runs, and having matching spares means a damaged tile can be heated with a hair dryer, pried up, and replaced in five minutes rather than leaving a mismatched patch.
What It Costs
For a typical 400-square-foot two-car garage, budget along these lines if you go with self-adhesive tile:
- Standard residential peel-and-stick: $0.75 to $2 per square foot, or $300 to $800 for the full floor.
- Commercial-grade or garage-rated tile: $2 to $4 per square foot, or $800 to $1,600.
- Primer, degreaser, and patching: $80 to $200.
- Roller rental: $20 to $35 per day.
Total DIY cost is usually $500 to $1,800. It is the cheapest finished-floor option, which is the main appeal. Just factor in the possibility of re-doing parking zones within a year or two if you use it under vehicles.
Is Peel and Stick Tile for Garage Floor Projects Worth It?
If your garage is used as a workshop, gym, or storage space, or it is climate controlled, self-adhesive tile is an affordable way to make the space feel finished. If you park a daily driver on it, especially in a snowy or hot climate, you will be happier with interlocking tiles or a polyaspartic coating in the parking bays. Plenty of homeowners split the difference, using peel-and-stick for the side workshop and a tougher system where the cars live.
Frequently Asked Questions
Can you park a car on peel and stick tile?
You can, but hot tires often soften the adhesive and cause lifting or staining. Only garage-rated tiles on primed, dry concrete have a reasonable chance of lasting under vehicles.
Does peel and stick tile stick to concrete?
It sticks well to clean, dry, primed concrete. On dusty, oily, sealed, or damp concrete, the bond fails quickly.
How long does peel and stick tile last in a garage?
In non-parking zones with good prep, 5 to 10 years is realistic. Under daily vehicle traffic, many installations need repairs within one to two years.
Can I install peel and stick tile in a cold garage?
Install only when the slab and air are at least 65°F, then keep it warm for 48 hours. Cold adhesive does not bond properly and will release later.