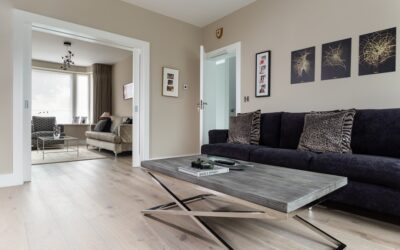
Vinyl peel and stick flooring is the quickest, cheapest, and most accessible way to transform a floor. Peel the backing, press the tile or plank onto a clean surface, and you have a new floor in hours — no glue, no click-lock mechanisms, no professional tools. It is the go-to choice for renters, budget renovations, and anyone who wants an instant upgrade with minimal commitment.
But simplicity comes with trade-offs. Peel and stick vinyl is not as durable, waterproof, or long-lasting as click-lock vinyl flooring or LVP. This guide explains exactly what to expect — the good, the bad, and the tips that make the difference between a peel-and-stick floor that looks great and one that peels up within months.
- What Is Vinyl Peel and Stick Flooring?
- Pros of Peel and Stick Vinyl
- Cons of Peel and Stick Vinyl
- Best Uses for Peel and Stick Vinyl
- Where to Avoid Peel and Stick
- How to Install Peel and Stick Vinyl
- Tips for Better Results
- Cost of Peel and Stick Vinyl
- Peel and Stick vs. Click-Lock Vinyl
- Maintaining Peel and Stick Vinyl
- Frequently Asked Questions
- Final Thoughts
What Is Vinyl Peel and Stick Flooring?
Peel and stick vinyl comes in tiles (typically 12″ x 12″ or 18″ x 18″) or planks (typically 6″ x 36″) with a pressure-sensitive adhesive pre-applied to the back. You peel off a protective paper liner and press the piece onto the subfloor. The adhesive bonds on contact and strengthens over 24 to 72 hours.
The tiles and planks are thin — usually 1 mm to 2.5 mm — and flexible. They conform to the surface beneath, which means every imperfection in the subfloor will telegraph through. Surface preparation is critical even though the installation itself is effortless.
Pros of Peel and Stick Vinyl
Extremely Affordable
Prices start as low as $0.50 per square foot for basic tiles and top out around $3.00 per square foot for premium planks with realistic wood or stone patterns. For a 100-square-foot bathroom, you could spend as little as $50 to $100 on materials.
Easy DIY Installation
No special tools are required. A utility knife, a straightedge, and a tape measure are all you need. Most people can install a room in 2 to 4 hours. There is no mixing adhesive, no waiting for glue to set, and no complicated click-lock profiles.
No Commitment
Peel and stick tiles can be removed without major damage to the subfloor — making them ideal for renters or temporary makeovers. Removal involves peeling up the tiles and cleaning off adhesive residue with a solvent.
Wide Design Selection
From marble and terrazzo to wood plank and encaustic tile patterns, peel and stick vinyl comes in hundreds of designs. The range has expanded dramatically in recent years, with some products rivalling the aesthetics of far more expensive materials.
Cons of Peel and Stick Vinyl
Adhesive Failure
The biggest drawback. Over time — especially in humid, warm, or high-traffic environments — the adhesive can weaken. Edges lift, corners peel, and tiles shift. Quality varies significantly between brands; cheap products are much more prone to failure.
Not Truly Waterproof
While the vinyl surface repels water, the seams between tiles are not sealed. Water can seep between pieces and undermine the adhesive, leading to lifting and mould growth beneath the tiles. Peel and stick vinyl is water-resistant, not waterproof. For true waterproof performance, waterproof click-lock flooring is the better choice.
Thin and Fragile
At 1 mm to 2.5 mm thick, peel and stick vinyl offers minimal cushioning and is vulnerable to punctures from sharp objects, heavy furniture legs, and high heels. It telegraphs every subfloor imperfection.
Shorter Lifespan
Expect 5 to 10 years from quality peel and stick products. Budget products may last only 2 to 5 years before adhesive failure, wear, or yellowing becomes noticeable. Compare this to 15 to 25 years for click-lock LVP.
Limited Resale Value
Peel and stick flooring does not add significant value to a property. Potential buyers and renters recognise it as a budget material. If resale value matters, investing in a higher-quality floor pays off.
Best Uses for Peel and Stick Vinyl
- Rental properties: Quick, cheap, removable — perfect for tenants who want to personalise without permanent changes.
- Temporary makeovers: Staging a home for sale, refreshing a room before a party, or testing a design idea before committing to a permanent floor.
- Low-traffic rooms: Closets, laundry rooms, craft rooms, and home offices with light foot traffic.
- Budget bathroom updates: Provided you keep water away from the seams and edges.
- Over existing vinyl or tile: Layering peel and stick over a clean, smooth existing floor is a quick facelift.
Where to Avoid Peel and Stick
- High-moisture bathrooms: Shower areas and around bathtubs see too much water for adhesive-backed tiles.
- High-traffic hallways: Adhesive fails faster under heavy foot traffic and rolling loads.
- Over uneven subfloors: Every bump, crack, and divot shows through and can cause tiles to lift.
- Rooms with direct sunlight: UV exposure and heat can soften the adhesive and cause tiles to shift.
How to Install Peel and Stick Vinyl
Step 1: Prepare the Subfloor
This is the most important step. The surface must be clean, smooth, dry, and dust-free. Sweep, vacuum, and mop. Fill any cracks or dips with floor-levelling compound. Sand down high spots. Remove any existing wax, sealant, or loose paint. The adhesive bonds best to smooth, nonporous surfaces.
Step 2: Plan the Layout
Measure the room and find the centre point. Snap chalk lines to create a grid. Starting from the centre ensures balanced borders — you avoid ending up with tiny slivers of tile along one wall.
Step 3: Start from the Centre
Peel the backing from the first tile and press it into position at the intersection of your chalk lines. Work outward in one quadrant at a time, butting each tile tightly against its neighbour.
Step 4: Press Firmly
Use a flooring roller or a rolling pin to press each tile firmly into the adhesive. Pay special attention to edges and corners — these are the first areas to lift if not fully bonded.
Step 5: Cut Border Tiles
At the walls, measure the remaining space, score the tile with a utility knife and straightedge, and snap. Leave a tiny gap (1/16 inch) at the wall for expansion — baseboards or quarter round will cover it.
Step 6: Roll the Entire Floor
After all tiles are placed, go over the entire floor with a heavy roller (or walk on every tile) to ensure full adhesive contact. Avoid heavy furniture for 24 to 72 hours while the adhesive cures.
Tips for Better Results
- Warm the tiles: In cold weather, adhesive becomes stiff. Store tiles in a warm room (70+ degrees Fahrenheit) for 24 hours before installation. You can also warm the subfloor with a space heater.
- Use additional adhesive in problem areas: Apply a thin layer of pressure-sensitive vinyl adhesive near doorways, under dishwashers, and in areas with temperature fluctuations for extra bond strength.
- Mix tiles from multiple boxes: Slight colour variations between production batches are common. Mixing tiles distributes any differences evenly.
- Clean the subfloor twice: Even a thin layer of dust prevents proper bonding. Clean once, let it dry, then clean again before installation.
Cost of Peel and Stick Vinyl
- Budget tiles (basic patterns): $0.50 to $1.50 per square foot.
- Mid-range tiles (realistic wood/stone): $1.50 to $2.50 per square foot.
- Premium planks (thicker, enhanced adhesive): $2.50 to $3.50 per square foot.
- Additional adhesive (optional): $0.15 to $0.30 per square foot.
No professional installation is typically needed, so the material cost is essentially the total cost. For a 150-square-foot room, budget $75 to $525 depending on quality.
Peel and Stick vs. Click-Lock Vinyl
- Durability: Click-lock wins. Rigid-core LVP is thicker, dent-resistant, and long-lasting.
- Water resistance: Click-lock wins. Tight-fitting joints resist water penetration better than adhesive seams.
- Ease of install: Peel and stick is slightly easier — no clicking, no tapping blocks.
- Cost: Peel and stick is cheaper upfront but may need replacing sooner.
- Removability: Peel and stick is easier to remove without damaging the subfloor.
For permanent flooring in a home you own, click-lock LVP or SPC flooring is the better investment. For temporary, rental, or ultra-budget applications, peel and stick is the smart choice.
Maintaining Peel and Stick Vinyl
- Sweep or vacuum regularly to remove grit.
- Damp-mop with a mild vinyl cleaner. Avoid soaking the floor — water seeping into seams weakens adhesive.
- Avoid abrasive cleaners, bleach, and ammonia.
- Use furniture pads to prevent dents and tears.
- Press down any lifting edges promptly with a roller or apply a dab of vinyl adhesive beneath.
Frequently Asked Questions
Can I put peel and stick vinyl over existing tile?
Yes, if the tile is smooth, level, and firmly bonded. Fill deep grout lines with a levelling compound first to prevent them from telegraphing through.
How long does peel and stick vinyl last?
Quality products last 5 to 10 years. Budget products may last only 2 to 5 years before adhesive failure becomes an issue.
Can I use peel and stick in a bathroom?
In a half-bath or powder room with minimal water exposure, yes. Near tubs and showers, the moisture risk is too high. Waterproof click-lock vinyl is a safer bathroom choice.
Is peel and stick vinyl toxic?
Modern peel and stick vinyl from reputable brands meets safety standards for VOC emissions. Look for FloorScore or Greenguard Gold certifications for added assurance. Avoid unbranded imports with no safety certifications.
Final Thoughts
Vinyl peel and stick flooring is the fastest, cheapest path to a new-looking floor. It shines in rental properties, low-traffic rooms, and temporary applications where budget and convenience outweigh long-term durability. The key to success is meticulous subfloor preparation, proper adhesion technique, and realistic expectations about lifespan. For permanent, heavy-use applications, step up to click-lock LVP — but for a quick, affordable refresh, peel and stick delivers remarkable results for the price.
Prefer to explore on your own?
See how new flooring looks in your actual room in seconds — free, no signup.
Try the free Floor Studio →