A tile backsplash is one of the highest-impact upgrades you can make to a kitchen or bathroom. It protects the wall from water, grease, and stains while serving as a major design element that ties the room together. With dozens of materials and hundreds of style combinations available, choosing the right backsplash can feel overwhelming — but narrowing your options by material first and style second simplifies the process considerably.
This guide covers the best tile backsplash materials, the most popular layout styles, kitchen vs bathroom considerations, cost ranges, DIY installation tips, grout selection, and sizing guidelines.
Best Backsplash Materials
The material you choose for your tile backsplash determines its durability, maintenance requirements, heat resistance, and overall aesthetic. Here is a comparison of the five main options.
| Material | Durability | Heat Resistance | Stain Resistance | Cost (per sq ft) | Best For |
|---|---|---|---|---|---|
| Ceramic | Good | Excellent | Very good (glazed) | $1 – $10 | Budget-friendly kitchens, bathrooms |
| Porcelain | Excellent | Excellent | Excellent | $3 – $15 | Behind stoves, high-use areas |
| Glass | Good | Good | Excellent (non-porous) | $5 – $25 | Modern design, light reflection |
| Natural Stone (marble, travertine, slate) | Very good | Very good | Poor (porous, needs sealing) | $5 – $30 | Luxury kitchens, statement walls |
| Metal (stainless, copper, tin) | Excellent | Excellent | Good | $8 – $30 | Industrial/contemporary kitchens |
Ceramic Tile
Ceramic is the most popular backsplash material by volume due to its low cost, wide availability, and extensive color and size options. Glazed ceramic is easy to clean, resistant to water and stains, and handles heat well (safe behind stoves and cooktops). The main drawback is that ceramic is softer than porcelain, so it can chip if struck by a heavy object — though this is rarely an issue on a vertical wall surface.
Porcelain Tile
Porcelain is ceramic’s denser, harder cousin. Fired at higher temperatures (2,200°F+ vs 1,800°F for ceramic), porcelain has a water absorption rate below 0.5 percent, making it essentially waterproof even without glazing. Porcelain is the best material for behind-stove backsplashes because it handles extreme heat without cracking or discoloration.
Glass Tile
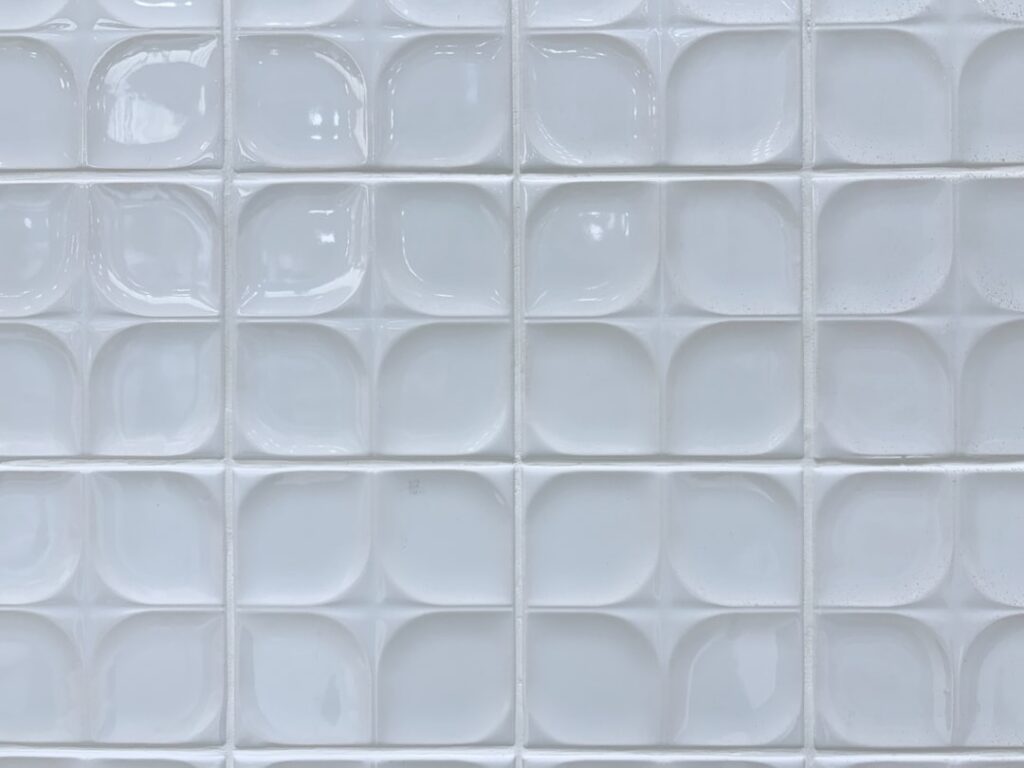
Glass backsplash tiles create a luminous, light-reflective surface that makes kitchens feel larger and brighter. They are completely non-porous (zero maintenance), available in a vast range of colors from translucent to opaque, and lend a contemporary feel to any space. The trade-off is higher cost and the fact that glass shows imperfections in the wall surface — thinset application must be very smooth and even. For subway tile specifically, glass versions are a popular modern upgrade.
Natural Stone
Marble, travertine, and slate backsplashes deliver a luxury aesthetic that no manufactured tile can fully replicate. Each piece has unique veining, color variation, and texture. However, natural stone is porous and requires sealing at installation and periodic resealing (every 1 to 2 years) to prevent stain absorption. Marble is especially susceptible to etching from acidic foods (lemon juice, tomato sauce, vinegar).
Metal Tile
Stainless steel, copper, and tin tiles create a bold, industrial or rustic look. Metal tiles are extremely heat-resistant (ideal behind ranges), easy to clean, and highly durable. They are typically available as small mosaic tiles or accent strips rather than large-format tiles. Copper develops a patina over time, which is either a pro or con depending on your preference.
Popular Styles & Patterns
The layout pattern of your tile backsplash has as much visual impact as the material itself.
Subway Tile
The classic 3 x 6 inch rectangular tile laid in a brick (running bond) pattern is the most popular backsplash style in America. Subway tile is timeless, versatile, and suits every kitchen style from farmhouse to modern. Variations include oversized subway (4 x 8, 4 x 12), beveled subway (with angled edges), and handmade subway (with irregular, artisanal texture).
Herringbone
Rectangular tiles arranged in a V-shaped zigzag pattern. Herringbone adds visual movement and sophistication to a backsplash. It works best with subway-format tiles (3 x 6 or 2 x 6) and requires more cuts and planning than standard brick layout. Herringbone can be installed at a 45-degree angle (true herringbone) or a 90-degree angle (chevron).
Penny Tile
Small, round tiles (typically 3/4 to 1 inch diameter) mounted on mesh sheets for easy installation. Penny tile creates a playful, retro-inspired look and works especially well in bathrooms. Available in porcelain, glass, and metal. The large amount of grout relative to tile makes grout color selection critical.
Hexagon Tile
Hexagon tiles are available from tiny 1-inch mosaics to large 8-inch statement tiles. Small hexagons create a classic vintage look; large hexagons are modern and geometric. Hexagonal layouts do not require complex cutting — the tiles tessellate naturally — but edge finishing at the top and bottom requires half-hex tiles or creative trim work.
Large Format
Tiles 12 x 24 inches or larger create a minimal, contemporary backsplash with very few grout lines. Large-format porcelain slabs (some up to 60 x 120 inches) can cover an entire backsplash with zero seams. The fewer grout lines mean less maintenance and a sleeker look, but installation requires precision and often specialized tools (suction cups, leveling systems).
Patterned / Encaustic
Cement tiles or porcelain tiles with bold, colorful patterns (Moroccan, Mediterranean, geometric, floral) make the backsplash the focal point of the kitchen. These tiles are typically 8 x 8 inches and can be mixed and matched for unique designs. True cement tiles require sealing; porcelain patterned tiles do not.
| Style | Difficulty (DIY) | Best Room | Design Vibe | Cost Impact |
|---|---|---|---|---|
| Subway (brick bond) | Easy | Kitchen, bathroom | Classic, timeless | Low |
| Herringbone | Moderate | Kitchen | Sophisticated, dynamic | Moderate (more cuts) |
| Penny round | Easy (mesh sheets) | Bathroom | Retro, playful | Moderate |
| Hexagon | Easy to moderate | Kitchen, bathroom | Vintage or modern (size-dependent) | Moderate |
| Large format | Moderate to hard | Kitchen | Modern, minimal | Higher (material + tools) |
| Patterned/Encaustic | Easy (simple grid) | Kitchen | Bold, Mediterranean | High (tile cost) |
Kitchen vs Bathroom Backsplash
While the installation process is similar, kitchen and bathroom backsplashes serve different purposes and face different conditions.
| Factor | Kitchen Backsplash | Bathroom Backsplash |
|---|---|---|
| Primary threat | Grease, oil, heat, food splatter | Water, soap, steam, humidity |
| Heat exposure | High (behind stove/range) | Low |
| Best material | Porcelain, ceramic, metal | Porcelain, ceramic, glass |
| Avoid | Unsealed natural stone behind stove | Porous materials in shower areas |
| Typical height | Counter to upper cabinets (18 in.) | Counter to mirror, or full wall in shower |
| Grout type | Epoxy (stain-proof) recommended | Epoxy or urethane (moisture-proof) required |
Cost Breakdown
The total cost of a tile backsplash project depends on material, area, labor, and complexity.
| Component | Cost Range |
|---|---|
| Tile material (per sq ft) | $1 – $30 |
| Thinset mortar | $15 – $25 per bag (covers ~50 sq ft) |
| Grout | $10 – $20 per bag |
| Grout sealer | $10 – $15 per bottle |
| Professional labor (per sq ft) | $8 – $20 |
| Total installed — budget (ceramic subway) | $10 – $25 per sq ft |
| Total installed — mid-range (porcelain/glass) | $20 – $40 per sq ft |
| Total installed — premium (stone/handmade) | $35 – $60+ per sq ft |
A typical kitchen backsplash covers 25 to 35 square feet. At mid-range pricing, expect to spend $500 to $1,400 installed — or $100 to $500 for a DIY project using affordable ceramic or porcelain tile.
DIY Installation Tips
A tile backsplash is one of the most approachable DIY tile projects. The area is small, the tiles are light, and there is no floor traffic to worry about. For details on tile installation techniques that apply to floors and walls, see our dedicated guide.
Tools Needed
- Tile wet saw or manual tile cutter
- Notched trowel (1/4 x 1/4 inch V-notch for most wall tiles)
- Tile spacers (1/16 to 1/8 inch depending on desired grout line width)
- Level (4 ft)
- Grout float
- Bucket and sponge
- Tape measure and pencil
Step-by-Step Overview
- Prep the wall. Ensure drywall is clean, dry, and free of grease or wallpaper. Lightly sand glossy painted surfaces for better thinset adhesion. Remove outlet covers and switch plates.
- Plan the layout. Dry-fit tiles on the counter to determine centering and cut tile placement. Start from the center of the most visible wall and work outward so cut tiles end up at corners and edges.
- Mark a level line. Do not trust the countertop to be level. Snap a level chalk line at the bottom row and use it as your starting guide.
- Apply thinset. Spread a thin layer of modified thinset with the flat side of the trowel, then comb with the notched side at a 45-degree angle. Cover only enough area for 3 to 4 tiles at a time — thinset skins over in 15 to 20 minutes.
- Set tiles. Press each tile into the thinset with a slight twist. Insert spacers between tiles. Check level and alignment every few rows.
- Cut tiles. Use a wet saw for straight cuts and a tile nipper or rotary tool for notches around outlets and pipes.
- Allow thinset to cure. Wait 24 hours before grouting.
- Grout. Mix grout per instructions and apply with a grout float at a 45-degree angle, pressing grout into joints. Wipe excess with a damp sponge in diagonal strokes. Allow to haze, then buff with a dry cloth.
- Seal grout. After grout cures (48 to 72 hours), apply a penetrating grout sealer if using cement-based grout. Epoxy grout does not require sealing.
- Caulk edges. Use color-matched caulk (not grout) where the backsplash meets the countertop, cabinets, and any change of plane. Caulk absorbs movement and prevents cracking at these junctions.
Grout Selection
Grout plays a bigger role in backsplash appearance and maintenance than most homeowners realize.
| Grout Type | Stain Resistance | Maintenance | Cost | Best For |
|---|---|---|---|---|
| Cement (sanded) | Poor (porous) | Requires sealing | Low ($0.50/sq ft) | Joints wider than 1/8 inch |
| Cement (unsanded) | Poor (porous) | Requires sealing | Low ($0.50/sq ft) | Joints 1/8 inch or narrower, glass tile |
| Epoxy | Excellent (non-porous) | No sealing needed | High ($1 – $2/sq ft) | Kitchens (stain-proof), wet areas |
| Urethane (premixed) | Very good | No sealing needed | High ($1.50 – $3/sq ft) | DIY (easy application), bathrooms |
Pro tip: For kitchen backsplashes, choose a grout color close to your tile color. Contrasting grout (white grout with dark tile, for instance) emphasizes every grout line and shows staining more readily. If you want contrast, invest in epoxy grout to avoid long-term staining.
Height & Coverage Guidelines
Standard backsplash heights vary by application.
- Standard kitchen backsplash: 4 inches (just above the counter) — minimal protection, builder-grade
- Full kitchen backsplash: Counter to bottom of upper cabinets (typically 18 inches) — the most popular and recommended height
- Full-wall backsplash: Counter to ceiling — creates a dramatic, high-end look
- Behind range/cooktop: Extend to the bottom of the range hood or vent, which may be higher than surrounding cabinets
- Bathroom vanity: Counter to mirror, or 4 to 6 inches above the counter as a simple splash guard
When designing your layout, account for the areas behind the stove (usually the widest visible section), window openings (require finishing tiles on the sill and jamb), and open shelving areas (backsplash becomes fully visible with no cabinets above).
Frequently Asked Questions
What is the easiest tile backsplash to install?
Peel-and-stick mosaic tiles are the absolute easiest option — no thinset, no grout, and no special tools. For traditional tile, subway tile in a standard brick pattern is the easiest because the layout is simple, cuts are minimal, and the rectangular shape is forgiving. Mesh-backed mosaic sheets (penny, hexagon) are also straightforward since alignment is built into the sheet.
Do I need to tile behind a range?
It is strongly recommended. The area behind a range or cooktop is exposed to the most grease, heat, and splatter in the kitchen. At minimum, tile from the countertop to the bottom of the range hood. If you are doing a backsplash anywhere in the kitchen, leaving the area behind the range untiled looks unfinished.
Can I install a tile backsplash over existing tile?
Yes, if the existing tile is firmly attached, flat, and in good condition. Lightly sand or scarify the existing tile surface for adhesion, use a premium modified thinset rated for tile-over-tile applications, and account for the added thickness at edges and outlets. However, removing old tile and starting with bare drywall produces the cleanest, most reliable result.
How long does a tile backsplash last?
A properly installed ceramic or porcelain backsplash lasts 25 to 50+ years — effectively the life of the kitchen. Grout may need refreshing or recaulking every 10 to 15 years with cement-based products, or never with epoxy grout. Natural stone requires resealing every 1 to 2 years to maintain stain resistance.
What backsplash style has the best resale value?
White or neutral subway tile in a standard brick pattern consistently ranks as the safest choice for resale value. It appeals to the broadest range of buyers, pairs with any cabinet and countertop combination, and never goes out of style. Bold patterns and bright colors are riskier — they may attract or repel buyers depending on taste.
Should backsplash tile match floor tile?
Matching is not necessary and often not recommended — using the exact same tile on the floor and backsplash can make the room feel monotonous. Instead, coordinate: choose tiles in the same color family or material type but in different sizes or patterns. For example, pair a large-format porcelain floor tile with a smaller subway backsplash in a complementary shade.
Prefer to explore on your own?
See how new flooring looks in your actual room in seconds — free, no signup.
Try the free Floor Studio →