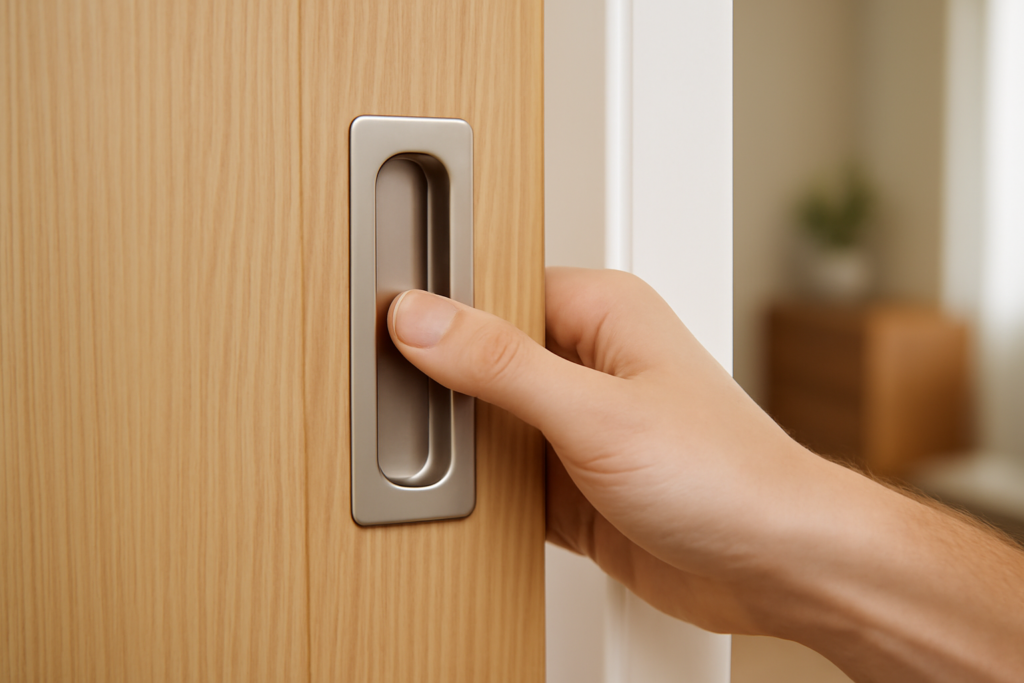
A pocket door disappears into the wall, which is the whole point — so it cannot use a knob or lever that sticks out. That is where a pocket door pull comes in: recessed hardware that sits flush with the door face so nothing catches on the jamb as the panel slides into its cavity. Choose the wrong style or size and the door either jams on the frame or leaves you clawing at a slot with no leverage.
- The Three Pull Types You Will Choose Between
- Standard Sizes and What Fits
- Finishes and Matching the Room
- Cost
- Tools You Will Need
- Where to Locate the Pull
- Installing a Flush Cup Pull
- Installing the Edge Pull
- Adding Privacy
- Retrofitting a Pull Without Removing the Door
- Solid-Core vs. Hollow-Core Doors
- Coordinating With the Rest of the Door
- Troubleshooting
I have retrofitted a lot of these on doors that shipped with cheap builder-grade cups. The difference between fumbling with a door and gliding it open one-handed usually comes down to the pull hardware and where it is mortised. Here is how to pick and install the right one.
The Three Pull Types You Will Choose Between
- Flush cup pull: A rectangular or round recessed cup mortised into the door face, one on each side. Your fingers drop into the cup to slide the door. Simplest and cheapest.
- Edge pull: A spring-loaded pull mortised into the leading edge of the door. It pops out so you can grab the door once it has slid into the pocket and the face cups are no longer reachable. Almost every pocket door needs one of these in addition to face cups.
- Privacy set: A flush pull combined with a turn latch and, on the outside, a coin-slot or emergency release — used on bathroom and bedroom pocket doors that must lock.
For a working door you almost always want two face cups plus one edge pull. The edge pull is the piece people forget, and without it you cannot start the door moving once it is fully seated in the wall.
Standard Sizes and What Fits
Face cups come in common footprints so replacements drop into existing mortises:
- Rectangular cups: roughly 2-3/4 in. x 4-1/2 in. is a widespread standard; also 2 in. x 4 in.
- Round cups: 2-1/2 in. to 3 in. diameter.
- Door thickness: hardware is rated for 1-3/8 in. (interior standard) or 1-3/4 in. doors. Confirm before buying — a mortise cut for a thicker door leaves a gap on a thin slab.
Measure your existing mortise before ordering a swap. If you are cutting fresh, pick the hardware first and mortise to its template.
Finishes and Matching the Room
Pulls come in the same finish families as the rest of your door hardware: satin nickel, matte black, oil-rubbed bronze, polished chrome, brass, and unlacquered brass that patinas over time. Match the pull to your hinges, switch plates, and other knobs in the space. Matte black and satin nickel are the safest for resale; unlacquered brass looks great but will darken, which some people love and others hate.
Cost
- Basic flush cup (pair): $10–$25.
- Solid-brass designer cups: $30–$80 per side.
- Edge pull: $8–$30.
- Privacy pull set with latch: $30–$120.
Hardware for a nice pocket door lands around $60–$150 all in. The door and pocket frame are the expensive parts; the pulls are cheap insurance for how the door feels to use.
Tools You Will Need
- Drill and a set of Forstner bits (for round cups) or a router/chisel for rectangular mortises
- Sharp 3/4-in. and 1-in. chisels
- Utility knife and a combination square
- Painter’s tape and a pencil for layout
- Self-centering (Vix) bit for the mounting screws
Where to Locate the Pull
Height matters for daily comfort. Set the face cups at the same height you would place a knob — 36 to 40 inches from the finished floor is standard, centered on the door’s stile. Keep the cup at least 1-1/2 inches from the leading edge so you do not weaken the stile or blow through into the edge-pull mortise. The edge pull mounts on the vertical leading edge, usually just below or aligned with the face cups.
Installing a Flush Cup Pull
- Mark the mortise. Tape the door face, hold the cup where it will sit, and trace the outline plus the screw holes. Use a square to keep it plumb with the door edge.
- Set the depth. Measure the cup’s flange thickness; that is how deep the flange recess must be so the pull sits flush. The cup body needs a deeper pocket behind it.
- Rout or drill the pocket. For a round cup, a Forstner bit at the body depth is fast. For a rectangular cup, drill a series of overlapping holes then clean the walls with a chisel, or use a router and template.
- Cut the flange recess. Score the outline with a knife, then pare the shallow flange rebate with a chisel so the lip finishes flush.
- Test-fit, then fasten. Drop the cup in; it should sit dead flush. Pilot the screw holes with a self-centering bit and drive the screws.
- Repeat on the opposite face, transferring your center marks through the door so both cups line up.
Installing the Edge Pull
- Mark the mortise on the leading edge, centered on the door thickness.
- Drill and chisel a pocket to the pull’s body depth, plus a shallow rebate for its faceplate.
- Seat the pull so its faceplate finishes flush with the door edge, then pilot and screw it in.
- Test the spring: it should pop out with a fingertip and retract fully so it clears the jamb.
A proud faceplate here is the classic mistake — it will scrape the strike jamb every time the door closes. Take the extra minute to rebate it flush.
Adding Privacy
If the door needs to lock (bathroom, bedroom), install a pocket-door privacy set instead of a plain cup. These combine the flush pull with a small thumb-turn latch that throws a bolt into the jamb. The outside gets an emergency release — usually a coin slot or a small hole you turn with a screwdriver — so no one gets trapped. Mortise the latch bolt into the leading edge and the strike into the jamb, keeping the bolt height consistent with your pull layout.
Retrofitting a Pull Without Removing the Door
You do not always have to pull the door off its track to swap a tired builder cup for something nicer, as long as the new pull uses the same mortise footprint. Measure the existing recess first — the common 2-3/4 by 4-1/2 inch rectangle covers a lot of doors, and many designer cups are sized to drop straight into it. Tape off the face, back out the two screws, lift the old cup, and clean any paint or caulk from the rebate before setting the new one. If the new pull is slightly smaller than the old mortise, a thin backer of matching wood or a filler behind the flange keeps it from rattling. When the new footprint is larger, you can enlarge the mortise in place with a sharp chisel and a steady hand rather than dismounting the slab.
Solid-Core vs. Hollow-Core Doors
The door’s construction changes how you mortise a pull. A solid-core slab gives you material everywhere, so you can locate the cup and edge pull freely and the screws bite into real wood. A hollow-core door is only solid at the perimeter stiles and rails; the middle is cardboard honeycomb. On a hollow-core door you must keep the face cup within the solid stile near the leading edge, or the mortise breaks through into the void and the pull has nothing to anchor to. Before cutting, tap the door and listen — the solid zone sounds dull, the hollow center sounds like a drum. Keep every fastener in the dull-sounding wood.
Coordinating With the Rest of the Door
A pocket door still needs a few pieces working together beyond the pull. The floor guide at the bottom keeps the panel from swinging and rubbing the jamb; the jamb stop or bumper inside the pocket sets how far the door recesses; and any privacy latch has to align with the pull height you chose. Set the pull layout first, then align the latch and strike to it so everything sits on one clean horizontal line. Matching the pull finish to your hinges — wait, pocket doors have no hinges, so match it instead to nearby door levers, cabinet pulls, and switch plates in the same sightline so the hardware reads as a deliberate set rather than a grab-bag.
Troubleshooting
- Door hard to start from the pocket: you are missing an edge pull, or it is set too deep to grab. Add or reposition it.
- Cup not flush: the flange rebate is too shallow — deepen it a hair with a chisel.
- Screws stripping: the stile is thin; use shorter screws or add a dab of epoxy in the pilot hole.
- Pulls do not line up side to side: transfer your layout through drilled reference points next time instead of measuring each face separately.
Get the pull selection and mortise depth right and a pocket door becomes the most satisfying door in the house — flush, quiet, and out of the way. Buy the face cups and the edge pull together, match the finish to your existing hardware, and mortise everything flush so nothing catches as the panel glides home.