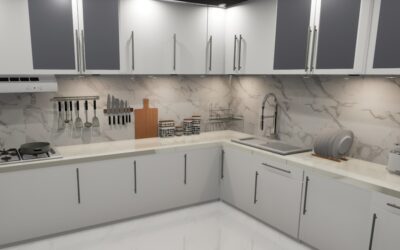
Few countertop materials make a stronger design statement than polished concrete countertops. They bring raw, industrial character to kitchens and bathrooms while offering genuine customization that stone and engineered surfaces cannot match. Every pour is unique. Every finish tells a story. At DnG Flooring, we have watched concrete countertops evolve from a niche builder trend into a mainstream option embraced by homeowners who want something different. This guide covers everything from costs and DIY feasibility to sealing, colors, and long-term maintenance.
What Are Polished Concrete Countertops?
Polished concrete countertops are custom-formed surfaces made from a mixture of Portland cement, fine aggregates (sand), water, and often decorative additives like glass chips, stone fragments, or pigments. Unlike precast stone slabs that are cut from large blocks, concrete countertops are either cast in place on top of your cabinets or poured into custom molds in a workshop and then installed.
The “polished” finish comes from progressively grinding the cured surface with diamond pads, starting with coarse grits and working up to fine grits that produce a smooth, semi-glossy sheen. The polishing process can expose embedded aggregate for a terrazzo-like appearance, or it can produce a smooth, uniform surface depending on the mix design and grinding depth.
Concrete countertops are typically 1-1/2 to 2 inches thick and weigh roughly 18 to 25 pounds per square foot — similar to granite. They require sturdy cabinets capable of supporting the weight, particularly for island installations and overhangs.
The appeal of concrete is its total customizability. Shape, color, texture, edge profile, embedded objects, and integral features like drain boards or trivets can all be built into the pour. No other countertop material offers this level of design freedom.
DIY vs. Professional Installation
Concrete countertops are one of the few premium surfaces that ambitious DIYers can tackle. But the gap between a DIY pour and a professional installation is significant.
DIY concrete countertops are achievable for someone with basic construction skills, patience, and a willingness to accept imperfections. The process involves building a form (typically from melamine-coated particleboard), mixing the concrete, pouring and vibrating to remove air bubbles, curing for several days, demolding, grinding, polishing, and sealing. Expect the project to take two to three weekends from start to finish.
DIY kits from companies like Z Counterform and Concrete Countertop Solutions simplify the process with pre-measured mixes, edge forms, and detailed instructions. A full kitchen’s worth of materials costs $300 to $800. The risk is that mistakes — air pockets (pinholes), cracks, uneven surfaces, or color inconsistencies — are difficult to fix after the concrete cures.
Professional concrete countertops are crafted by specialized artisans, not standard countertop fabricators. Pros use high-performance concrete mixes with fiber reinforcement, vacuum de-airing equipment, and professional-grade polishing systems that produce flawless surfaces. They manage the curing environment to prevent shrinkage cracks and can achieve finishes that rival polished stone.
Professional installation costs $80 to $200 per square foot — significantly more than DIY but far more predictable in quality. If you want a showpiece kitchen with zero tolerance for imperfections, hire a pro. If you embrace the handmade aesthetic and enjoy hands-on projects, DIY is a rewarding option.
Cost Breakdown
Here is what polished concrete countertops cost in 2026 for a typical 40-square-foot kitchen.
DIY with bagged mix: $200 to $500. Uses standard concrete mix with added pigment and sealer. Most budget-friendly but highest risk of imperfections.
DIY with specialty kit: $400 to $900. Pre-formulated countertop mixes with better flow, fewer pinholes, and more consistent color. Includes edge forms and sealer.
Professional cast-in-place: $2,500 to $5,000. The fabricator builds forms on your cabinets and pours on-site. Good for complex layouts with integral sinks.
Professional precast: $3,000 to $8,000. Countertops are poured in a controlled shop environment, then transported and installed. Highest quality and most consistent results.
Additional costs to consider: Custom edge profiles add $5 to $15 per linear foot. Integral drain boards add $200 to $500. Embedded decorative aggregate (glass, stone, metal) adds $10 to $30 per square foot. Sink cutouts run $150 to $300 each.
Compared to other premium materials, professional concrete countertops fall in the same price range as mid-tier quartz and granite. The DIY route, however, is dramatically cheaper — one of the few ways to get a custom, artisan-quality countertop for under $1,000.
Pros and Cons
Pros:
- Fully customizable. Any shape, color, size, or edge profile is possible. You can pour concrete to fit curved walls, odd angles, and unusual layouts that would be difficult or impossible with slab materials.
- Unique character. Every concrete countertop is one of a kind. The natural variations in color, texture, and aggregate distribution give each piece an artisan quality that manufactured materials cannot replicate.
- Heat resistant. Concrete handles hot pans without damage. No scorching, no cracking, no discoloration from heat.
- Integral features. Drain boards, trivets, soap dishes, and even sinks can be cast directly into the concrete, creating a seamless, monolithic surface.
- Affordable DIY option. For handy homeowners, concrete is one of the cheapest paths to a custom countertop surface.
- Repairable. Surface scratches and minor chips can be filled and re-polished. Concrete is more forgiving of damage than most stone or engineered surfaces.
Cons:
- Porous surface. Concrete absorbs liquids and stains without proper sealing. Even sealed concrete is more stain-prone than quartz or sintered stone.
- Requires sealing and maintenance. The sealer needs periodic reapplication — every one to three years depending on the product and usage.
- Potential for cracking. Concrete can develop hairline cracks over time, especially at stress points like sink cutouts. Fiber reinforcement and proper curing reduce this risk but do not eliminate it.
- Heavy. At 18 to 25 pounds per square foot, concrete countertops require robust cabinet support. Standard cabinets may need reinforcement for large spans or overhangs.
- Long fabrication time. Concrete must cure for at least seven days (28 days for full strength) before installation. Professional projects take three to six weeks from templating to installation.
- Inconsistent DIY results. Without experience, air pockets, color variations, and surface imperfections are common. These can be charming or frustrating depending on your expectations.
Color Options and Finishes
One of the greatest strengths of polished concrete countertops is the virtually unlimited color palette.
Natural gray is the classic concrete look. Standard Portland cement produces a medium gray that pairs beautifully with stainless steel, wood, and industrial design elements. The exact shade varies with the aggregate and water-to-cement ratio.
White concrete uses white Portland cement and light-colored aggregates. It creates a clean, contemporary look that works in both modern and farmhouse kitchens. White concrete stains more visibly than gray, so meticulous sealing is essential.
Integral pigments mixed directly into the concrete produce consistent, through-body color. Charcoal, black, brown, terracotta, blue, green, and cream are all achievable. Iron oxide pigments produce the most natural-looking earth tones. Synthetic pigments deliver brighter, bolder colors.
Acid staining applied after curing creates marbled, variegated color effects. Acid stains react with the minerals in the concrete to produce unique patterns that cannot be exactly replicated — every application is different.
Finish options range from rough and textured (for an authentic industrial feel) to mirror-smooth polished (for a refined, stone-like appearance). Most homeowners choose a satin or semi-gloss polish that splits the difference between rustic and refined. The polishing level also affects stain resistance — smoother surfaces shed spills more easily.
Exposed aggregate finishes reveal the stones, glass, or other materials mixed into the concrete. Crushed recycled glass in various colors creates a terrazzo-inspired look. River pebbles, marble chips, or crushed seashells produce organic textures. This approach works best with professional fabrication, as the grinding depth must be precisely controlled to expose the aggregate without weakening the surface.
Sealing Your Concrete Countertops
Sealing is the single most important maintenance task for concrete countertops. Without a quality sealer, the porous surface absorbs water, oil, wine, coffee, and anything else that touches it.
Penetrating sealers (also called impregnating sealers) soak into the concrete and chemically react to block the pores from within. They do not change the surface appearance — the concrete still looks and feels natural. Brands like Ghostshield and SiActiv offer food-safe penetrating sealers designed for countertops. Reapply every one to two years.
Topical sealers sit on the surface and create a protective film. Epoxy and polyurethane topical sealers provide excellent stain protection and a glossy finish, but they can scratch, peel, and show wear patterns over time. Food-safe options are available. Reapply every two to four years or when wear becomes visible.
Wax sealers (beeswax or carnauba-based) provide a natural, low-sheen finish and add a layer of stain protection. They are the least durable option and need monthly reapplication in heavy-use kitchens, but they are all-natural, food-safe, and easy to apply.
For the best protection, many professionals recommend a two-step approach: apply a penetrating sealer first, then follow with a topical sealer or wax. This creates both deep pore protection and a surface barrier.
Regardless of which sealer you choose, always test on an inconspicuous area first. Some sealers darken the concrete or alter the color. Apply in thin, even coats per the manufacturer’s instructions, and allow full cure time before using the countertop.
Maintenance and Daily Care
Concrete countertops require more attention than quartz or granite, but the maintenance routine is straightforward once it becomes habit.
Daily cleaning: Wipe with a soft cloth, warm water, and a few drops of pH-neutral dish soap. Avoid acidic cleaners (vinegar, citrus-based products) and abrasive scrubbers that can strip the sealer.
Spill management: Blot spills immediately, especially wine, coffee, lemon juice, and oil. Even sealed concrete can stain if acidic or pigmented liquids sit on the surface for extended periods. This is the biggest behavioral adjustment for concrete countertop owners.
Cutting: Use cutting boards. While concrete is hard enough to resist knife marks, cutting directly on the surface can score the sealer, creating entry points for stains.
Heat: Concrete handles hot pans without damage, but thermal shock (placing a very hot pan on a cold concrete surface) can theoretically cause cracking. Use a trivet as a precaution, even though the concrete itself will not scorch.
Resealing: Plan to reseal your concrete countertops every one to three years depending on usage and sealer type. You will know it is time when water no longer beads on the surface. Resealing is a simple DIY task — clean the surface thoroughly, apply the sealer with a foam roller or cloth, and allow it to cure.
Waxing: If you use a wax finish, reapply monthly in high-use areas. Apply a thin coat of food-safe beeswax or countertop wax, let it haze for 10 minutes, then buff with a soft cloth.
Design Styles and Applications
Concrete countertops are not limited to industrial lofts and modern minimalist kitchens. Here is how they work across different design aesthetics.
Industrial: The most natural fit. Gray or charcoal concrete with a matte finish, paired with steel fixtures, exposed ductwork, and open shelving. This is the look most people envision when they think of concrete countertops.
Modern farmhouse: White or light gray concrete with a slightly textured finish pairs beautifully with shaker cabinets, apron-front sinks, and wood accents. The concrete adds an earthy, handmade quality that complements the farmhouse aesthetic without looking cold.
Scandinavian: Light concrete with a smooth, polished finish and minimal edge profiles. Paired with blonde wood cabinets and simple hardware, concrete contributes to the clean, natural palette that defines Scandinavian design.
Rustic: Concrete with exposed river pebble aggregate or rough-textured finishes works in cabin and rustic-style kitchens. Paired with natural wood, stone walls, and wrought iron hardware, it feels organic and grounded.
Outdoor kitchens: Concrete is an excellent outdoor countertop material. It handles UV exposure, rain, and temperature extremes. Seal with a UV-resistant outdoor sealer and the countertop will last decades. Integral drain slopes can be built right into the pour.
Bathroom vanities: Concrete vanity tops with integral vessel sinks create a spa-like, sculptural element. The smaller scale of a bathroom vanity makes this an accessible DIY project.
Frequently Asked Questions
Do polished concrete countertops crack?
Hairline cracks can develop, particularly at stress points like sink cutouts and corners. Proper fiber reinforcement, controlled curing (keeping the surface moist and covered for at least seven days), and steel or fiberglass mesh embedded in the pour minimize cracking. Many concrete countertop owners view hairline cracks as part of the material’s natural character rather than a defect.
How long do concrete countertops last?
With proper sealing and maintenance, concrete countertops last 20 to 30 years or more. The concrete itself is essentially permanent — it is the sealer that requires periodic attention. If the surface becomes stained or worn over the years, it can be re-polished and resealed to restore its original appearance.
Are concrete countertops cheaper than granite?
DIY concrete countertops ($5 to $20 per square foot) are significantly cheaper than granite ($40 to $150 per square foot installed). Professional concrete countertops ($80 to $200 per square foot) overlap with mid to high-end granite pricing. The DIY option is where concrete delivers the most dramatic cost savings.
Can you make concrete countertops without special tools?
Basic DIY concrete countertops require a drill with a mixing paddle, an orbital sander with diamond polishing pads, a trowel, and standard woodworking tools for building forms. You do not need a wet saw, CNC machine, or other specialized stone fabrication equipment. Countertop kits include most specialized materials. Budget $100 to $200 for tools if you are starting from scratch.
Do concrete countertops stain easily?
Unsealed concrete stains very easily — it absorbs liquids like a sponge. Properly sealed concrete resists most stains, but it is still more stain-prone than non-porous materials like quartz or sintered stone. The key is immediate spill cleanup and consistent resealing. Coffee, red wine, and cooking oil are the most common staining agents. If a stain does penetrate, a poultice (baking soda paste left overnight) often draws it out.