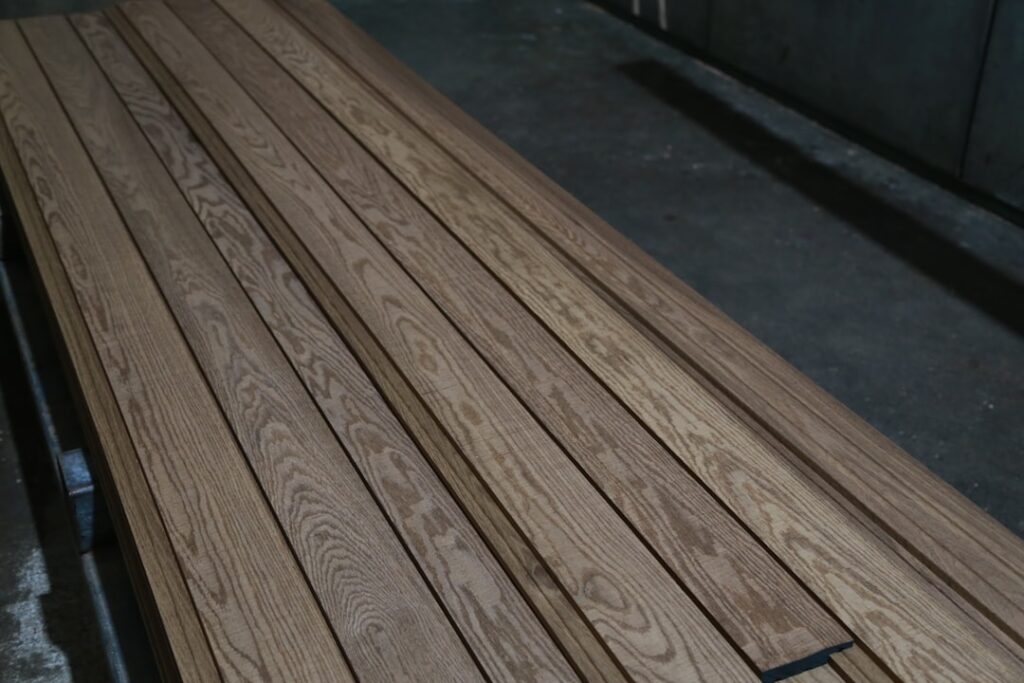
Polyurethane for floors is the most popular protective finish for hardwood and the final — and arguably most important — step in any refinishing project. A quality polyurethane coating shields the wood from scratches, moisture, stains, and daily wear while enhancing the grain’s natural beauty. But choosing the wrong type, applying too few coats, or using improper technique can leave you with a finish that peels, yellows, or wears through prematurely.
- Oil-Based vs Water-Based Polyurethane
- How Many Coats (3 Recommended)
- Application Methods
- Dry Time Between Coats
- Cure Time
- Sheen Levels
- Sanding Between Coats
- Recoating Old Polyurethane
- Common Mistakes to Avoid
- Cost Comparison
- Frequently Asked Questions
- How many coats of polyurethane should I put on a hardwood floor?
- Is oil-based or water-based polyurethane better for floors?
- How long does polyurethane take to dry between coats?
- Can I apply water-based polyurethane over oil-based?
- What sheen should I choose for hardwood floors?
- Do I need to sand between coats of polyurethane?
- The Finish Makes the Floor
This guide covers everything you need to know: oil-based vs water-based polyurethane, how many coats to apply, application methods, dry times, sheen options, sanding between coats, and how to recoat old polyurethane.
Oil-Based vs Water-Based Polyurethane
The first decision when choosing polyurethane for floors is oil-based vs water-based. Both protect effectively, but they differ in appearance, application, durability, dry time, and odor.
| Characteristic | Oil-Based Polyurethane | Water-Based Polyurethane |
|---|---|---|
| Color/tone | Warm amber/golden tone that deepens over time | Crystal clear, no color shift |
| Yellowing | Yes — develops amber patina over years | Minimal to none |
| Durability | Slightly more durable per coat | Very durable (with 3+ coats) |
| Dry time between coats | 8 – 24 hours | 2 – 4 hours |
| Full cure time | 30 days | 14 – 21 days |
| Odor/VOCs | Strong odor, high VOCs | Low odor, low VOCs |
| Application difficulty | Easier (longer open time) | Harder (dries fast, shows lap marks) |
| Cost per gallon | $35 – $55 | $40 – $70 |
| Coats recommended | 2 – 3 | 3 – 4 |
| Best for | Traditional/warm-toned wood, high-traffic areas | Light/white/gray stains, modern looks, occupied homes |
Choose oil-based polyurethane if: You want a warm, amber tone (enhances oak, walnut, and cherry beautifully), need maximum durability with fewer coats, and can vacate the space for 3 to 5 days during application due to strong fumes. Oil-based is the traditional choice and many floor professionals still prefer it for its durability and forgiving application.
Choose water-based polyurethane if: You want a crystal-clear finish that won’t alter the wood’s natural color (essential over white, gray, or light stains), need faster recoat times to finish the project in a day or two, prefer lower odor and VOCs (important in occupied homes), or want a more modern, light appearance. Leading products include Bona Traffic HD, Loba 2K Supra, and Basic Coatings StreetShoe.
For the complete refinishing process, see our how to refinish hardwood floors guide.
How Many Coats (3 Recommended)
Three coats of polyurethane for floors is the professional standard. Here is why.
One coat: Never sufficient. A single coat leaves thin spots, doesn’t fully seal the wood grain, and wears through quickly in traffic areas. One coat is only appropriate for a maintenance recoat over existing polyurethane (see the recoating section).
Two coats: The bare minimum for a new floor. Two coats provide a sealed surface but leave little margin for wear. High-traffic areas (hallways, kitchen, entryways) will show wear through within 3 to 5 years. Some professionals apply two coats as a budget option, but three is always better.
Three coats (recommended): Three coats provide a thick, durable film that handles heavy residential traffic for 7 to 12 years before needing attention. The third coat fills any thin spots from the first two, ensures complete grain sealing, and provides a sacrifice layer — the top coat absorbs daily wear while the lower coats protect the wood.
Four coats: Sometimes applied with water-based polyurethane (which lays down a thinner film per coat than oil-based). Four coats of water-based approximately equal three coats of oil-based in total film thickness. A fourth coat also makes sense in extreme-traffic commercial or rental spaces.
| Number of Coats | Oil-Based Total Thickness | Water-Based Total Thickness | Expected Traffic Life |
|---|---|---|---|
| 1 coat | ~2 mils | ~1.5 mils | 1 – 2 years (insufficient) |
| 2 coats | ~4 mils | ~3 mils | 3 – 5 years |
| 3 coats | ~6 mils | ~4.5 mils | 7 – 12 years |
| 4 coats | ~8 mils | ~6 mils | 10 – 15 years |
Application Methods
The tool you use to apply polyurethane for floors affects the final appearance, coat thickness, and ease of application.
Lambswool applicator (T-bar): The most common professional tool. A lambswool pad attached to a T-bar handle allows you to apply polyurethane while standing, covering large areas quickly with a consistent coat. It works well with both oil-based and water-based products. Lambswool creates a slightly thicker coat than synthetic pads. Use a fresh applicator for each project — cleaning and reusing lambswool pads often leaves fibers in the finish.
Synthetic pad applicator (T-bar): A synthetic microfiber or foam pad on a T-bar is the preferred tool for water-based polyurethane. Synthetic pads lay down a thinner, more even coat and won’t shed fibers. They’re also easier to clean and reuse. Products like the Bona applicator pad are specifically designed for water-based finishes.
Roller: A 3/8-inch nap high-density foam roller works well for smaller areas, closets, and touch-ups. Rollers provide good control but are slower than T-bar applicators for large rooms. Never use a standard paint roller — the texture creates bubbles and an orange-peel surface. Use only rollers specifically designed for floor finishes.
Brush: A high-quality natural-bristle brush (for oil-based) or synthetic brush (for water-based) provides the most control for edges, corners, and tight areas. Brushes are too slow for large floor areas but essential for cutting in along walls and cabinets before using a T-bar on the main field.
Application technique:
- Cut in 3 to 4 inches along all walls, cabinets, and obstacles with a brush
- Pour a line of polyurethane along the far wall
- Spread with the T-bar applicator, working in long, even strokes parallel to the wood grain
- Maintain a wet edge — never let a partially dried edge overlap with fresh polyurethane
- Work from the farthest corner toward the exit
- Apply in thin, even coats — heavy application causes runs, bubbles, and longer dry times
Dry Time Between Coats
Proper dry time between coats is critical. Applying the next coat too soon traps solvents and causes peeling. Waiting too long creates adhesion problems.
| Product Type | Dry to Touch | Ready for Recoat | Light Foot Traffic |
|---|---|---|---|
| Oil-based polyurethane | 6 – 8 hours | 12 – 24 hours | 24 – 48 hours after final coat |
| Water-based polyurethane | 1 – 2 hours | 2 – 4 hours | 12 – 24 hours after final coat |
| Water-based (2-component) | 2 – 3 hours | 3 – 4 hours | 24 hours after final coat |
Temperature and humidity affect dry time. Ideal application conditions are 65°F to 75°F with 40% to 60% relative humidity. Cold temperatures, high humidity, and poor ventilation extend dry times significantly. In humid conditions (above 70% RH), oil-based polyurethane may take 36+ hours between coats.
The recoat window matters. Both oil-based and water-based polyurethane have a recoat window — a timeframe during which the next coat bonds chemically to the previous coat without sanding. For oil-based, this window is typically 24 hours. For water-based, it’s 2 to 4 hours. If you exceed the recoat window, you must lightly sand (screen) the previous coat to create mechanical adhesion before applying the next coat.
Cure Time
Dry time and cure time are different. Polyurethane for floors may feel dry to the touch and support light foot traffic well before the finish is fully cured and hardened.
| Milestone | Oil-Based | Water-Based |
|---|---|---|
| Dry to touch | 6 – 8 hours | 1 – 2 hours |
| Light foot traffic (socks only) | 24 – 48 hours | 12 – 24 hours |
| Normal foot traffic | 3 – 5 days | 2 – 3 days |
| Furniture placement | 5 – 7 days | 3 – 5 days |
| Area rugs | 30 days | 14 – 21 days |
| Full cure (maximum hardness) | 30 days | 14 – 21 days |
During the cure period: Use felt pads on all furniture legs. Avoid dragging anything across the surface. Do not wet-mop — only dry dust. Keep pets’ nails trimmed. Avoid placing rubber-backed mats (the rubber can bond to uncured polyurethane). The floor gains hardness and scratch resistance throughout the cure period, reaching full strength at the times above.
Sheen Levels
Sheen refers to how much light the surface reflects. Polyurethane for floors comes in four to five sheen levels.
| Sheen Level | Light Reflectance | Appearance | Shows Imperfections | Trend in 2026 |
|---|---|---|---|---|
| Matte/flat | 10 – 25% | Natural, no shine | Hides most | Very popular |
| Satin | 25 – 40% | Low luster, soft glow | Hides most | Most popular |
| Semi-gloss | 40 – 55% | Noticeable shine | Shows some | Moderate |
| Gloss | 55 – 70% | High shine | Shows most | Less popular |
| High gloss | 70 – 90% | Mirror-like | Shows everything | Rare (bowling alleys, formal) |
Satin is the most popular choice in 2026. It provides enough sheen to show off the wood grain’s beauty while hiding the minor imperfections, dust nibs, and sanding marks that higher sheens amplify. Satin also hides everyday wear better than gloss — scratches and scuffs are less visible on a low-luster surface.
Matte is gaining popularity rapidly. It creates a natural, raw-wood look that’s very contemporary. Matte finishes hide scratches and wear better than any other sheen. The trade-off is that matte can look “flat” or “dull” to homeowners accustomed to higher sheens.
Semi-gloss and gloss create a traditional, formal look and make colors appear richer and deeper. However, they show every scratch, dust particle, and application imperfection. Gloss finishes require near-perfect sanding and application technique to look good.
For more on staining before applying polyurethane, see our wood floor stain guide.
Sanding Between Coats
Light sanding (screening) between coats of polyurethane for floors serves two purposes: it creates a mechanical bond for the next coat to adhere to, and it removes dust nibs, bubbles, and minor imperfections from the previous coat.
When to sand between coats:
- Always sand between coats if you’ve exceeded the recoat window (24 hours for oil-based, 4+ hours for most water-based)
- Always sand between coats if you see dust nibs, bubbles, or imperfections in the dried coat
- Some professionals sand between every coat as standard practice for the best possible finish quality
When you can skip sanding:
- If you’re within the recoat window and the previous coat looks clean and smooth, the chemical bond is sufficient without sanding
- If using a two-component water-based product that chemically cross-links between coats
How to sand between coats:
- Use a floor buffer with a 220-grit screen pad or a maroon abrasive pad
- The goal is to lightly scuff the surface — not remove material. A few passes with the buffer is sufficient
- Vacuum all dust thoroughly after screening
- Tack the floor with a slightly damp microfiber cloth to remove any remaining particles
- Allow the tacked surface to dry completely before applying the next coat
Recoating Old Polyurethane
If your existing polyurethane finish is worn but the wood underneath is in good condition, you may be able to recoat without a full sanding and refinish. This process is called a “screen and recoat” or “buff and recoat.”
When recoating works:
- The existing finish is polyurethane (not wax, shellac, or varnish)
- Wear is limited to the finish layer — the bare wood is not exposed
- No deep scratches, stains, or discoloration that require sanding to remove
- The existing finish is clean and free of silicone or wax-based cleaners (which prevent adhesion)
Screen and recoat process:
- Clean the floor thoroughly — any contaminant can cause adhesion failure
- Screen the entire floor with a 120 to 150-grit screen pad on a buffer
- Vacuum and tack the floor
- Apply one to two coats of polyurethane matching the existing type (oil over oil, water over water — or water over oil after proper preparation)
Cost: A screen and recoat costs $1 to $2.50 per square foot — 50% to 70% less than a full refinish.
Explore more about hardwood flooring care and maintenance in our comprehensive guide.
Common Mistakes to Avoid
These mistakes ruin more polyurethane for floors projects than anything else.
- Applying too thick: Thick coats trap solvents, creating bubbles, cloudiness, and extended dry times. Two thin coats are always better than one thick coat.
- Not maintaining a wet edge: If a partially dried edge overlaps with fresh polyurethane, you get a visible lap mark — a dark, raised line in the finish. Keep the edge wet by working quickly and systematically.
- Skipping the vacuum between coats: Dust from screening settles into the fresh coat, creating nibs (tiny bumps) throughout the finish. Vacuum and tack meticulously before every coat.
- Ignoring temperature and humidity: Applying polyurethane in cold, humid, or poorly ventilated conditions leads to slow drying, milky discoloration (water-based), and adhesion failure.
- Using the wrong roller or applicator: Standard paint rollers create bubbles and orange-peel texture. Use only applicators designed for floor finishes.
- Shaking the can: Shaking polyurethane introduces air bubbles that transfer to the finish. Stir gently — never shake.
- Walking on the floor too soon: Premature foot traffic leaves permanent marks and scuffs in the partially cured finish. Wait the full recommended time for each milestone.
- Placing rugs before full cure: Rubber-backed rugs placed on uncured polyurethane can chemically bond to the surface, tearing the finish when removed. Wait 30 days for oil-based, 14 to 21 days for water-based.
Cost Comparison
| Product | Cost per Gallon | Coverage per Gallon | Cost per Sq Ft (3 Coats) |
|---|---|---|---|
| Oil-based polyurethane (Minwax, Varathane) | $35 – $55 | 400 – 500 sq ft | $0.20 – $0.40 |
| Water-based polyurethane (Bona, Basic Coatings) | $45 – $70 | 400 – 500 sq ft | $0.25 – $0.50 |
| Water-based 2K (Bona Traffic HD, Loba 2K) | $80 – $130 | 400 – 500 sq ft | $0.50 – $0.95 |
| Professional application (labor + material) | — | — | $1.50 – $3.00 |
Frequently Asked Questions
How many coats of polyurethane should I put on a hardwood floor?
Three coats is the professional standard for residential hardwood floors. Two coats is the absolute minimum but will wear through faster in high-traffic areas. Four coats are recommended for water-based polyurethane in high-traffic spaces like hallways and kitchens.
Is oil-based or water-based polyurethane better for floors?
Neither is universally better. Oil-based provides a warm amber tone, slightly more durability per coat, and easier application but has strong odor and long dry times. Water-based is crystal clear, fast-drying, low-odor, and better for light-colored stains. Most professionals in 2026 lean toward water-based for its speed and environmental profile, with oil-based reserved for traditional warm-toned floors.
How long does polyurethane take to dry between coats?
Oil-based polyurethane needs 12 to 24 hours between coats. Water-based needs 2 to 4 hours between coats. These times assume temperatures of 65°F to 75°F and moderate humidity. Cold or humid conditions extend dry times significantly.
Can I apply water-based polyurethane over oil-based?
Yes, but the existing oil-based finish must be fully cured and properly prepared. Screen the floor with a 120 to 150-grit pad, clean thoroughly, and ensure no wax or silicone residue is present. Water-based polyurethane adheres well to properly prepared oil-based surfaces. You cannot apply oil-based over water-based.
What sheen should I choose for hardwood floors?
Satin (25% to 40% reflectance) is the most popular and recommended choice. It shows off the wood grain while hiding minor imperfections and daily wear. Matte is increasingly popular for a natural, contemporary look. Semi-gloss and gloss are beautiful but show every scratch and dust particle.
Do I need to sand between coats of polyurethane?
If you’re applying the next coat within the manufacturer’s recoat window, sanding is optional but recommended for the best adhesion. If you’ve exceeded the recoat window, sanding (screening with 220-grit) is mandatory for proper adhesion. Always sand between coats if you see dust nibs or imperfections.
The Finish Makes the Floor
The quality of your polyurethane for floors application determines how your hardwood looks and performs for the next decade. Choose the right type for your goals (oil for warmth, water for clarity), apply three coats with proper technique and dry time, and respect the cure period. A properly applied polyurethane finish transforms raw wood into a beautiful, protected floor that handles daily life with grace.
Prefer to explore on your own?
See how new flooring looks in your actual room in seconds — free, no signup.
Try the free Floor Studio →