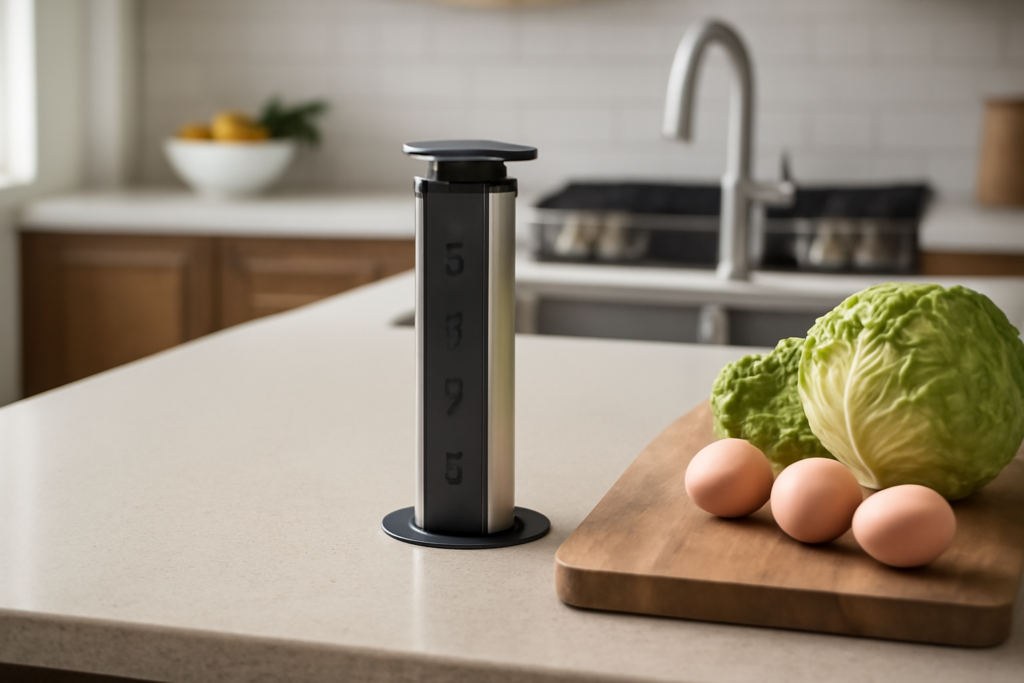
A pop up outlet for kitchen island solves a problem every island has: you need power out there for the blender, the phone charger, and the laptop, but nobody wants a clunky outlet box breaking up the side of a beautiful waterfall counter. A pop-up unit hides flush in the countertop and rises up when you need it, then drops back down out of sight when you are done. I install these on most island jobs now, and homeowners love that they get convenient power without staring at a receptacle on the cabinet face. There is a catch worth knowing up front, though: electrical code has specific rules about island power, and not every pop-up unit satisfies them by itself.
This guide covers the types of pop-up outlets, the code and safety rules you cannot skip, how installation works, and what to look for when you buy.
Why an Island Needs Its Own Power
Islands are where a lot of kitchen work happens, prepping, mixing, charging devices, running a stand mixer, so power there is genuinely useful rather than a luxury. The trouble is that an island floats in the middle of the room with no wall behind it, so the only traditional place to put an outlet is on the side of the cabinet, low and awkward, where cords drape across the floor and the receptacle collects splatter.
A pop-up outlet mounted in the countertop puts power right at the work surface, up where you use it, and hides it completely when retracted so it does not interrupt the clean lines of the stone. For a modern island, especially one with a waterfall edge or a seating overhang, a flush pop-up is often the only way to add power without ruining the look.
Types of Pop-Up Outlets
Pop-up units come in a few mechanisms and configurations, and the right one depends on your counter material and how you will use it:
- Manual push-to-pop: you press the top and it springs up, then push it back down to retract. Simple, reliable, and the most affordable, with no motor to fail.
- Motorized rise: a touch or button raises and lowers the unit on a small motor. Sleek and effortless, but pricier and dependent on a working motor.
- Slide-out or tilt-up styles: variations that emerge at an angle or slide horizontally, useful in shallow counters.
- Configuration: most units offer two or three standard outlets, and many now include USB-A and USB-C charging ports built in, which is worth having so phones and tablets charge without a bulky adapter hogging a receptacle.
For most kitchens I recommend a manual push unit with two outlets plus USB-C, it covers the real use cases, has nothing to break, and costs far less than a motorized model.
Code and Safety Rules You Cannot Skip
This is the part that trips up DIYers, and it matters because it is about fire and shock safety. Two rules govern kitchen island power under modern electrical code:
- GFCI protection is required. Any receptacle serving a kitchen countertop, including a pop-up, must be GFCI protected, either the pop-up itself is GFCI, or it is fed from a GFCI breaker or an upstream GFCI device. This is non-negotiable near water.
- Listing and location. A key detail changed in recent code cycles: for a receptacle to count as a required countertop outlet, it generally must not be a pop-up that is installed face-up in the horizontal surface, because debris and liquid can fall in. Many jurisdictions require the code-mandated island receptacle to be a proper installation, with the pop-up serving as an added convenience rather than the one that satisfies the requirement.
Because the rules vary by code edition and local amendments, confirm with your local electrical inspector or a licensed electrician before you rely on a pop-up as your island’s only power. Also verify the unit is UL listed and rated for countertop use, and that any model near a sink is protected against splashes.
How Installation Works
Physically, installing a pop-up outlet means cutting a hole in the countertop and running a circuit to it, and the difficulty depends heavily on the counter material and whether the circuit already exists.
- Confirm you have or can run an appropriate circuit to the island, kitchen countertop receptacles are typically served by 20-amp circuits on 12-gauge wire, and GFCI protection must be in the path.
- Choose the location on the counter, clear of the sink and cooktop and where the retracted unit will not sit under a heavy appliance.
- Cut the hole to the manufacturer’s specified diameter. In stone counters, quartz or granite, this is a job for a fabricator or a pro with a diamond hole saw and water, cutting stone dry or wrong will crack it. In wood or laminate, a careful DIYer can do it.
- Run the cable up through the cabinet and island base to the opening, following code for support and connections.
- Wire the unit, either to a GFCI breaker or with the GFCI in the unit or an upstream device, and secure it in the counter opening per the instructions.
- Test the GFCI function with the built-in test button before you call it done.
The wiring and the code compliance are where most homeowners bring in a licensed electrician, and honestly should, an island circuit is one of the more scrutinized parts of a kitchen inspection. Cutting stone is the other pro-level step. Many people handle the cabinetry and hand the electrical and the stone cut to the trades.
What to Look For When Buying
Not all pop-up outlets are equal, and a few features separate the good ones from the ones you will regret:
- UL listing and a clear rating for countertop or kitchen use, skip anything unlisted.
- Built-in GFCI or clear compatibility with a GFCI feed, so you can meet code cleanly.
- USB-A and USB-C ports, ideally with enough wattage, 20 watts or more on the USB-C, to fast-charge a phone or tablet.
- A splash-resistant or gasketed seal so crumbs and liquid do not drop into the mechanism when it is closed.
- Solid metal construction and a smooth mechanism, cheap plastic units feel flimsy and stick over time.
- A finish that matches your faucet and hardware, black, stainless, and brushed nickel are the common options.
Cost and Whether It Is Worth It
Pop-up outlet units run $40 to $150 for a good manual model with USB, and $150 to $350 for a motorized unit with more ports and premium finishes. On top of the unit, budget for the electrical work, running a new 20-amp GFCI-protected circuit to an island can run $200 to $600 with an electrician depending on the distance to the panel and how open the floor and cabinetry are. If the counter is stone, add the fabricator’s charge for the cutout.
Is it worth it? For an island you actually work at, absolutely. The convenience of power at the surface, clean lines when it is down, and integrated device charging is exactly what a modern island wants. The one thing I will repeat, because it is the mistake people make, is do not treat a pop-up as a shortcut around code. Confirm the GFCI protection and the local requirements first, use a listed unit, and get the electrical done right. Done properly, a pop-up outlet for a kitchen island is one of those upgrades you use every single day and never think twice about.
Placement, Cleaning, and Living With It
Where you put the pop-up on the island matters more than people expect, because you have to live with it retracted as well as raised. Keep it out of the primary food-prep zone where you chop and where liquids splash, and away from the cooktop if the island has one. A good spot is toward one end near where you would set a laptop or charge a phone, or on the seating side where guests plug in. Avoid placing it where a heavy stand mixer or a bulky appliance would sit directly on top of the closed lid, both for looks and to keep debris from being ground into the seam.
Cleaning is the practical downside of any horizontal-surface outlet. Even a well-gasketed unit has a seam where crumbs and liquid can collect, so wipe around and into the lid when you clean the counter, and periodically raise the unit to clear anything that has worked its way into the recess. This is exactly why code steers you away from relying on a face-up pop-up as your only required receptacle, water and food finding their way in is a real concern, and it is why the better units invest in splash-resistant seals. Treat the pop-up as a convenience outlet and keep a properly located, code-compliant receptacle handling the requirement, and you sidestep the issue entirely.
Finally, think about the cords. The whole appeal of a pop-up is a clean island, so route charging cables and appliance cords thoughtfully rather than draping them across the prep surface. Some units include an integrated cord channel or come paired with under-counter management. A little planning here preserves the clean look that made you want a hidden outlet in the first place. Placed sensibly, sealed well, and kept clean, a pop-up outlet turns the dead center of your kitchen into usable, charge-anything workspace without a single visible receptacle marring the island.