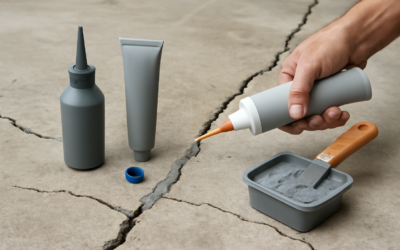
A thin dark line snaking across the bottom of your basin is rarely a plumbing emergency, but it is a warning. Porcelain sink crack repair is one of those projects that looks intimidating and turns out to be forgiving, provided you match the fix to the damage. A surface hairline can be sealed in an afternoon with a kit from the hardware store. A structural crack that flexes when you press it is a different animal, and pretending otherwise just wastes epoxy. This guide walks through both, plus the honest point where replacement beats repair.
Part of our Tile & Grout guide — explore the full guide →
Hairline Cracks vs. Structural Cracks
Before you buy anything, figure out what you are dealing with. The two categories behave completely differently, and the wrong repair on the wrong crack fails within weeks.
A hairline crack sits in the glaze. It is cosmetic, often shorter than 2 inches, and does not go all the way through the porcelain or the cast iron and steel body beneath it. Run a fingernail across it. If your nail glides over with only a faint catch, you are almost certainly looking at surface crazing. These are ideal DIY candidates because water is not passing through the sink wall.
A structural crack is the one that keeps you up at night. It penetrates the full thickness of the material, sometimes leaking underneath into the cabinet. Press gently on either side with your thumbs. Any visible movement, springiness, or a crack that widens under pressure means the substrate itself has failed. Epoxy can slow that down, but it will not restore strength, and a sink that flexes will crack the repair open again.
What You Need for the Job
The supply list stays short. Most homeowners already own half of it.
- A porcelain repair kit or two-part epoxy rated for wet areas
- Fine-grit sandpaper, 400 to 600 grit
- Acetone or denatured alcohol for degreasing
- Painter’s tape to mask the edges of the crack
- A plastic putty knife or applicator stick
- Color-matched touch-up glaze or enamel, white or almond in most cases
- Clean lint-free rags and disposable gloves
Dedicated porcelain repair kits from brands like Magic Touch Up and Devcon bundle the epoxy and a small color range together, which saves the frustration of trying to tint filler by eye. If your basin is an off-white or a discontinued shade, buy a kit with a mixing option so you can nudge the tone closer to a match.
Repairing a Hairline Crack Step by Step
This is the version most readers came here for, and it is genuinely straightforward.
Start bone dry. Empty the sink, wipe it down, and give the porcelain at least a couple of hours to lose surface moisture. Trapped water under the repair is the number one reason a fix bubbles up and peels later. Next, scuff the crack lightly with the fine sandpaper. You are not trying to grind it out, just roughen the glaze so the epoxy grips. Wipe the dust away, then swab the area with acetone to strip any soap film or skin oil.
Mix a small amount of the two-part epoxy on a scrap of cardboard. Work fast, because most formulas start to set within five minutes. Press it into the crack with the plastic knife, forcing the material down rather than smearing it across the surface. Scrape the excess flush and pull the painter’s tape while the epoxy is still soft. Let it cure the full time on the label, usually 24 hours, before you run water. Once hard, sand the patch level with 600 grit and apply the color glaze in thin coats, letting each dry before the next.
Tackling a Deeper or Chipped Area
Chips around the drain or a corner that took a dropped pan need a slightly heavier hand. Build the repair up in layers rather than trying to fill a deep void in one pass, which sags and traps air. Feather each layer past the edge of the damage so the final surface blends instead of forming a raised island. For chips that expose bare metal, a rust-inhibiting primer under the epoxy stops corrosion from creeping back and lifting your work months down the road.
When to Replace Instead of Repair
Good judgment here saves money and a soaked cabinet. Any of the following tips the scale toward replacement:
- The crack runs the full length of the basin or crosses the drain hole
- Water is visibly leaking into the cabinet below
- The porcelain flexes or you can feel the two sides move independently
- Rust is spreading under the glaze from a steel or cast-iron core
- You have already patched the same spot and it reopened
A drop-in bathroom sink often costs less than $80, and a basic kitchen sink not much more, so pouring hours into a compromised structural crack rarely pencils out. Repair buys time and cosmetics; it does not resurrect a failed body.
Honest Limits of a DIY Fix
Set expectations before you start. A well-done epoxy repair is watertight and can last for years, but it is almost never invisible up close. Under bright bathroom lighting you may still catch the ghost of the original line. The color glaze also wears differently than fired porcelain, so an area that sees heavy scrubbing may dull faster than the surrounding basin. None of that is a failure of technique; it is simply the ceiling of what surface products can do outside a factory kiln.
The other honest limit is chemistry. Epoxy hates two things: moisture during cure and abrasive cleaners afterward. Keep the sink dry for a full day, then switch to gentle, non-scouring cleaners on the repaired zone permanently. Treat the patch with a little care and a proper porcelain sink crack repair will hold. Abuse it with steel wool and bleach gels and even a perfect application will chalk and fail early.
Matching the Color
Color is where most DIY repairs give themselves away, so it deserves a little patience. Pure bright white is the easiest to match; the trouble starts with the almonds, biscuits, and off-whites that dominated bathroom fixtures from the 1980s and 1990s. Test your touch-up glaze on an inconspicuous spot, like the underside of the rim, before you commit it to the visible patch. Let it fully dry first, because most enamels shift a shade as they cure and a match that looks perfect while wet can read too gray or too yellow once hard.
If your kit includes tint bases, mix in tiny increments and keep notes on the ratio so you can reproduce the blend. Thin coats always beat one thick coat: they cure harder, level better, and let you sneak up on the color gradually. When the surrounding porcelain has yellowed with age, aim to match the aged tone rather than the original factory white, or your fresh patch will stand out as the one bright spot on the sink.
Preventing the Next Crack
Most cracks are impact damage, not age. A rubber sink mat absorbs the shock of dropped mugs and cast-iron skillets, which is where kitchen basins take their worst hits. Avoid pouring boiling water directly onto cold porcelain, since the sudden thermal swing is exactly what causes crazing in the first place. Tighten a wobbly faucet or a loose mounting clip early, because a sink that shifts under load concentrates stress along the same lines that eventually split. A few small habits keep you out of a repeat repair entirely.
It also pays to catch trouble early. A faint hairline you seal today is a ten-minute job; the same crack ignored for a year can wick water into a steel or cast-iron core, spread rust under the glaze, and turn a cosmetic fix into a full replacement. Give the basin a quick once-over when you clean it, run a fingernail over any suspicious line, and deal with small damage while it is still small. That single habit is the difference between an occasional touch-up and shopping for a new sink.