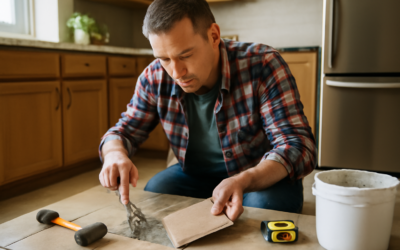
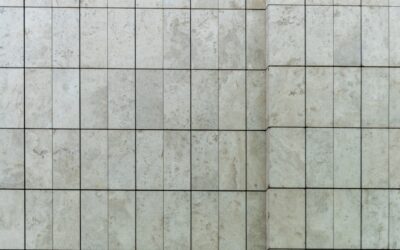
A chip on the front edge of a marble counter feels like a disaster, but it’s one of the most repairable flaws in natural stone. Marble countertop repair relies on the same method pros use: fill the damage with a tinted epoxy or knife-grade stone adhesive, level it flush with a razor blade, then hone and polish until the patch disappears into the surrounding stone.
Part of our Countertops guide — explore the full guide →
For a small chip or a hairline crack, you can do this yourself in an afternoon with a marble repair kit, a razor, and a few grits of sandpaper. The key is color matching. Marble isn’t one flat color, so a good patch is slightly translucent and tinted to the background tone, not to the veins. Structural cracks that run through the slab, or pieces that have fully broken off, are a different job and usually need a stone fabricator.
- Marble Countertop Repair: Assessing the Damage
- Tools and Materials
- Step-by-Step: How to Repair a Chipped Marble Countertop
- Fixing a Hairline Crack or a Crack in a Marble Table
- Troubleshooting Common Repair Problems
- Cost Ranges for Marble Repair
- When to Call a Stone Professional
- Frequently Asked Questions
The same techniques work for marble tables, vanity tops, and fireplace surrounds. Before you start, clean the area with a pH-neutral stone cleaner only. Acidic cleaners such as vinegar, lemon, or many bathroom sprays etch marble and will leave a dull ring around your repair.
Marble Countertop Repair: Assessing the Damage
Look closely under raking light, holding a flashlight low and nearly parallel to the surface. That shows you what you’re really dealing with.
- Edge chips: The most common damage, caused by pots, bottles, and dishwasher racks bumping the counter lip. Easy to fill.
- Surface pits: Small craters where softer mineral wore out. Fill like a chip.
- Hairline cracks: Thin lines, often near sinks or cooktop cutouts. If the two sides are level and don’t move, they can be filled with a thin, penetrating adhesive.
- Open or offset cracks: If one side sits higher than the other, or you can feel movement, the slab may lack support. That’s a call for a pro.
- Etching: Dull, cloudy spots from acids aren’t chips. They need polishing powder, not filler.
If you still have the broken chip, keep it. Reattaching the original piece with clear epoxy often gives the most invisible result when you fix a chipped marble countertop.
Tools and Materials
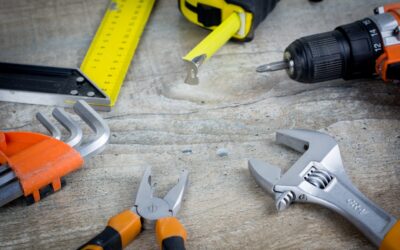
- Marble repair kit, or two-part clear epoxy or knife-grade polyester stone adhesive
- Stone tinting pigments (white, black, brown, and yellow ochre cover most marble)
- Single-edge razor blades and a plastic or metal putty knife
- Painter’s tape
- Acetone and lint-free cloths
- Wet/dry sandpaper in progressive grits, or diamond hand pads
- Marble polishing powder or polishing compound
- Penetrating stone sealer
- Nitrile gloves, safety glasses, and good ventilation
A kit made for natural stone bundles the adhesive, hardener, and tints, which is the simplest way to start if you only have one or two chips.
Step-by-Step: How to Repair a Chipped Marble Countertop
- Clean the area. Wash with a pH-neutral stone cleaner, rinse, and dry. Wipe the chip with acetone to remove grease and old sealer so the adhesive bonds.
- Protect the surrounding stone. Tape around the chip, leaving a small margin. This keeps adhesive off the polished surface.
- Mix and tint the filler. Mix a small batch of epoxy or adhesive on a scrap surface. Add pigment a tiny amount at a time. Match the background color of the stone, and keep it slightly lighter and translucent, since most fillers darken a little as they cure. Test a dab on tape next to the chip.
- Fill the chip. Press filler into the chip with a putty knife, working out air bubbles. Overfill slightly so it stands proud of the surface. On a vertical edge, build it up in thin layers or tape a small dam to hold it.
- Add veining if needed. If a vein runs through the chip, drag a toothpick with darker tinted adhesive through the wet fill to continue the line.
- Level with a razor. Once the filler reaches a rubbery, partly cured state, hold a razor blade nearly flat and shave off the excess. Leave just a hair above the stone.
- Let it cure fully. Follow the product’s cure time. Rushing this step causes gummy sanding and a cloudy patch.
- Hone flush. Wet-sand with progressively finer grits, keeping the paper flat on a small block. Stop when the patch is perfectly level with the stone.
- Polish to blend. Work polishing powder with a damp cloth or buffing pad until the sheen matches. Honed marble needs less polishing than a high-gloss top.
- Seal. Apply penetrating sealer to the area, wait as directed, and buff off the excess.
Fixing a Hairline Crack or a Crack in a Marble Table
Hairline cracks call for a thinner approach. Clean the crack with acetone and let it dry fully. Use a low-viscosity clear or lightly tinted epoxy that wicks into narrow gaps. Run it along the crack, press it in with a razor, and let gravity and capillary action pull it deep. Scrape and polish just as you would a chip.
To fix a marble table, look underneath first. Tables often crack because the top flexes over an unsupported span or an uneven base. Shim the base level and add support if needed, or the crack will reopen. A crack in a marble table that runs completely through the slab can sometimes be repaired from below with a reinforcing strip and epoxy, but that’s best left to a stone restorer.
When you repair a marble table, work in good light and keep your fill thin. A table top is viewed from every angle, so a patch that looks fine from above can show from the side if it’s too opaque.
Troubleshooting Common Repair Problems
- Patch looks too dark: Fillers darken when they cure. Start lighter next time, or remove the patch with a razor and heat and redo it.
- Patch looks flat and chalky: You stopped at a coarse grit. Continue through finer grits and polish again.
- Dull ring around the repair: Either the sanding went too wide or an acidic cleaner etched the stone. Polish the ring with marble polishing powder.
- Air bubbles show: Press the filler in harder, or apply a second thin layer after the first cures and hone again.
- Filler won’t harden: The mix ratio was off. Scrape it out, clean with acetone, and mix a fresh batch carefully.
- Chip reappears after weeks: The bond failed because of grease or sealer in the chip. Clean more thoroughly before refilling.
Cost Ranges for Marble Repair
DIY marble countertop repair is inexpensive. A stone repair kit or a small tube of epoxy plus pigments usually costs less than a nice dinner out, and polishing powder and sealer add a modest amount. If you already own sandpaper and razor blades, the total is small.
Professional stone restoration costs more because you’re paying for a trip charge and skilled color matching. A single chip repair is typically a modest service call, while multiple chips, crack repair, or a full hone-and-polish of the countertop runs higher. Refinishing an entire kitchen of marble is a larger project priced by square footage. Replacing a slab is by far the most expensive option, which is why repairing a chipped marble countertop almost always makes financial sense.
When to Call a Stone Professional
Hire a stone restoration pro when a crack is wide, offset, or growing, when a piece has broken completely off an edge or a sink cutout, or when the marble has rare veining you can’t match. Call one too if the countertop shows widespread etching and dullness, since pro diamond honing equipment levels large areas far faster and more evenly than hand pads.
A fabricator should also check any crack near an undermount sink. Those often signal failing support underneath, and a patch alone won’t hold if the stone keeps flexing.
Frequently Asked Questions
Can you fix a chip in marble so it’s invisible?
Often, yes. A well-tinted, slightly translucent epoxy that’s leveled with a razor and polished to the same sheen can be very hard to spot, especially on busy veined marble. Solid white marble is less forgiving.
What is the best filler to fix a marble chip?
Clear two-part epoxy or knife-grade polyester stone adhesive, tinted with stone pigments, works best. A marble repair kit packages these together with instructions.
Can I use vinegar to clean marble before a repair?
No. Vinegar and other acidic cleaners etch marble and leave dull spots. Use a pH-neutral stone cleaner and acetone to prep the chip.
How do I fix a crack in a marble table?
Clean the crack, wick in a thin clear epoxy, scrape flush, and polish. Check the base and add support first, because cracks in tables often come from flexing.
Do I need to reseal marble after a repair?
Yes. Sanding and polishing remove sealer around the patch, so apply a penetrating stone sealer to the area once the repair has fully cured.