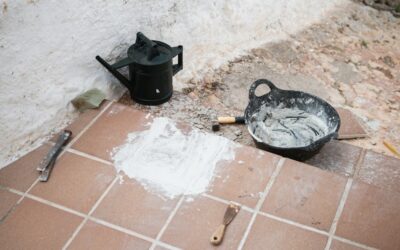
A single cracked tile or a patch of crumbling grout can make an entire floor look neglected, and left alone it invites water damage underneath. Tile repair is one of the most satisfying DIY fixes because the damage is usually localized, the materials are cheap, and a careful repair is nearly invisible. The key is diagnosing what actually failed, the tile, the grout, or the substrate beneath, because fixing the wrong thing means the problem comes right back.
Part of our Tile & Grout guide — explore the full guide →
This guide covers the common failures, how to replace a broken tile, how to renew grout, and when a small repair is really a sign of a bigger structural issue.
Diagnose the Real Problem First
Before you grab a chisel, figure out why the tile failed. A tile that cracks straight down the middle with no impact point often signals movement in the subfloor, and replacing it without fixing the flex just sets you up for another crack. A tile that came loose but is intact usually means the original mortar bond failed. Crumbling grout points to age, moisture, or the wrong grout used originally.
Tap suspect tiles with a coin. A solid sound means good adhesion; a hollow click means the tile has debonded from the substrate and may need to come up.
Replacing a Single Cracked Tile
Swapping out one broken tile is the classic repair, and with patience it blends in perfectly. Work slowly to avoid damaging neighboring tiles.
- Scrape out the grout around the damaged tile with a grout saw or oscillating tool.
- Score an X across the tile and break it from the center out with a hammer and cold chisel, wearing eye protection.
- Remove all the old mortar from the cavity so the new tile sits flush.
- Spread fresh thin-set, back-butter the replacement tile, and press it level with its neighbors using spacers.
- Let it cure, then grout the joints to match.
Always keep a few spare tiles from any installation. Dye lots vary, and a perfectly matched replacement years later is nearly impossible to source.
Fixing Loose Tiles Without Removal
If a tile is loose but uncracked, you may be able to re-bond it without breaking it. For wall tile or a single hollow floor tile, carefully pry it up, clean the back and the substrate, apply fresh thin-set, and reset it. A discreet alternative for a hairline gap is to inject a tile-bonding adhesive through a grout-line opening, though this is a stopgap rather than a permanent fix.
Repairing and Renewing Grout
Grout problems are even more common than tile damage. For cracked or crumbling grout, rake out the old grout to a uniform depth with a grout saw, vacuum the dust, and apply fresh grout, pressing it fully into the joints with a rubber float. Wipe the haze with a damp sponge after it firms up.
If the grout is sound but just stained and dingy, a deep clean or a grout colorant can refresh it without full replacement. Once cured, seal cement-based grout to resist future staining and moisture, especially in wet areas.
Repairing Chips and Hairline Cracks
Small chips on the surface of a glazed tile can be filled rather than replaced. A two-part epoxy filler or a color-matched touch-up glaze, available at most hardware stores, blends a chip so it disappears from a few feet away. Clean the chip, fill it slightly proud, level it once tacky, and let it cure fully.
This approach works for cosmetic damage only. A crack that goes through the body of the tile cannot be reliably filled and should be replaced.
Tools and Materials to Have on Hand
Having the right gear makes tile repair go smoothly and prevents collateral damage. For a basic single-tile job you will want:
- Grout saw or oscillating multi-tool to remove grout
- Cold chisel and hammer, plus a putty knife or margin trowel
- Eye protection and work gloves for breaking out the old tile
- Thin-set mortar matched to your tile type and tile spacers
- Replacement grout, a rubber float, and a sponge
- A small notched trowel for spreading mortar in the cavity
Buy grout in the same color and type as the existing joints. If you cannot match it exactly, regrouting the whole area sometimes blends better than a single mismatched patch.
Preventing Future Damage
Most repeat tile failures trace back to causes you can address. Movement is the biggest one: a subfloor that flexes will keep cracking tiles until it is stiffened, so add bracing or an uncoupling membrane in chronic problem areas. Use felt pads under heavy furniture, place mats at entries to catch grit, and avoid dropping heavy items on tile floors.
Keeping grout sealed and intact also protects the tiles, because water that seeps through failed grout undermines the bond and the substrate below. A few minutes of grout maintenance a year prevents far larger repairs down the road.
Cost and When to Call a Pro
A DIY single-tile replacement costs little beyond a spare tile and a small bag of thin-set and grout, often under $30. A pro typically charges a minimum service fee for a small repair, frequently $150 to $400 depending on access and matching. Regrouting a room is more labor-intensive and priced by square footage.
Call a professional when multiple tiles crack in a line, when the floor flexes underfoot, or when you find soft, water-damaged subfloor beneath the tile. Those point to a substrate failure that surface tile repair cannot solve. Fix the underlying movement or moisture first, then the new tile will last. Trying to repair tile over a flexing or wet subfloor simply wastes your materials, because the same forces that broke the first tile will crack its replacement within months. Diagnosing correctly the first time, deciding whether you are dealing with a surface problem or a structural one, is what separates a repair that disappears for good from one you find yourself redoing season after season. Take the extra few minutes to tap the surrounding tiles, inspect the grout, and check the floor for flex before you start, and you will know whether the fix in front of you is a simple cosmetic swap or the first sign of something that needs to be addressed underneath.
Prefer to explore on your own?
See how new flooring looks in your actual room in seconds — free, no signup.
Try the free Floor Studio →