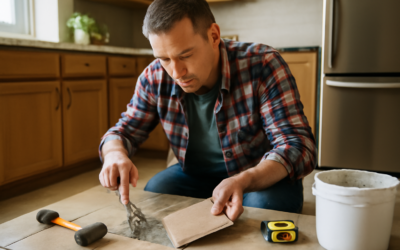
A cracked tile does not always mean tearing up the floor. Hairline cracks can be filled in minutes. Single broken tiles can be swapped out in an afternoon. The repair method depends on the crack type, the tile material, and whether the underlying cause has been addressed — because patching a tile while ignoring the reason it cracked guarantees the problem returns.
Part of our Tile & Grout guide — explore the full guide →
Why Tiles Crack
Understanding the cause helps you decide whether a repair will hold or whether a bigger fix is needed.
- Impact: Dropping a heavy object. This cracks the tile but not the substrate. Repair is straightforward.
- Subfloor deflection: The subfloor flexes underfoot and the rigid tile cannot accommodate the movement. Common when the subfloor is too thin for the joist spacing or when cement board was not used. Fixing the tile without stiffening the subfloor means it will crack again.
- Settling: Foundation or slab settling creates stress on the tile above it. Cracks from settling often run in straight lines across multiple tiles.
- Improper installation: Insufficient thinset coverage (hollow spots underneath) leaves tiles unsupported. Tapping the tile and hearing a hollow sound confirms this. These tiles need to be removed and reinstalled, not just patched.
- Temperature and moisture changes: Concrete slabs expand and contract. Without expansion joints in the tile layout, this movement cracks tiles, typically near walls and transitions.
Repairing Hairline Cracks
Hairline cracks are thin surface cracks where the tile has not separated or shifted. The tile is still firmly bonded to the substrate and there is no loose movement when pressed.
Method 1: Epoxy Fill
- Clean the crack with rubbing alcohol on a cotton swab to remove dirt and grease.
- Mix a small amount of two-part clear epoxy (5-minute epoxy works well for this).
- Apply the epoxy into the crack using a toothpick or syringe. Work slowly to fill the crack without overfilling.
- Wipe excess epoxy off the tile surface immediately with a cloth dampened with rubbing alcohol. Cured epoxy is extremely difficult to remove.
- Let cure 24 hours before regular use.
For colored tiles, you can tint the epoxy with a tiny amount of acrylic paint to match the tile color. Alternatively, use a color-matched epoxy repair kit designed for tile.
Method 2: Nail Polish (Temporary Fix)
Clear nail polish or nail polish that matches the tile color fills hairline cracks effectively as a temporary measure. Apply a thin line of polish into the crack, wipe excess, and let dry. This is not a permanent solution but makes the crack less visible until you can do a proper repair.
Method 3: Porcelain Touch-Up Paint
For white or solid-colored porcelain and ceramic tiles, porcelain repair paint (like Porc-A-Fix or the Rust-Oleum Specialty Tub & Tile Repair) fills and seals hairline cracks. These products are color-matched to common tile and fixture colors.
- Cost: $8 to $15 per bottle
- Best for: White, almond, bisque, and other solid-colored tiles
- Limitation: Difficult to match patterned or multi-toned tiles
Repairing Major Cracks Without Replacing the Tile
If the tile has a significant crack but has not shifted (both pieces are flush and the tile is still bonded to the substrate), you can fill the crack for a more durable repair.
- Clean the crack thoroughly. Use a utility knife to carefully remove any loose fragments along the crack edges.
- Vacuum dust from the crack.
- Apply two-part epoxy (clear or color-matched) into the crack using a squeeze bottle or syringe.
- Press both sides of the crack together gently if there is any separation.
- Place painter’s tape along both sides of the crack to keep epoxy from spreading onto the tile face.
- Smooth the epoxy with a plastic spreader or damp finger.
- Remove tape before epoxy fully cures (within 30 minutes for 5-minute epoxy, or per product instructions for slower-setting types).
- Once cured, the repair can be painted with a matching touch-up paint for a less visible fix.
This method works but the crack will always be somewhat visible. For tiles in prominent locations (entryways, kitchen centers), replacement is a better option.
Replacing a Single Cracked Tile
Replacing one tile is a common DIY project. The key challenge is removing the damaged tile without cracking adjacent tiles.
Tools Needed
- Grout saw or oscillating multi-tool with a grout removal blade
- Cold chisel (narrow, 1/2 inch)
- Hammer
- Safety glasses and gloves
- Shop vacuum
- Notched trowel (1/4 x 1/4 inch for most wall tiles, 1/2 x 1/2 inch for floor tiles)
- Thinset mortar
- Matching grout
- Tile spacers
- Grout float
- Sponge
Step-by-Step Tile Replacement
- Remove the grout: Use a grout saw or oscillating tool to cut out all grout around the damaged tile. Cut all the way down to the substrate. This is the most important step — removing grout creates a buffer that protects surrounding tiles from damage during removal.
- Score an X on the tile: Using a glass cutter or carbide-tipped scoring tool, score a large X from corner to corner on the damaged tile. This helps the tile break inward rather than outward toward neighboring tiles.
- Break out the center: Place the chisel at the center intersection of the X and tap with the hammer. Start gently. The tile should crack along the scored lines and break inward.
- Remove pieces from center outward: Working from the center toward the edges, chip out tile pieces. Angle the chisel toward the center of the damaged tile, never toward adjacent tiles. Wear safety glasses — tile shards are sharp and fly unpredictably.
- Remove old thinset: Chisel the remaining thinset off the substrate. The surface should be reasonably flat and clean. If using cement board, be careful not to damage it.
- Dry-fit the new tile: Place the replacement tile in the opening to verify it fits. There should be a small gap on all sides for grout lines. If the new tile sits higher than surrounding tiles, you need to remove more old thinset. If it sits lower, you will build up with additional thinset.
- Apply thinset: Spread thinset on the back of the replacement tile (called back-buttering) using a notched trowel. For floor tiles, also apply thinset to the substrate for full coverage.
- Set the tile: Press the tile into position. Use spacers to maintain even grout lines with surrounding tiles. Push down and wiggle slightly to collapse the thinset ridges.
- Check level: Place a straightedge or level across the new tile and its neighbors. The replacement should be flush. Adjust by pressing down or adding thinset as needed.
- Let thinset cure: Do not walk on the tile or grout for 24 hours.
- Grout: Mix grout to match the existing grout color. Apply with a grout float, pressing into joints at a 45-degree angle. Wipe excess with a damp sponge after 15 to 20 minutes.
- Seal the grout (if using sanded grout): After the grout cures for 48 to 72 hours, apply grout sealer to protect against staining.
Matching Grout Color
Matching existing grout is often harder than matching the tile. Grout changes color as it ages, absorbs dirt, and weathers.
- Bring a sample: Chip out a small piece of existing grout and take it to the store for color matching.
- Test before committing: Mix a small batch and let it dry on a piece of cardboard. Wet grout looks different from cured grout — always wait for it to dry before judging the match.
- Custom mixing: You can mix two grout colors to get a closer match. Combine them dry before adding water.
- Grout stain: If you cannot match the color, consider applying grout stain or grout paint to all grout lines in the area for a uniform look. Products like Polyblend Grout Renew recolor grout without removal.
When to Replace vs Repair
- Repair (fill the crack): Hairline crack, tile is firmly bonded, crack is in a low-visibility area, you do not have a matching replacement tile.
- Replace the tile: Crack is wide or the tile has shifted, the tile is in a high-visibility area, you have matching tiles available, the tile sounds hollow when tapped.
- Call a professional: Multiple tiles are cracked in a pattern (suggests subfloor or structural issue), tiles are on a heated floor system, the substrate is damaged, or the tile is natural stone that requires special cutting.
Cost of Tile Repair (2026)
- DIY crack fill (epoxy): $5 to $15
- DIY tile replacement (one tile): $20 to $60 (thinset, grout, and tools if you do not own them)
- Professional single tile replacement: $150 to $400 depending on tile type and accessibility
- Professional multi-tile repair: $300 to $800 for 3 to 6 tiles
- Replacement tile: Keep leftover tiles from installation. Buying a single replacement tile later often means purchasing a full box ($20 to $80+), and the dye lot may not match exactly.
Preventing Future Tile Cracks
- Ensure the subfloor meets deflection standards (L/360 for ceramic, L/720 for stone) before installing tile.
- Use uncoupling membrane (like Schluter DITRA) over concrete and plywood substrates to absorb movement.
- Maintain proper thinset coverage — at least 85% on floors, 95% in wet areas.
- Include expansion joints at perimeters, transitions, and every 20 to 25 linear feet in large installations.
- Use throw rugs in areas where heavy objects are frequently handled (kitchens near the stove, workshop areas).
Prefer to explore on your own?
See how new flooring looks in your actual room in seconds — free, no signup.
Try the free Floor Studio →