Every concrete patio cracks eventually. That is not a defect, it is concrete behaving exactly as concrete behaves. The question with a cracked concrete patio is not whether you can stop the cracks, but whether the cracks you have are cosmetic or structural, and how to fix them before water works its way in and turns a hairline into a trip hazard. The good news is that most patio cracks are weekend DIY fixes that cost under $50 in materials.
Part of our Decks & Outdoor guide — explore the full guide →
Why Concrete Cracks in the First Place
Concrete is strong in compression, weak in tension, and shrinks as it cures. Standard 4-inch residential slab concrete shrinks roughly 1/16 inch per 10 feet during the first year, and that shrinkage has to go somewhere. Control joints cut into the surface tell the concrete where to crack, but joints that are too shallow or too far apart guarantee random cracking elsewhere.
Beyond shrinkage, freeze-thaw cycles are the biggest villain in northern climates. Water enters a hairline crack in October, freezes in December, expands 9 percent, and pries the crack wider. Repeat that 40 times over one winter and the crack doubles in width by spring.
Identifying the Type of Crack
Before you grab a bag of repair mortar, figure out what kind of crack you are dealing with. The repair approach changes dramatically.
- Hairline cracks under 1/16 inch wide: cosmetic, fixed with crack filler or sealer.
- Shrinkage cracks up to 1/4 inch: standard polyurethane or cement-based filler.
- Settlement cracks with one side lower than the other: slabjacking or mudjacking required.
- Heaving cracks with one side raised: frost heave or tree root pressure.
- Spiderweb cracks across a large area: alkali-silica reaction or poor original mix.
- Edge spalling where the surface flakes off: deicer damage or low-strength surface.
Repairing Hairline and Shrinkage Cracks
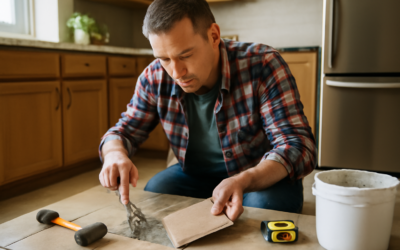
For cracks under 1/4 inch, the process takes under an hour. Clean the crack with a wire brush and shop vac to remove loose concrete and debris. Skip the pressure washer unless you can wait 48 hours for the concrete to dry completely. Moisture in the crack prevents most fillers from bonding.
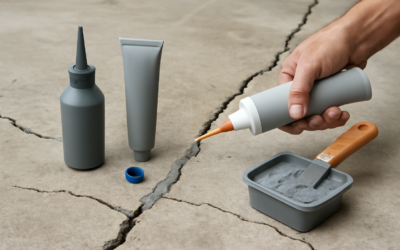
Quikrete Concrete Repair and Sikaflex Self-Leveling Sealant are the two products most pros reach for. Both squeeze from a caulk gun into the crack, self-level as they cure, and stay flexible so the next round of thermal movement does not reopen the repair. Tool the surface flush and walk away. Cost runs $8 to $14 per tube, and one tube handles 20 linear feet of 1/4-inch crack.
Wider Cracks and Structural Repairs
Once a crack opens past 1/2 inch, caulk-grade fillers no longer have enough body to support their own weight. Step up to a sand-mix patching compound or a two-part epoxy. Widen the crack slightly with a grinder or chisel, undercutting the edges so the patch locks mechanically into the concrete. This is called keying and it is what separates a repair that lasts 10 years from one that pops out in two.
For cracks that have allowed one side of the slab to drop lower than the other, filling the crack will not solve the problem. The slab needs to be re-leveled. Slabjacking pumps a cement slurry or polyurethane foam under the low side to raise it back to grade. Pros charge $500 to $1,500 for a typical patio depending on size and the number of lift points. DIY polyurethane kits exist for $150 to $300 but take practice to get right.
Dealing with Heaving and Root Damage
A patio that has heaved from frost or tree roots requires addressing the underlying cause before any surface repair holds. Tree roots within 10 feet of the slab are the usual suspects for single-point heaving. Cutting the root rarely works long-term because the tree simply sends a new one. The permanent solutions are removing the tree, installing a root barrier, or replacing that section of slab with pavers that tolerate movement.
Frost heave points to a base course problem. The original contractor either skipped compacted gravel under the slab or built the patio on expansive clay that swells when wet. The honest fix is demo and replacement with proper base prep. A patchwork approach buys two or three years at best.
Sealing to Prevent Future Cracks
A quality concrete sealer applied every 2 to 3 years cuts water absorption by 80 percent, which dramatically slows freeze-thaw damage. Siloxane and silane-based penetrating sealers soak into the concrete without changing the appearance. Acrylic topcoats add a slight sheen and enhance color but need more frequent reapplication.
Budget $0.25 to $0.60 per square foot for materials, so a 300-square-foot patio runs $75 to $180 in sealer. Apply with a pump sprayer or 3/8-inch nap roller on a dry day above 55°F with no rain forecast for 24 hours. Eagle Supreme Seal and Foundation Armor SX5000 are both solid choices that most homeowners can apply in an afternoon.
When to Replace Rather Than Repair
A patio with multiple structural cracks, significant settlement, or spalling across more than 25 percent of the surface is usually a replacement candidate rather than a repair project. The repairs will keep coming, and each one looks like a patch. Full slab replacement runs $6 to $12 per square foot for plain concrete, or $12 to $22 for stamped or colored. A 300-square-foot replacement lands at $1,800 to $3,600 for standard concrete.
If you are going to spend that money, consider whether concrete is still the right material. Paver patios cost slightly more up front but individual units can be lifted and reset when the base settles. Natural stone on a sand-set base offers the same advantage. Both outperform poured concrete in long-term lifecycle cost for climates with real freeze-thaw cycles.