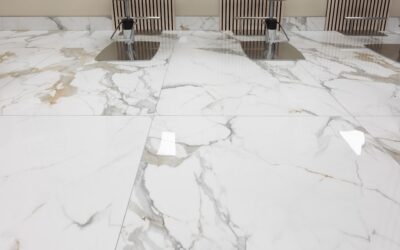
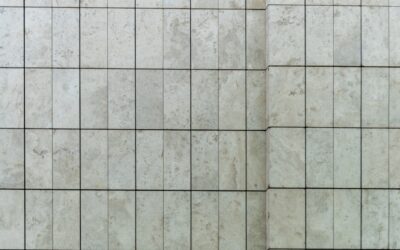
Porcelain tile sealer is one of the most misunderstood products in flooring, because most glazed porcelain tile does not actually need it, yet the grout between those tiles almost always does. Porcelain is fired at extremely high temperatures, around 2,200°F to 2,500°F, which makes it dense and nearly nonporous with a water absorption rate at or below 0.5 percent. That density is exactly why sealing the tile face is usually unnecessary, and knowing the difference saves you money and effort.
Part of our Tile & Grout guide — explore the full guide →
Understanding when porcelain tile sealer is genuinely useful, and when it is a waste, starts with the type of porcelain you have. Here is how to tell the difference and how to seal correctly when you do need to.
- Glazed vs Unglazed Porcelain
- The Water-Drop Test
- Why the Grout Almost Always Needs Sealing
- Types of Sealer to Know
- How to Apply Porcelain Tile Sealer
- How Often to Reseal
- Common Mistakes to Avoid
- Sealing Polished vs Textured Porcelain
- Products and What to Expect to Spend
- Troubleshooting a Hazy or Sticky Finish
Glazed vs Unglazed Porcelain
The single biggest question is whether your tile is glazed. Glazed porcelain has a hard, glass-like coating fired onto the surface. That glaze is impervious to water and stains, so sealing it does nothing; the sealer simply cannot penetrate and will sit on top or wear off. Most polished and glossy porcelain floor and wall tiles fall into this category and need no sealer at all.
Unglazed porcelain, including through-body porcelain and many textured, matte, or natural-stone-look tiles, has a more porous surface that can absorb liquids and stains over time. These tiles do benefit from a penetrating sealer. If you are unsure, do the water-drop test below.
The Water-Drop Test
Before you buy any sealer, test your tile. Drip a few drops of water onto a clean, unsealed area and wait 10 to 15 minutes. If the water beads up and wipes away with no change to the tile, the surface is nonporous and does not need sealing. If the water soaks in and darkens the tile, the surface is porous and a penetrating sealer will help protect it. Do the same test on the grout, which almost always absorbs water quickly.
Why the Grout Almost Always Needs Sealing
Here is the key point most homeowners miss. Even when the porcelain itself is sealed for life at the factory, standard cement-based grout is porous and soaks up water, spills, grease, and dirt like a sponge. Unsealed grout stains, harbors mildew, and darkens quickly, especially in kitchens, bathrooms, and entryways. Sealing the grout lines is the real reason most tile installations get a sealer at all. The exception is epoxy grout, which is naturally stain-resistant and does not require sealing.
Types of Sealer to Know
Choosing the right product matters:
- Penetrating (impregnating) sealer: Soaks into porous surfaces and repels water and oil from within without changing the look. Best for unglazed porcelain and cement grout. Silane and siloxane-based formulas are common.
- Topical (surface) sealer: Leaves a film on top and can add sheen, but it wears in high-traffic areas and can look cloudy. Generally not recommended for dense porcelain floors.
- Grout-specific sealer: Often a penetrating formula with a precision applicator tip for running along grout lines.
- Enhancing sealer: A penetrating sealer that also deepens color, useful for stone-look and textured unglazed tile.
How to Apply Porcelain Tile Sealer
Wait for new installations to fully cure before sealing, at least 48 to 72 hours after grouting, per the grout manufacturer. Then follow these steps:
- Clean thoroughly: Vacuum and mop with a pH-neutral cleaner, then let the floor dry completely. Any dirt sealed in becomes permanent.
- Ventilate the room and wear gloves; many sealers have strong fumes.
- Apply to grout lines with a small brush, roller bottle, or the applicator tip, staying on the grout if the tile is glazed and nonporous.
- For unglazed tile, apply the penetrating sealer evenly across the surface with a clean cloth, sponge, or low-nap roller.
- Let it dwell the recommended time, usually 5 to 15 minutes, then wipe off all excess before it dries, or you will get a hazy residue.
- Apply a second coat if the product calls for it, and allow the full cure time, often 24 to 48 hours, before heavy use or getting the floor wet.
How Often to Reseal
Penetrating sealers typically last one to three years on grout in a busy floor, longer in low-traffic areas. Retest with the water-drop method periodically: when water stops beading on the grout and starts soaking in, it is time to reseal. High-moisture and high-traffic zones like shower floors and kitchen entries need resealing more often than a guest bath. Keeping the grout sealed is the cheapest insurance against permanent staining and mildew.
Common Mistakes to Avoid
Do not seal glazed porcelain surfaces, since the sealer cannot absorb and leaves a smeary film that dulls the tile. Never apply sealer over a dirty floor, because you lock the dirt in. Do not skip wiping off the excess; dried-on penetrating sealer creates a stubborn haze that requires stripping. Avoid topical film sealers on floors, which peel and wear unevenly. And do not rush the grout cure time before sealing. Get these details right and your porcelain floor will shrug off spills, resist staining, and keep its grout looking clean for years, with only a modest amount of periodic maintenance.
Sealing Polished vs Textured Porcelain
The finish of your tile changes the calculus. Polished porcelain is mechanically ground and buffed to a shine, and while the body is dense, the polishing process can open microscopic pores in the surface, called micro-porosity, that occasionally accept a stain from oil or colored liquids. For polished porcelain in a kitchen, a thin coat of penetrating sealer can add insurance against oily stains, but always test first and wipe off every trace of excess. Textured, matte, and structured porcelain used outdoors or in showers has more surface area and tiny recesses that hold dirt, so a penetrating sealer here makes cleaning easier even when the tile itself does not truly need protection. Glossy glazed wall tile, by contrast, never needs anything on the face.
Products and What to Expect to Spend
A quality penetrating sealer runs about $20 to $50 for a quart, which covers a surprising amount of grout line, often several hundred linear feet, since you are only treating the joints on a glazed floor. For full-surface sealing of unglazed tile, a quart covers roughly 100 to 200 square feet per coat depending on porosity. Grout-only applicator bottles with a rolling tip cost $10 to $20 and make edging along joints far cleaner than a brush. Buy a product rated for both grout and natural stone if you want one bottle to handle everything, and check whether it is water-based, which has lower odor and easier cleanup, or solvent-based, which can penetrate denser materials better. For food-prep areas, confirm the sealer is food-safe once cured.
Troubleshooting a Hazy or Sticky Finish
If your tile looks cloudy or feels tacky after sealing, you almost certainly left excess sealer on the surface that dried into a residue. This is the number one sealer complaint, and it is fixable. For water-based products, a fresh application followed by immediate thorough wiping can re-dissolve and lift the haze; for stubborn cases, a dedicated sealer and coating stripper removes it so you can start over. Prevent the problem entirely by working in small sections, respecting the dwell time, and buffing off all excess with a clean dry cloth before it flashes over. When done correctly, a penetrating sealer leaves no visible change to the tile at all, only better resistance to water and stains where you need it most.
To sum up the decision simply: test before you spend. Drip water on both the tile face and the grout, wait fifteen minutes, and let the results tell you what needs sealing. In the overwhelming majority of homes the answer is the same, seal the grout and leave the glazed porcelain alone, because the tile is already impervious from the factory while the cement grout is thirsty and stain-prone. Reserve full-surface sealing for genuinely porous unglazed, textured, or through-body porcelain that fails the water test. Follow the product directions, wipe off every trace of excess, respect the cure time, and retest the grout every year or two. That small routine is all it takes to keep a porcelain floor looking clean and staying protected for the long run.
Prefer to explore on your own?
See how new flooring looks in your actual room in seconds — free, no signup.
Try the free Floor Studio →