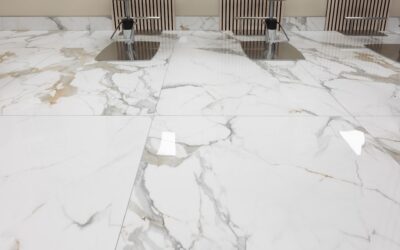
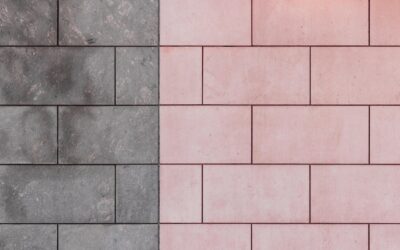
Your patio, pool deck, and walkway tile take a brutal beating that indoor tile never sees, which is exactly why outdoor tile sealer is not an optional extra but a necessity. Sun, rain, freeze-thaw cycles, tracked-in dirt, spilled food, and pooling water all conspire to stain, crack, and dull outdoor tile over time. A good sealer forms an invisible line of defense that keeps water and stains out and dramatically extends the life of your investment.
Part of our Tile & Grout guide — explore the full guide →
I have sealed everything from travertine pool decks to porcelain patios, and the number one mistake homeowners make is either skipping sealer entirely or using the wrong type for their tile. Let me help you avoid both.
Why Outdoor Tile Needs Sealing
Outdoor conditions are relentless. Water is the biggest threat, because when it soaks into porous tile or grout and then freezes, it expands and cracks the surface from within. This freeze-thaw damage is the leading cause of failing patios in cold climates. Even in warm regions, absorbed water breeds mildew and leaves mineral stains.
Then there are stains. A dropped burger, spilled wine at a party, falling leaves, and lawn fertilizer all leave marks on unsealed tile and grout. Sealer buys you time to clean up spills before they penetrate, and it keeps grout from turning black with embedded grime. On a pool deck, it also improves slip resistance and protects against pool chemicals.
Once your patio flooring is in place, think about how you’ll use the space. A gazebo adds shade and structure, while a good outdoor furniture set turns it into a spot you’ll actually want to hang out in. A deck box is also worth considering if you need somewhere to stash cushions and outdoor gear.
We may earn a commission when you purchase through our links.
Which Tiles Actually Need Sealing
Not all outdoor tile is equally thirsty, so match your approach to the material:
- Natural stone (travertine, slate, limestone, sandstone): Highly porous and absolutely requires sealing, often more than once a year.
- Unglazed porcelain and quarry tile: Moderately porous and benefits from a penetrating sealer.
- Glazed porcelain and ceramic: The tile face is nearly waterproof, but the grout lines still need sealing.
- Concrete and cement tile: Porous and prone to staining, so sealer is strongly recommended.
Even when the tile itself resists water, remember that grout is almost always porous. Sealing the grout alone prevents the most common outdoor failure: dingy, cracking grout lines.
Types of Outdoor Tile Sealer
Sealers fall into two broad camps, and choosing correctly is critical to the final look. Penetrating sealers, also called impregnating sealers, soak into the tile and grout to block water from within while leaving the surface looking natural. They are the top choice for stone and outdoor use because they do not create a slippery film or peel in the sun.
Topical or film-forming sealers sit on the surface and can add a matte or glossy sheen and enhance color. They look great initially but can become slippery when wet, may peel under UV exposure, and require stripping and reapplication. For most outdoor applications, especially pool decks and walkways, a breathable penetrating sealer is the safer, longer-lasting option.
Solvent-Based vs. Water-Based
Within penetrating sealers, you will choose between water-based and solvent-based formulas. Water-based sealers are low-odor, easy to apply, and environmentally friendly, and they work well for most homeowners. Solvent-based sealers penetrate deeper and often offer better protection on very dense or heavily exposed stone, but they carry stronger fumes and require more ventilation and care.
For a typical residential patio, a quality water-based penetrating sealer does the job. Reserve solvent-based products for demanding stone in harsh freeze-thaw climates where maximum penetration matters most.
How to Apply Outdoor Tile Sealer
Application is straightforward, but preparation determines the result. Follow this sequence:
- Clean thoroughly. Scrub the tile and grout to remove all dirt, mildew, and old sealer. Any contaminant trapped under new sealer becomes permanent.
- Let it dry completely. The surface must be bone dry, which usually means waiting 24 to 48 hours after cleaning or rain. Sealing damp tile traps moisture and causes a cloudy haze.
- Check the weather. Apply on a dry day with temperatures between 50 and 90 degrees Fahrenheit and no rain forecast for at least 24 hours.
- Apply evenly. Use a sprayer, roller, or brush to spread a thin, uniform coat over the tile and grout.
- Wipe excess and add coats. On penetrating sealers, wipe away any product that has not absorbed after 5 to 10 minutes, then apply a second coat if the label recommends it.
Rushing the drying step is the single most common cause of a hazy, uneven finish, so give the tile time.
How Often to Reseal
Sealer wears down with sun, traffic, and weather, so it is not a one-time job. As a rule, reseal porous stone every 1 to 2 years and denser porcelain or well-protected surfaces every 3 to 5 years. The easiest test is to splash a little water on the tile: if it beads up, the sealer is still working; if it soaks in and darkens the tile, it is time to reapply.
High-exposure areas like a south-facing patio or a busy pool deck wear faster than a shaded walkway, so inspect the busiest zones first. Keeping up with resealing is far cheaper than replacing cracked, stained tile.
Enhancing vs. Natural-Look Sealers
Beyond the penetrating-versus-topical distinction, sealers also differ in how they change the appearance of your tile, and this catches many homeowners off guard. A natural-look or invisible sealer protects without altering the color, leaving stone and tile looking exactly as they did dry. This is what most people want for a clean, understated patio.
Enhancing sealers, sometimes called color-enhancing or wet-look sealers, deepen and enrich the tile’s color, making the veining in stone pop as if it were permanently wet. They can turn a flat, faded travertine into something rich and dramatic. The catch is that the effect is hard to reverse, and an uneven application shows badly, so test an enhancing sealer on a hidden spot first. Decide up front whether you want your outdoor tile to look natural or enhanced, because switching later means stripping and re-sealing the entire surface.
Sealing Grout and Problem Areas
Even if your tile is dense enough to resist water on its own, the grout almost never is, and grout lines are where outdoor tile most often fails cosmetically. Unsealed grout absorbs dirt, breeds mildew, and eventually crumbles under freeze-thaw stress. Running sealer over the grout, or using a dedicated grout sealer applied with a small applicator bottle, keeps those lines clean and intact far longer.
Pay special attention to problem zones: the grout around a pool where chlorinated water splashes constantly, the base of steps where water collects, and any low spots where puddles linger after rain. These areas wear their sealer faster and deserve an extra coat and more frequent reapplication. Inspect them each season and touch up as needed, since catching a failing seal early is far cheaper than repairing water-damaged grout and cracked tile later.
What It Costs
Sealer itself is inexpensive relative to the protection it provides. A gallon of quality penetrating sealer runs $30 to $80 and covers roughly 200 to 500 square feet depending on tile porosity. For a typical patio, expect to spend $50 to $150 on materials for a DIY job.
Hiring a pro to clean and seal a patio or pool deck runs $1 to $3 per square foot. Either way, the cost is trivial compared with re-tiling a freeze-cracked deck. Seal your outdoor tile, keep up with resealing on schedule, and your patio or pool surround will shrug off weather and stains for years to come.
Prefer to explore on your own?
See how new flooring looks in your actual room in seconds — free, no signup.
Try the free Floor Studio →