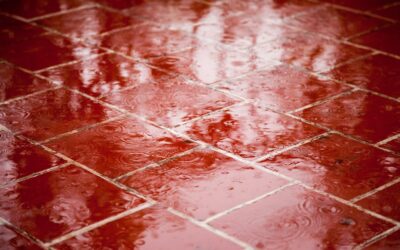
Saltillo tile brings warm, handmade character to a floor, but its rustic charm comes with a catch: the clay is extremely porous and will soak up dirt, water, and stains unless it is protected. The right saltillo tile sealer is what stands between that beautiful terracotta surface and a lifetime of spills, foot traffic, and moisture.
Part of our Tile & Grout guide — explore the full guide →
Named for the city of Saltillo in Mexico, these unglazed terracotta tiles are sun-dried and kiln-fired, leaving them soft, absorbent, and full of natural variation. Because they have no factory glaze, sealing is not optional; it is essential. This guide explains the sealer types available, how to apply them properly, and how often you will need to reseal.
Why Saltillo Tile Must Be Sealed
Unlike porcelain or glazed ceramic, Saltillo tile is fired at relatively low temperatures, leaving a dense network of open pores. Left bare, the clay drinks up anything that lands on it, water rings, oil, wine, mud, and pet accidents all penetrate quickly and can stain permanently. The surface also sheds a fine dust and erodes underfoot without protection.
A good sealer fills or coats those pores, blocking liquids while letting the tile’s earthy color and texture show through. Sealing also makes the floor far easier to clean, since spills sit on the surface long enough to wipe up instead of soaking in. In short, sealing transforms a fragile raw material into a durable, livable floor.
Penetrating vs. Topical Sealers
Sealers fall into two broad families, and many Saltillo floors use a combination of both:
- Penetrating (impregnating) sealers: Soak into the clay and protect from within without forming a surface film. They preserve a natural, matte look and let the tile breathe, which helps in areas prone to moisture from below. They offer stain resistance but little surface sheen or scuff protection.
- Topical sealers: Sit on top of the tile and form a protective film that adds sheen, from satin to high gloss, and shields against surface wear. Acrylic and wax-based topcoats fall in this group. They show scratches over time and need periodic recoating but deliver that classic glossy Saltillo look.
A common professional approach is a penetrating sealer first to guard against deep staining, followed by a topical finish for sheen and surface durability. This layered system gives you the best of both worlds.
Solvent-Based vs. Water-Based
Sealers also differ by their carrier. Solvent-based products typically penetrate deeply and can enrich the tile color with a warm, wet look, but they release strong fumes and demand serious ventilation. Water-based sealers have lower odor, easier cleanup, and a smaller environmental footprint, though some offer a slightly less dramatic color enhancement.
Both can perform well; the right choice depends on the look you want, your tolerance for fumes, and local regulations on volatile compounds. Whatever you choose, always test the product on a spare tile or an inconspicuous corner first, since Saltillo varies from batch to batch and the final color can surprise you.
Climate and location should steer the decision too. For outdoor patios, entry courtyards, and tiles set over a slab that can wick ground moisture, a breathable penetrating sealer is usually the safer bet, because a sealed topical film can trap vapor beneath it and eventually cloud, bubble, or peel. Indoors, where moisture from below is rarely an issue, a topical finish can deliver the rich, glossy patina many homeowners associate with classic Saltillo floors.
How to Apply Saltillo Tile Sealer
Preparation determines the result. Work through these steps, adapting them to the manufacturer’s directions:
- Clean thoroughly: Remove all dust, grout haze, and old sealer or wax. Any debris trapped under the sealer becomes permanent.
- Dry completely: The tile and grout must be fully cured and dry, often several days to weeks after installation, since trapped moisture clouds the sealer.
- Apply the penetrating sealer: Spread an even coat with a lambswool applicator, roller, or sprayer, working in manageable sections and wiping excess before it dries.
- Let it cure: Allow the recommended dry time between coats and before adding a topical finish.
- Add topcoats: Apply thin, even coats of topical sealer or finish, building sheen gradually rather than flooding the surface.
Thin, multiple coats almost always outperform one heavy coat, which can puddle, cloud, or peel. Avoid foot traffic until each coat cures.
Safety and Ventilation
Sealing chemicals deserve respect. Solvent-based sealers in particular give off strong, flammable fumes, so open windows, run fans, and wear a properly rated respirator rather than a simple dust mask. Use chemical-resistant gloves and protect your eyes. Keep the area free of open flames and pilot lights, and follow the product’s cure and recoat times before walking on or using the floor.
Always read and follow the manufacturer’s safety data and application instructions, since formulations differ. If you are sealing a large area, an enclosed room, or are unsure about the product, hiring an experienced tile professional is a reasonable and often worthwhile choice.
How Often to Reseal
Resealing frequency depends on the sealer type, traffic, and whether the tile is indoors or out. As a general rule, penetrating sealers often last several years before a refresh, while topical finishes in busy areas may need a recoat every one to three years as they wear. High-traffic kitchens and entryways wear faster than a quiet guest room.
An easy field test tells you when it is time: drop a little water on the tile. If it beads up, the seal is intact; if it darkens and soaks in, the floor needs resealing. Catching it early, before stains set, keeps maintenance simple.
Cost and Long-Term Care
Sealer itself is affordable relative to the floor it protects. Quality sealers commonly run from about $30 to $80 per gallon, and a gallon covers a substantial area, though coverage varies with the tile’s porosity. Treat these figures as estimates that shift by brand and region. Professional sealing service adds labor cost but ensures even application.
Between resealings, clean Saltillo with a pH-neutral cleaner and avoid harsh acids or abrasive scrubbers that strip the finish. Wipe spills promptly, use rugs at entries, and dust mop regularly. With the right sealer and consistent care, a Saltillo floor develops a rich patina and can last for decades.
Prefer to explore on your own?
See how new flooring looks in your actual room in seconds — free, no signup.
Try the free Floor Studio →