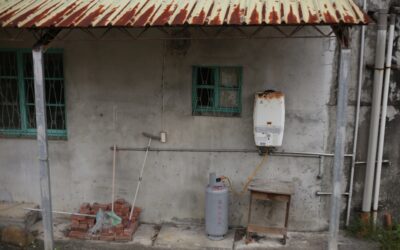
A water heater rarely fails at a convenient moment, and the wrong time to start learning about it is when cold water hits you mid-shower or a puddle appears in the basement. Knowing when to replace water heater equipment, what a new one costs, and how the process works lets you plan the swap on your terms instead of scrambling during an emergency. This guide walks through the warning signs, your options, realistic pricing, and what the job actually involves.
Signs It’s Time to Replace
Most water heaters give plenty of warning before they quit for good. Watch for these red flags, and treat several appearing together as a strong signal to plan a replacement.
- Age: A standard tank heater lasts about 8 to 12 years. Past that, failure risk climbs sharply.
- Rusty or discolored hot water, which points to corrosion inside the tank.
- Rumbling or popping noises from sediment hardening on the tank bottom.
- Water pooling around the base, a sign the tank itself is leaking and cannot be repaired.
- Running out of hot water faster than it used to, or lukewarm water that never gets hot.
- Frequent repairs that start to add up toward the cost of a new unit.
A leaking tank is the clearest and most urgent sign. Once the steel tank corrodes through, there is no fix; replacement is the only option, and delaying it risks serious water damage.
Find the Age of Your Current Unit
If you are not sure how old your heater is, check the serial number on the manufacturer’s label. Most brands encode the manufacture date in the serial number, often with the first letters or digits representing the month or week and year. If the unit is approaching or past a decade old, it makes sense to plan ahead even if it is still working, so you can shop deliberately rather than accept whatever a plumber can install fastest in a crisis.
Tank vs Tankless: Choosing a Replacement
Replacement is also a chance to reconsider the type of heater you own. The two main choices are conventional storage tanks and tankless on-demand units, and each suits different households.
A traditional tank heater stores and continuously heats 40 to 80 gallons of water. It is cheaper to buy and simpler to install, but it takes up floor space, wastes some energy keeping water hot around the clock, and can run out during heavy use. A tankless heater heats water only as you draw it, providing endless hot water, lasting up to 20 years, and saving space, but it costs more upfront and may require electrical or gas upgrades.
- Choose a tank for lower upfront cost, simple like-for-like replacement, and homes with predictable demand.
- Choose tankless for long-term energy savings, endless hot water, longevity, and space savings, if the higher initial cost fits your budget.
What It Costs
Replacement cost varies widely with the type, size, fuel source, and your region. As a general guide, a standard 40- to 50-gallon tank water heater runs about $900 to $1,800 installed, including the unit and professional labor. Higher-capacity or higher-efficiency tanks and gas models sit at the upper end.
Tankless units cost more: roughly $2,000 to $4,500 installed, since the equipment is pricier and installation may involve upgrading gas lines, adding electrical capacity, or new venting. Heat-pump hybrid electric heaters, among the most efficient tank-style options, typically run $1,800 to $3,500 installed but can significantly cut operating costs. Additional charges can apply if the installation requires code upgrades, a new expansion tank, permits, or hauling away the old unit.
DIY or Hire a Plumber?
Replacing a water heater sits at the harder end of home projects, and the right call depends on the fuel type and your experience. An electric tank swap is within reach for a confident DIYer comfortable with basic plumbing and electrical work. A gas unit adds real risk, since it involves gas connections and combustion venting where mistakes can cause leaks or carbon monoxide hazards.
For gas and tankless installations, hiring a licensed plumber is strongly recommended, both for safety and because many jurisdictions require a permit and inspection. Professional installation also protects your warranty and ensures the job meets local code, including seismic strapping, expansion tanks, and proper venting where required. When in doubt, the modest labor cost buys peace of mind on a system that handles pressurized hot water, gas, or high-amperage electricity.
The Replacement Process, Step by Step
Understanding the basic sequence helps whether you DIY or supervise a pro. A typical tank replacement follows these stages:
- Shut off utilities. Turn off the gas or electricity to the unit and close the cold-water supply valve.
- Drain the old tank. Attach a hose to the drain valve and empty the tank, opening a hot tap to break the vacuum.
- Disconnect and remove. Detach the water lines, gas line or electrical wiring, and venting, then haul out the old heater.
- Set the new unit. Position it, connect the water lines with new fittings, and reconnect gas or electrical and venting to code.
- Fill and check. Open the supply, let the tank fill completely with a hot tap open, then inspect every connection for leaks.
- Restore power and test. Relight the gas or restore electricity, set the thermostat around 120°F, and confirm proper heating.
A tankless installation adds mounting the unit, running proper venting, and often upgrading the gas or electrical supply, which is why it usually calls for a professional.
Getting the Right Size
Match the new heater to your household’s demand. For a tank, sizing is based on first-hour rating and household size: roughly a 40-gallon tank for one to three people, 50 gallons for three to four, and 60 to 80 gallons for larger households. For tankless, sizing is based on flow rate in gallons per minute and the temperature rise your climate requires, since incoming water is colder in northern regions. Undersizing leaves you short on hot water, so err toward matching or slightly exceeding your current capacity.
Gas vs Electric Considerations
Beyond tank versus tankless, the fuel source shapes both cost and performance. Gas water heaters heat water faster and cost less to operate in most areas where natural gas is cheaper than electricity, but they require proper venting and combustion air, and installation is more involved. Electric heaters are simpler and safer to install, run cleaner indoors, and suit homes without a gas line, though they can cost more to operate depending on local electricity rates.
Heat-pump electric water heaters are the efficiency standout, using ambient air to move heat rather than generating it directly, and they can cut water-heating energy use dramatically. They need adequate space and a warmer surrounding area to work well, such as a garage or utility room, and cost more upfront, but rebates and long-term savings often make them worthwhile. Generally, stick with your existing fuel type unless you have a strong reason to switch, since converting adds cost for new lines or venting.
Extending the Life of Your New Heater
A little maintenance dramatically extends how long a new water heater lasts, protecting your investment. The most valuable habit is flushing the tank once a year to remove sediment, which otherwise hardens on the bottom, reduces efficiency, and shortens the tank’s life. This is a simple job: connect a hose to the drain valve and let a few gallons run out until it flows clear.
- Flush the tank annually to clear sediment buildup.
- Check the anode rod every few years and replace it when heavily corroded to protect the tank from rust.
- Test the pressure-relief valve yearly to ensure it operates safely.
- Set the thermostat to 120°F to balance safety, efficiency, and scald prevention.
- Insulate the tank and hot-water pipes to reduce standby heat loss.
Planning Your Replacement
The homeowners who fare best are the ones who replace on a schedule rather than in a panic. If your heater is nearing the end of its life, research your options now, get a couple of quotes, and decide between a straightforward tank swap and an upgrade to tankless or a heat pump. Set the thermostat to 120°F on the new unit for safety and efficiency, keep the paperwork for the warranty, and note the install date so you know when to start watching for the next round of warning signs. A little planning turns a stressful failure into a routine, well-priced upgrade.