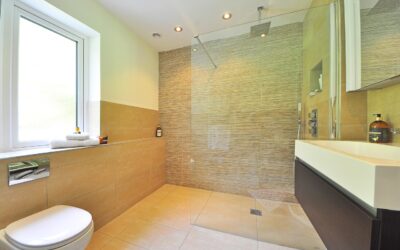
A tired vanity drags down an entire bathroom, and replacing bathroom vanity units is one of the highest-impact weekend projects a homeowner can tackle. Done right, replacing bathroom vanity cabinets refreshes the whole room, adds storage, and can even fix a wobbly top or a slow drain in the process. The job involves plumbing, a little carpentry, and some patience, but it is well within reach for anyone comfortable with basic tools. This guide walks through every step, from shutting off the water to sealing the new top.
Part of our Bathroom Remodeling & Flooring guide — explore the full guide →
- Planning and Measuring
- Tools and Materials You Will Need
- Step One: Shut Off the Water and Disconnect
- Step Two: Remove the Old Vanity
- Step Three: Prep the Space
- Step Four: Set the New Cabinet
- Step Five: Install the Countertop and Sink
- Step Six: Reconnect the Plumbing
- Step Seven: Caulk and Finish
- Cost Expectations
- Choosing the Right Vanity and Top
- Handling Plumbing Surprises
- Final Thoughts
Planning and Measuring
Before you buy anything, measure carefully. Note the width, depth, and height of the space, and account for the door swing, adjacent walls, and any baseboard or trim. Standard vanities come in widths of 24, 30, 36, 48, and 60 inches, with a common height of 32 to 36 inches. Taller “comfort height” vanities around 36 inches suit adults; a shorter unit works better in a kids’ bath.
Locate your plumbing rough-in: the height and position of the drain and supply lines. A new vanity must accommodate them, or you will be moving plumbing. Also decide whether you want a combo unit with the top included or a cabinet plus a separate countertop and sink.
Tools and Materials You Will Need
- Adjustable wrench and channel-lock pliers
- Utility knife, putty knife, and pry bar
- Cordless drill, level, and stud finder
- Bucket, towels, and a shop vacuum
- New supply lines, a P-trap kit, and plumber’s putty or silicone
- Shims, wood screws, and 100 percent silicone caulk
- New faucet and drain assembly if not reusing the old ones
Step One: Shut Off the Water and Disconnect
Turn off the supply valves under the sink, then open the faucet to relieve pressure. Place a bucket under the P-trap and disconnect it, expecting some standing water. Unhook the supply lines from the valves or the faucet tailpieces. If the shutoff valves are old and corroded, this is a good time to replace them; a quarter-turn valve is far more reliable than a decades-old multi-turn one.
Disconnect the drain and set the trap aside. Snap a photo of the connections first so reassembly is straightforward.
Step Two: Remove the Old Vanity
Cut the caulk line where the countertop meets the wall with a utility knife. The top is usually attached to the cabinet with adhesive or a few brackets; pry it loose gently and lift it off. Some tops are heavy cast stone, so get a helper.
Next, locate the screws fastening the cabinet to the wall studs, remove them, and cut any caulk along the base. Slide the cabinet away from the wall. If it has been in place a long time, you may need to work it loose with a pry bar. Vacuum out debris and inspect the wall and floor for any hidden water damage or mold, addressing it before installing the new unit.
Step Three: Prep the Space
With the old vanity gone, patch and repaint the wall behind where the new cabinet sits, especially if the new unit is smaller. Check that the floor is level and the plumbing lines are in good shape. Mark the stud locations on the wall at the height where the new cabinet’s back rail will land, so you know where to drive your anchoring screws.
Test-fit the new cabinet, checking for level in both directions. Floors and walls are rarely perfectly true, so plan to shim.
Step Four: Set the New Cabinet
Slide the new vanity cabinet into position over the plumbing. Many cabinets have an open back or a removable panel to fit around the pipes; if not, you will need to cut openings. Level the cabinet front to back and side to side, tapping shims under the base as needed until it sits true.
Anchor the cabinet by driving screws through the back rail into the wall studs. Do not overtighten, which can rack the cabinet out of level. Trim any protruding shims flush with a utility knife.
Step Five: Install the Countertop and Sink
If your faucet and drain are not preinstalled, mount them on the countertop before setting it in place; it is far easier to work on the top on sawhorses than reaching into a tight cabinet. Apply the faucet with its gasket, tighten from below, and set the drain with plumber’s putty or the supplied gasket.
Run a bead of silicone along the top edge of the cabinet, then lower the countertop into place and press it down. Check it sits level and flush to the wall. Where gaps exist against an uneven wall, a bead of caulk or a backsplash piece hides them.
Step Six: Reconnect the Plumbing
Connect the P-trap from the drain tailpiece to the wall stub, hand-tightening the slip nuts and then snugging them with pliers, careful not to crack the plastic. Attach the supply lines from the shutoff valves to the faucet, using new braided stainless lines for reliability. Turn the water back on slowly and check every joint for leaks.
Run the faucet, fill and drain the sink, and watch the trap and supply connections closely. Tighten any weeping joint a quarter turn at a time until dry. Leaving a paper towel under the connections overnight makes a slow drip obvious the next morning.
Step Seven: Caulk and Finish
Seal the joint between the countertop or backsplash and the wall with a thin, neat bead of 100 percent silicone caulk, smoothing it with a wet finger. Caulk the base of the cabinet to the floor if desired to block water intrusion. Install the cabinet doors, drawers, and hardware, and adjust the hinges so the doors sit even.
Cost Expectations
A budget vanity combo starts around $150 to $300, mid-range units run $400 to $900, and high-end custom or stone-topped vanities exceed $1,500. Doing the labor yourself saves the $200 to $600 a plumber or handyman would charge. Budget extra for new supply lines, valves, and a faucet if you are upgrading those at the same time.
Choosing the Right Vanity and Top
The vanity you pick shapes both the look and the function of the bathroom. Freestanding vanities are the most common and easiest to install. Floating (wall-mounted) vanities create a modern, open feel and make the floor easier to clean, but they require solid blocking in the wall to carry the load. For small baths, a pedestal-style or narrow 18- to 24-inch vanity preserves floor space, while double-sink units need at least 60 inches of width.
Countertop material matters too. Cultured marble and solid-surface tops with integrated sinks are affordable and seamless. Quartz offers durability and a premium look at $50 to $100 per square foot. Granite brings natural stone character but needs periodic sealing. Match the sink type to your plumbing and habits: a drop-in sink is simple, while an undermount sink gives a cleaner counter edge and easier wipe-down.
Handling Plumbing Surprises
Older bathrooms often hide surprises behind the vanity, so plan for them. Corroded shutoff valves, undersized supply lines, and a P-trap that no longer aligns with the new drain height are common. Replacing the shutoff valves and supply lines while the cabinet is out is cheap insurance, usually under $40 in parts, and saves a future headache.
If the new vanity’s drain sits at a different height than the wall stub, a flexible or adjustable P-trap kit bridges the gap. Should you find the drain or supply lines badly out of position, or discover galvanized pipe or a mystery leak, that is the moment to call a plumber rather than force a connection. Fixing a plumbing issue while the wall is accessible costs far less than tearing back into a finished vanity later.
Final Thoughts
Replacing bathroom vanity units is a satisfying project that pays off in both looks and function. Measure precisely, shut off the water before you disconnect anything, level and anchor the new cabinet securely, and take your time reconnecting the plumbing so nothing leaks. With a free weekend and basic tools, you can transform the busiest room in the house and enjoy fresh storage and a clean, modern look for years.