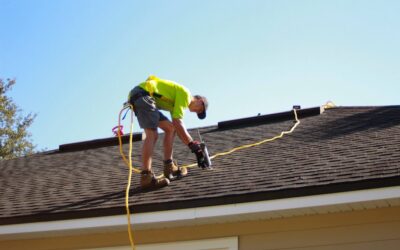
A hailstorm rolls through, a branch punches a hole in your shingles, or you spot a water stain spreading across the ceiling. Your first instinct is to call the insurance company, and that instinct can be either your best move or a costly mistake depending on what you know. A roof repair insurance claim can cover thousands of dollars in damage, but insurers deny or underpay claims every day over documentation gaps, missed deadlines, and misunderstandings about what a policy actually covers. Knowing the process before disaster strikes puts you in control.
Part of our Roofing guide — explore the full guide →
- What a Roof Repair Insurance Claim Typically Covers
- Understanding Your Policy Before You File
- Step One: Document the Damage Immediately
- Step Two: Get an Independent Roof Inspection
- Step Three: File the Claim
- Step Four: The Adjuster Inspection
- What to Do If Your Claim Is Denied or Underpaid
- How the Payout Usually Works
- Avoiding the Most Common Mistakes
- Repair vs. Full Replacement Claims
- Keeping Records for Future Claims
- The Bottom Line
What a Roof Repair Insurance Claim Typically Covers
Homeowners insurance covers roof damage from “sudden and accidental” events, known as covered perils. Understanding this distinction is the foundation of every successful claim. Commonly covered causes include:
- Wind damage from storms that lift, crack, or tear off shingles.
- Hail damage that bruises or fractures shingles and dents metal.
- Fallen trees or debris that impact the roof.
- Fire and lightning damage.
- Weight of ice or snow causing structural damage in some policies.
What is almost never covered is damage from age, neglect, or lack of maintenance. If your roof fails because it is 25 years old and worn out, that is considered wear and tear, and it is your responsibility. The line between “storm damage” and “old roof” is where most disputes happen, which is why documentation matters so much.
Understanding Your Policy Before You File
Pull out your policy and read the roof section before you do anything else. Two details drive your payout more than any other. The first is your deductible, the amount you pay out of pocket before coverage kicks in, which can be a flat dollar figure or, in many storm-prone states, a percentage of your home’s insured value. On a $400,000 home, a 2 percent wind-hail deductible is $8,000, which can exceed the cost of a minor repair entirely.
The second is whether your policy pays replacement cost value (RCV) or actual cash value (ACV). RCV pays what it costs to replace the damaged roof today. ACV subtracts depreciation for the roof’s age, so an older roof yields a much smaller check. Knowing which you have prevents a nasty surprise when the settlement arrives.
Step One: Document the Damage Immediately
Before you file, and before you make anything but emergency repairs, build your evidence file. Insurers pay what you can prove. Photograph and video everything: wide shots of the roof, close-ups of damaged shingles, interior water stains, and any damaged belongings. Note the date of the storm or event and save any local weather reports or news coverage confirming hail or high winds in your area.
If water is actively entering the home, you are obligated to make reasonable emergency repairs to prevent further damage, such as tarping the roof. Keep every receipt. These temporary measures are usually reimbursable, but permanent repairs before the adjuster inspects can jeopardize the claim, so photograph thoroughly first.
Step Two: Get an Independent Roof Inspection
Before or shortly after you file, have a reputable local roofing contractor inspect the roof and provide a written estimate. A professional can identify storm damage a homeowner might miss, such as bruised shingles from hail or lifted seals from wind, and document it properly. This estimate becomes a benchmark against the insurer’s own assessment.
Be cautious of contractors who knock on your door after a storm promising a “free roof” through insurance, sometimes called storm chasers. Some are legitimate; many are not. Verify licensing, check reviews, and never sign over your claim rights through an “assignment of benefits” document without understanding exactly what you are giving up.
Step Three: File the Claim
Contact your insurer promptly, since most policies require timely notice, often within a set number of days of the damage. When you file, provide the date and cause of damage, your documentation, and the contractor’s estimate. The insurer will assign a claim number and schedule an adjuster to inspect the property.
Keep a written log of every interaction: dates, names, what was said, and any deadlines given. Follow up phone conversations with a short email summarizing what was discussed. This paper trail protects you if the claim is later disputed or delayed.
Step Four: The Adjuster Inspection
The insurance adjuster works for the insurance company, so their job is to assess the damage and its cost from the insurer’s perspective. Be present for the inspection if you can, and have your contractor there too. This is your chance to point out damage the adjuster might overlook and to ensure the assessment is complete.
After the inspection, the adjuster issues a report and the insurer makes a settlement offer. Compare that offer line by line against your contractor’s estimate. If the insurer missed damage or priced the work below local rates, you have grounds to push back.
What to Do If Your Claim Is Denied or Underpaid
A denial or a lowball offer is not the end of the road. You have options:
- Request the denial in writing with the specific policy language the insurer is relying on.
- Provide additional evidence, such as a more detailed contractor report, additional photos, or weather data.
- Request a re-inspection if you believe the adjuster missed damage.
- Invoke the appraisal clause, a process in many policies for resolving disputes over the amount of loss using independent appraisers.
- Hire a public adjuster, a licensed professional who represents you, not the insurer, for a percentage of the settlement.
- File a complaint with your state’s insurance department if you believe the insurer acted in bad faith.
Many initially denied claims are paid after a well-documented appeal. Persistence and paperwork win these disputes.
How the Payout Usually Works
With a replacement-cost policy, insurers commonly pay in two parts. You first receive the actual cash value, the depreciated amount, minus your deductible. After the work is completed and you submit final invoices, the insurer releases the remaining “recoverable depreciation,” bringing the total to full replacement cost. This structure means you may need to front some money or coordinate closely with your contractor on payment timing.
Watch the deadlines here too. Recoverable depreciation is often forfeited if you do not complete the repairs and submit documentation within a set window, sometimes a year. Do not let the second check slip away by delaying the work.
Avoiding the Most Common Mistakes
A few errors sink otherwise valid claims. Do not wait too long to file, since delay lets insurers argue the damage worsened from neglect. Do not throw away damaged materials before the adjuster sees them. Do not make permanent repairs prematurely. And do not accept the first offer if it clearly falls short of a legitimate contractor estimate. Above all, keep your roof maintained year-round, because a documented history of care undercuts any “wear and tear” denial.
Repair vs. Full Replacement Claims
A common point of friction is whether the insurer will pay to repair a section or replace the whole roof. Insurers naturally prefer the cheaper repair, but a spot repair is not always adequate. If your shingles are discontinued, a repair may leave a mismatched patch, and many states have “matching” provisions requiring the insurer to address the resulting uniformity problem. If storm damage is widespread across multiple slopes, a full replacement may be justified even when each individual area looks minor.
Your contractor’s estimate is your leverage here. If they document that a repair cannot be made without a visible mismatch, or that the damage compromises the roof system as a whole, submit that in writing. Do not let an adjuster’s preference for a quick patch override a legitimate need for broader work.
Keeping Records for Future Claims
Your best defense against a “wear and tear” denial is a documented maintenance history. Keep receipts for inspections, repairs, and cleanings, and photograph your roof in good condition every year or two. When a storm hits, you can then show clear before-and-after evidence that the damage was sudden, not the slow decline of a neglected roof. Store these records digitally so they survive the very disaster you may need them for.
The Bottom Line
A roof repair insurance claim rewards preparation. Know your deductible and whether you carry replacement-cost or actual-cash-value coverage, document damage thoroughly and immediately, bring in an independent contractor, and be present when the adjuster inspects. If the offer falls short, push back with evidence and use the tools your policy provides. Homeowners who treat the claim as a documented, deadline-driven process consistently recover far more than those who simply accept whatever the first check happens to say.