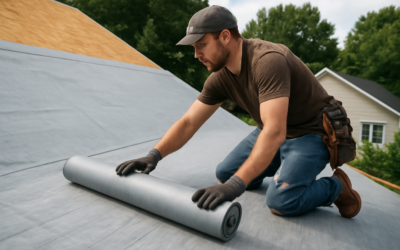
Most homeowners never see it, yet roofing underlayment is the layer that decides whether a leak ruins your attic or stays harmlessly outside. Sitting between the roof deck and the shingles, this water-resistant barrier is the second line of defense after your visible roofing material. Choosing the right type matters more than people expect, because the cheapest option and the premium option can differ by hundreds of dollars across an average roof, and they behave very differently in wind, heat, and rain.
Part of our Roofing guide — explore the full guide →
- What Underlayment Actually Does
- The Three Main Material Types
- How to Choose for Your Climate
- Underlayment by Roof Type
- Cost for a Typical Roof
- Installation Basics
- Signs Your Underlayment Has Failed
- Felt vs Synthetic: A Closer Comparison
- Exposure Time and Weather Windows
- Common Installation Mistakes to Avoid
- The Bottom Line
What Underlayment Actually Does
Underlayment serves three jobs at once. It blocks wind-driven rain and ice-dam backup that sneaks under shingles, it protects the wood deck during installation before the shingles go on, and it adds a measure of fire and weather resistance to the whole assembly. Without it, water that gets past a lifted shingle hits bare plywood and finds the nearest seam.
Building codes in nearly every US jurisdiction require at least one layer of underlayment under asphalt shingles. In colder climates, an ice-and-water membrane along the eaves is also mandatory, typically extending at least 24 inches inside the warm wall line.
The Three Main Material Types
The market sorts into three broad categories, and each suits a different budget and roof.
Asphalt-Saturated Felt
The traditional choice, felt comes in two weights: No. 15 (lighter) and No. 30 (heavier and more tear-resistant). It runs roughly $0.05 to $0.10 per square foot for materials, making it the budget pick. The downsides are real, though. Felt absorbs water, wrinkles when wet, gets brittle in heat, and tears in wind if it is left exposed for more than a day or two.
Synthetic Underlayment
Made from woven polypropylene or polyethylene, synthetic underlayment is now the default on most professional jobs. It is lighter, far stronger, and resists tearing and UV exposure for weeks. Material cost typically lands between $0.15 and $0.35 per square foot. The walkable surface and printed nailing lines also speed up installation, which lowers labor.
Rubberized Asphalt (Peel-and-Stick)
This self-adhering membrane bonds directly to the deck and seals around nail penetrations, making it the gold standard for leak-prone areas. Expect $0.45 to $1.00 per square foot. Most homes use it only at eaves, valleys, and around penetrations rather than across the entire roof, though steep coastal homes sometimes get full coverage.
How to Choose for Your Climate
Climate should drive the decision more than price alone. In hot southern regions, synthetic handles attic heat without drying out or cracking the way felt does. In northern snow country, peel-and-stick along the eaves and valleys is non-negotiable because ice dams force water uphill under the shingles. Coastal and high-wind zones benefit from synthetic across the field plus self-adhering membrane at every vulnerable detail.
Underlayment by Roof Type
The roofing material above influences what belongs below. Asphalt shingles pair well with synthetic or felt. Metal roofing usually calls for a high-temperature synthetic or high-temp peel-and-stick rated above 240°F, since metal transmits more heat to the deck. Tile and slate, which last decades, deserve a premium self-adhering membrane so the underlayment lasts as long as the surface above it.
Cost for a Typical Roof
For a standard 2,000-square-foot roof, underlayment material alone might cost:
- No. 30 felt: roughly $100 to $200
- Synthetic: roughly $300 to $700
- Full peel-and-stick: roughly $900 to $2,000
Because underlayment is buried for the life of the roof, the upgrade from felt to synthetic is one of the better-value decisions in a roofing project. You will not replace it again for 20 to 30 years, so paying a little more now spreads that cost thin.
Installation Basics
Underlayment is laid horizontally from the eave upward, with each course overlapping the one below by at least 2 to 4 inches so water sheds down the laps. Fasteners are placed along nailing lines, often with plastic cap nails that resist pulling through. Valleys and penetrations get the membrane first, then the field underlayment laps over them.
While experienced DIYers can install field underlayment on a low-slope, single-story roof, steep or multi-story roofs and any structural concerns belong to a licensed roofer. Fall risk is the leading hazard in roofing work, and a poor membrane lap that leaks will not show up until the next heavy storm.
Signs Your Underlayment Has Failed
You rarely inspect underlayment directly, but warning signs appear elsewhere. Water stains on the attic deck, granules collecting in gutters, persistent ceiling spots after rain, and shingles that lift or curl all hint that the layer beneath is no longer doing its job. When a roof reaches the end of its shingle life, the underlayment is usually replaced at the same time.
Felt vs Synthetic: A Closer Comparison
The felt-versus-synthetic debate is the one most homeowners actually face, so it is worth a direct head-to-head. Felt’s only real advantage is upfront price. Beyond that, synthetic outperforms it on nearly every metric that matters over a roof’s life. A single roll of synthetic covers up to ten squares (1,000 square feet), compared with two to four squares for a roll of felt, which means fewer rolls to haul up the ladder and fewer seams overall.
Weight tells the story too. A typical synthetic roll weighs around 25 to 35 pounds while covering four times the area of a No. 30 felt roll that weighs about 60 pounds. Crews move faster and tire less. Synthetic also resists fungal growth, will not absorb rainwater if a storm rolls in before shingles go down, and stays dimensionally stable rather than wrinkling into ridges that telegraph through thin shingles. Felt still has a loyal following among older roofers and works fine on budget reroofs, but if you plan to keep the home, the long-term math favors synthetic.
Exposure Time and Weather Windows
One spec homeowners overlook is the manufacturer’s allowable exposure time, the number of days the underlayment can sit uncovered before shingles must go on. Felt is rated for only a day or two before sun and rain degrade it. Quality synthetics carry UV exposure ratings of 90 to 180 days, and some premium products go higher. That window is a genuine safety net when a multi-day roofing job hits a rain delay or a shingle delivery slips. If your project may stall mid-installation, choose a synthetic with a long exposure rating and confirm the number on the product data sheet rather than assuming.
Common Installation Mistakes to Avoid
Even good underlayment fails when installed carelessly. A few errors show up again and again on problem roofs:
- Insufficient overlap at the horizontal laps, which lets wind-driven water track under the course above
- Fasteners spaced too far apart, allowing the sheet to flap loose and tear in high wind
- Using regular roofing nails instead of cap nails on synthetic, so the heads pull through the smooth surface
- Reversing the lap direction so water runs into a seam rather than over it
- Skipping the ice-and-water membrane in valleys, the single most leak-prone detail on any roof
If you hire a contractor, ask which underlayment they plan to use and how they detail the valleys and eaves. A roofer who specifies synthetic in the field and peel-and-stick at the critical details is giving you a roof built to last.
The Bottom Line
Quality roofing underlayment is cheap insurance against expensive water damage. For most homeowners, synthetic across the field plus a self-adhering membrane at eaves and valleys delivers the best balance of protection and price. Match the material to your climate and your roofing surface, and you will have a barrier that quietly earns its keep for decades.