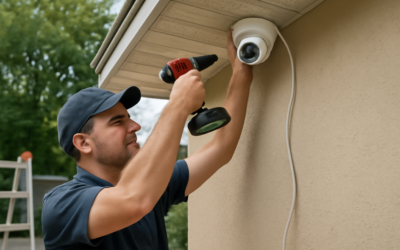
Most homeowners budget for the cameras and forget the labor, which is often the larger half of the bill. The typical security camera installation cost for professional labor runs roughly $100 to $250 per camera, and a complete four-camera wired system with a recorder usually lands between $1,000 and $2,500 installed. Wireless setups cost less to put up but more to own over time, while wired systems take longer to install and then run for a decade with little attention.
The biggest swing factor is not the camera itself. It is how hard the cable runs are. A single-story ranch with an open attic can be wired in an afternoon, while a two-story brick home with finished ceilings can double the labor. Knowing what drives each line on a quote helps you compare bids and decide which parts you can handle yourself.
- Security Camera Installation Cost at a Glance
- What Drives CCTV Installation Cost Up or Down
- Wired vs Wireless: How System Type Changes the Price
- Installation Challenges That Add Labor
- DIY Savings: What You Can Realistically Handle
- Troubleshooting Common Post-Install Problems
- When to Hire a Professional Installer
- Frequently Asked Questions
Before you collect quotes, map where each camera needs to go, where the recorder or hub will live, and whether you have attic or crawlspace access between those points. That one sketch will make every estimate more accurate.
Security Camera Installation Cost at a Glance
Pricing falls into a few predictable tiers. These are general national ranges; labor rates in large metro areas trend toward the high end, and rural installers often sit near the bottom.
| Project | Typical Installed Range | Notes |
|---|---|---|
| Single camera, labor only | $100 to $250 | Easy mount, short cable run |
| Single wireless camera | $75 to $200 | Mount, power, app setup |
| 4-camera wired system | $1,000 to $2,500 | Includes recorder and cabling |
| 8-camera wired system | $2,000 to $5,000 | More runs, larger drive |
| Doorbell camera swap | $75 to $200 | Uses existing doorbell wiring |
Equipment makes up the rest. Entry-level consumer cameras can be inexpensive, while commercial-grade 4K bullet or turret cameras cost considerably more per unit. A network video recorder (NVR) with a surveillance-rated hard drive adds a few hundred dollars for most home systems.
What Drives CCTV Installation Cost Up or Down
Two installers can look at the same house and quote very different numbers. Usually, one of them has spotted a difficult cable path the other missed. These are the factors that move the price most.
- Cable run length and route: Short runs through an open attic are fast. Runs that must be fished through insulated exterior walls, across finished basement ceilings, or around firestops take much longer.
- Wall material: Drilling through vinyl or wood siding is quick. Brick, stone, and stucco require masonry bits, careful sealing, and more time per penetration.
- Mounting height: Cameras under eaves on a single-story home are simple. Second-story soffits need extension ladders or lifts, which adds labor and sometimes equipment rental.
- Camera count: Per-camera labor usually drops as the count rises because the recorder setup and network configuration are shared across the job.
- Power availability: Power over Ethernet (PoE) cameras draw power through the data cable, so no outlet is needed at each location. Cameras that need a nearby outlet may require an electrician if none exists.
- Configuration and remote viewing: Setting up motion zones, alerts, and phone access is often included, but complex network setups can carry an extra charge.
When comparing CCTV fitting cost from different companies, ask each one to list the number of cable runs, the wall penetrations, and whether patching and paint touch-up are included. Those details explain most of the gap between bids.
Wired vs Wireless: How System Type Changes the Price
A wired PoE system is the standard choice for homeowners who want reliability. Each camera connects to the NVR with a single Ethernet cable that carries both video and low-voltage power. There are no batteries to charge and no Wi-Fi dropouts, and recordings stay local unless you choose cloud backup. The trade-off is labor: every camera needs its own cable path back to the recorder.
Wireless cameras skip the cable runs. Battery models can be mounted almost anywhere in minutes, and plug-in models need only a nearby outlet. Camera installation cost for a wireless setup is lower on day one, but ongoing costs add up. Many wireless systems depend on monthly cloud subscriptions to store and review footage, batteries need recharging every few weeks to months depending on activity, and weak Wi-Fi at the far corners of a property can cause missed clips.
Which System Fits Your Home
- Choose wired if you own the home, want continuous recording, have attic or crawlspace access, or need cameras at the far edges of a large lot.
- Choose wireless if you rent, need two or three cameras quickly, or face construction that makes cable runs unreasonably expensive.
- Consider a hybrid with wired cameras at the main entry points and a wireless unit or two in hard-to-reach spots like a detached shed.
Installation Challenges That Add Labor
Certain conditions show up on quotes as line-item surcharges. Knowing them in advance keeps the final invoice from surprising you.
Attic Runs
Open, accessible attics are an installer’s best friend. Cable can be dropped to soffit-mounted cameras from overhead with very little drywall work. Problems start with low-slope roofs, deep blown-in insulation, or summer attic temperatures that limit working time. Expect a higher surveillance camera installation cost when the attic is cramped or inaccessible.
Brick and Masonry Walls
Every camera mounted on brick needs holes drilled with a hammer drill and a masonry bit, anchors set into the mortar or brick, and the penetration sealed against water. Installers often prefer to drill into mortar joints because they are easier to patch. Budget more time per camera for masonry homes.
Finished Spaces
If the recorder sits in a finished basement or closet with no easy path from the attic, the installer may need to fish cable through walls or run it inside raceways. Ask whether drywall patching is included or whether you will need to handle it afterward.
DIY Savings: What You Can Realistically Handle
A capable DIYer can cut the total security camera installation cost by half or more. Wireless cameras are the easiest win: mounting, charging, and pairing to an app takes little more than a drill and a ladder. Wired systems are also doable if you are comfortable in the attic and patient with fish tape.
Tools and Materials for a Wired DIY Install
- Cordless drill with long flex bits and masonry bits if needed
- Fish tape or glow rods for pulling cable
- Outdoor-rated Cat6 cable, RJ45 connectors, and a crimp tool, or pre-terminated cables
- Cable tester to confirm each run before mounting
- Exterior sealant and weatherproof junction boxes
- A sturdy extension ladder rated for your weight plus tools
Steps for a Basic Wired Install
- Plan each camera’s field of view, then mark mounting spots and the recorder location.
- Run a cable from the recorder location to each camera spot, labeling both ends.
- Drill the exterior penetration, pull the cable through, and seal around it.
- Terminate and test each run with a cable tester before mounting anything.
- Mount the cameras into solid material such as a fascia board or framing, not thin soffit panels alone.
- Connect the recorder, format the drive, and set motion zones, alerts, and remote access.
- Walk the property at night to confirm image quality and adjust angles.
PoE camera cables are low-voltage and generally safe to handle. Line-voltage work is different. If a camera location, floodlight camera, or recorder needs a new outlet or circuit, hire a licensed electrician. Anytime you replace an existing hardwired floodlight or doorbell with a camera model, turn off the breaker and confirm power is off with a non-contact voltage tester before touching any wires. Outdoor outlets must be GFCI-protected and weather-rated.
Ladder safety matters just as much. Set the ladder on firm, level ground, keep three points of contact, and do not overreach. For second-story eaves or steep sites, a professional with the right equipment is worth the cost.
Troubleshooting Common Post-Install Problems
- Camera shows no power: Test the cable run, reseat the connectors, and confirm the recorder’s PoE budget is not exceeded.
- Grainy night footage: Clean the lens, remove nearby reflective surfaces, and move the camera away from eaves that bounce infrared light back into the lens.
- Too many false alerts: Tighten motion zones, lower sensitivity, and use person or vehicle detection if the system supports it.
- Wireless camera drops offline: Add a mesh node or access point closer to the camera, or switch that location to a wired unit.
- Water in the housing: Reseal the cable entry, add a drip loop, and use a weatherproof junction box.
When to Hire a Professional Installer
Professional installation makes sense when the home has two or more stories, masonry exterior walls, no attic access, or when you want eight or more cameras tied into a single recorder. Installers also handle network configuration, which saves time if remote viewing and alerts feel intimidating. Get at least three quotes, confirm the installer carries liability insurance, and ask about the warranty on both labor and equipment. Some states and cities require low-voltage contractors to hold a license, so check local requirements before you sign.
Watch for bundled monitoring contracts. Some low upfront camera installation cost offers are tied to multi-year monitoring agreements that cost far more over their full term than a self-monitored system.
Frequently Asked Questions
How much does it cost to install one security camera?
Labor for a single camera generally runs about $100 to $250, depending on mounting height, wall material, and cable run length. The camera itself is extra unless the installer supplies it as part of a package.
Is professional CCTV camera installation cost worth it?
It is worth it for multi-story homes, brick exteriors, and larger systems where cable routing is difficult. For two or three wireless cameras on a single-story home, DIY installation is usually straightforward.
How long does a four-camera installation take?
A professional crew typically finishes a four-camera wired system in four to eight hours. Difficult attics, masonry walls, or finished ceilings can stretch the job to a full day or longer.
Do wired security cameras need an outlet at each camera?
No, not if they use Power over Ethernet. A single cable carries low-voltage power and video from the recorder, so outlets are needed only where the recorder and network equipment sit.
Are there ongoing costs after installation?
Wired systems with local recording usually have few ongoing costs beyond an eventual hard drive replacement. Wireless systems often rely on monthly cloud storage plans, and professional monitoring adds a separate recurring fee.