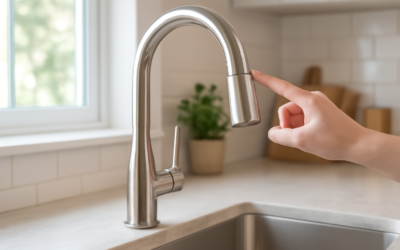
Anyone who has fumbled to turn on the tap with raw-chicken hands or a fistful of sticky dough already understands the appeal. A sensor kitchen faucet starts and stops water with a wave of your hand or the presence of an object under the spout, so you never smear the handle with whatever is on your fingers. Beyond the hygiene win, touchless faucets cut water waste because the flow stops the second you pull your hands away. Having installed and lived with several, I can tell you the technology has matured to the point where it just works, if you buy a good one and set it up right. Here is the full picture.
Part of our Kitchen Remodeling guide — explore the full guide →
- How Touchless Faucets Detect You
- Touchless Versus Touch Faucets
- Power: Batteries or Plug-In
- Key Features Worth Paying For
- Trusted Brands and What They Cost
- Installing a Sensor Kitchen Faucet
- Living With It and Avoiding Annoyances
- Maintenance
- Water Savings and Real-World Payback
- Do Sensor Faucets Work in a Power Outage?
- Cleaning and Preventing False Activations
How Touchless Faucets Detect You
The magic is an infrared sensor, usually mounted in the base or the top of the spout, that emits an invisible beam and reads the reflection. When your hand or a dish breaks the beam, an electronic solenoid valve inside the faucet opens and water flows; pull away and it closes. Most models use one or two sensors: a base sensor for a quick on/off wave, and sometimes a second sensor higher up for filling. Because the valve is electronic, the response is nearly instant, and better faucets add a short delay so it does not chatter on and off from stray movement.
Touchless Versus Touch Faucets
People conflate these, but they work differently and suit different users. A touchless faucet reacts to motion with no contact at all, ideal when your hands are truly messy. A touch faucet, by contrast, turns on when you tap it anywhere on the spout or handle with a wrist or forearm, which gives more deliberate control and fewer accidental activations, but still requires contact. Some premium faucets offer both modes in one unit. If your main goal is never touching the faucet with dirty hands, go fully touchless; if you want convenience but hate false triggers, touch-activated may suit you better.
Power: Batteries or Plug-In
Every sensor faucet needs electricity for its sensor and valve, and how it gets that power is a real decision.
- Battery-powered: most common, usually 4 to 6 AA batteries or a battery pack in the cabinet; lasts one to two years and keeps working in a power outage. Easiest to install since no outlet is needed.
- AC adapter: plugs into an outlet under the sink; never needs batteries but requires an available receptacle in the cabinet and stops working in a blackout.
Many models include both options or let you add an adapter later. If you have an outlet under the sink, the AC route saves you from ever changing batteries. If not, batteries are simpler than hiring an electrician.
Key Features Worth Paying For
Not all sensor faucets are equal. A few features separate the ones you will love from the ones you will disable in frustration.
- Manual handle backup: essential; you still want a lever to set temperature and to run water the old-fashioned way
- Temperature memory: keeps your last-set temperature so a wave gives you warm water, not a cold blast
- Pull-down sprayer: combine touchless with a docking spray head for full functionality
- Adjustable flow and sensor range: tune how close you must get to activate it
- Auto shut-off timer: stops the water after a few minutes if the sensor is accidentally left triggered, preventing floods
Trusted Brands and What They Cost
The big faucet makers all have strong touchless lines, and this is one area where brand reliability matters because you are trusting electronics near water.
- Moen MotionSense and Motionsense Wave: well-regarded, $250 to $500, with reliable single or dual sensors
- Delta Touch2O and VoiceIQ: touch and touchless options, some with voice control, $200 to $550
- Kohler Sensate: premium touchless with a responsive sensor, $400 to $700
- Budget brands (various): $80 to $180, functional but check reviews for sensor reliability
My advice is to spend in the mid-range from a major brand. The cheapest touchless faucets are where you find laggy sensors and valves that fail, and a faucet failure means water problems. A $250 to $400 unit from Moen, Delta, or Kohler buys proven electronics and real warranty support.
Installing a Sensor Kitchen Faucet
If you can install a standard pull-down faucet, you can install a touchless one; there are just a couple of extra connections.
- Shut off the hot and cold supply valves under the sink and open the old faucet to drain pressure
- Disconnect the supply lines and remove the old faucet
- Drop the new faucet through the deck hole and secure the mounting nut from below
- Connect the supply lines, then connect the sensor cable to the control box and the solenoid valve
- Install the batteries or plug in the AC adapter, and mount the control box up high in the cabinet, away from the drain in case of leaks
- Turn the water back on, flush the lines, and calibrate the sensor per the manual
Give yourself an hour to ninety minutes. The one extra step over a normal faucet is wiring the sensor and valve, which is just plug-in connectors, not electrical splicing. Mount the control box high so a future under-sink leak does not soak it.
Living With It and Avoiding Annoyances
A well-set-up touchless faucet fades into the background, but a poorly calibrated one drives you crazy. If it turns on by itself, the sensor range is too wide or it is catching reflections from a shiny sink; reduce the range in settings. If it is slow to respond, weak batteries are the usual cause. And teach the household how the temperature handle works, since the sensor only controls on/off, not how hot the water is. Set the handle to a comfortable warm and let temperature memory do the rest.
Maintenance
These faucets are low-maintenance, but a few habits keep them reliable. Wipe the sensor window clean of grease and hard-water film so it reads accurately; a filmed-over sensor gets erratic. Replace batteries when the indicator light warns you rather than waiting for it to die mid-dishwashing. If your water is hard, periodically unscrew and soak the aerator in vinegar to clear mineral buildup that weakens the stream. The solenoid valve is the one part that can fail long-term, but on quality brands it is warranted and rarely an issue within the first several years.
Water Savings and Real-World Payback
The touchless feature is not just about clean handles; it genuinely trims water use. Because the flow stops the instant you pull your hands away, you are not running the tap while you scrub a pot, lather your hands, or turn to grab a towel. The EPA notes that a WaterSense-labeled faucet uses no more than 1.5 gallons per minute, and pairing that flow rate with automatic shut-off adds up over a year of daily cooking and cleanup. In a busy household, the reduced runtime can shave a meaningful amount off both water and water-heating costs. It will not pay back a $400 faucet purely on utility savings, but the water conservation is a real bonus on top of the convenience and hygiene that are the main reasons people buy in.
Do Sensor Faucets Work in a Power Outage?
This is the question I get most, and the answer depends on your power source. Battery-powered models keep working through a blackout because they run off their own AA cells, which is a genuine advantage of the battery option over the AC adapter. Faucets wired to an outlet under the sink lose the touchless function during an outage. The saving grace on nearly every quality model is a manual handle, so even a dead battery or a power cut still lets you run water the conventional way by lifting the lever. When shopping, confirm the faucet has a true manual override; a model that only works via sensor would leave you without water when the electronics fail, which is why the manual backup is a non-negotiable feature.
Cleaning and Preventing False Activations
Living happily with a touchless faucet comes down to sensor upkeep and placement awareness. Grease and dried water spots build up on the little sensor window and make it misread, so wipe it with a soft damp cloth during your normal counter cleanup. If the faucet activates on its own, the usual culprits are a shiny sink bottom bouncing the infrared beam or the sensor range set too wide; dial the range down in the settings. Steam from a boiling pot directly under the spout can occasionally trigger it too, so slide tall pots slightly to the side while they boil. A well-placed, clean sensor rarely gives trouble, and once it is dialed in you stop thinking about it entirely.
For a busy kitchen, a sensor kitchen faucet is one of those upgrades that seems like a gimmick until you use one for a week, then you never want to go back. It keeps handles clean, trims water waste, and adds a modern touch to the sink. Buy a mid-range model from a reputable brand, wire the control box up high and dry, and calibrate the sensor to your sink, and it will serve you reliably for years.