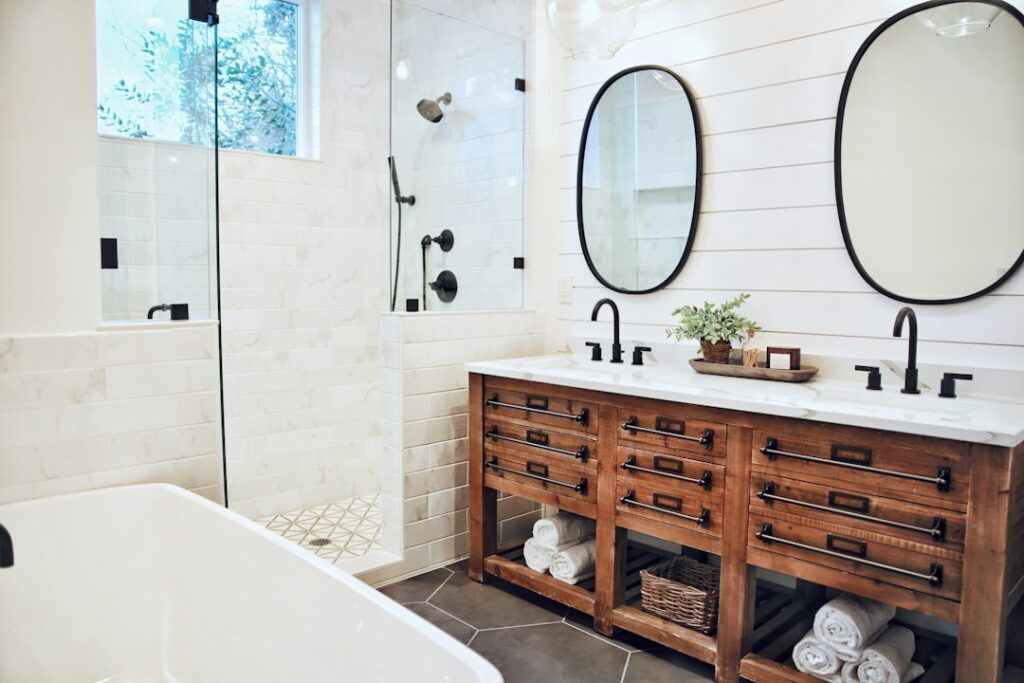
Few upgrades transform a plain bathroom as quickly or affordably as adding paneling to the lower portion of the walls. A shiplap half wall bathroom brings farmhouse charm and crisp architectural detail while protecting the most splash-prone part of the room. The catch that trips up a lot of DIYers is material choice: standard pine shiplap in a wet zone is asking for trouble. Get the height, the material, and the cap right, and you end up with a durable feature that looks like it was always there.
What Exactly Is a Shiplap Half Wall?
Shiplap refers to boards with an overlapping rabbet joint that creates the signature small, even gap between planks. A half wall, in this context, means running that paneling up only the lower section of the wall, typically at wainscoting height, and capping it with a horizontal trim board. The upper wall stays painted, wallpapered, or tiled.
This partial application is popular for good reason. It delivers texture and character without overwhelming a small room, and it costs a fraction of paneling the entire wall. It also keeps the busiest visual detail at eye level where it reads as intentional design.
Getting the Height Right
Standard wainscoting height runs about 36 to 48 inches from the floor, and shiplap half walls follow the same guideline. The most common choice is 36 to 42 inches, which lines up naturally with the top of a vanity and a toilet tank for a clean, continuous line.
- 32 to 36 inches: A lower, subtle band that works in tight powder rooms.
- 36 to 42 inches: The sweet spot for most bathrooms, aligning with fixtures.
- 48 inches and up: A bolder, more dramatic look best suited to rooms with tall ceilings.
A reliable design rule is to keep the paneling to roughly one-third of the total wall height, which keeps the proportions balanced rather than top- or bottom-heavy.
Choosing Moisture-Appropriate Materials
This is where a bathroom install differs from a bedroom accent wall. Bathrooms cycle through humidity and the occasional splash, and natural wood swells, cups, and eventually rots when it stays damp. Your material choice should match how wet that section of wall actually gets.
For Wet Zones
Near a tub, shower, or where water regularly hits the wall, use PVC shiplap or a moisture-resistant composite. PVC panels are completely waterproof, will not rot or grow mold, and wipe clean easily. They cost more than wood but are the correct call in a genuinely wet area.
For Dry Zones
On walls away from direct water, such as behind a toilet or along a dry stretch, primed MDF shiplap or moisture-resistant MDF is an economical and stable option. Real wood, like primed pine or poplar, works too, provided it is properly sealed and painted on all sides, including the back and cut edges, before installation.
Whatever you choose, seal every cut edge. Raw MDF and wood ends drink up moisture and are the first place a bathroom install fails.
Capping It With a Chair Rail
The top of a half wall needs a cap, both for looks and for function. A chair rail or a simple beveled top board finishes the paneling and creates a small ledge. That cap is not just decorative. It sheds water away from the seam where the paneling meets the upper wall, protecting the joint from moisture intrusion.
For a bathroom, run a bead of paintable silicone caulk along the top of the cap and any seams before painting. Silicone flexes with humidity swings and keeps water out of the gaps far better than standard latex caulk alone.
Installation Overview
The process is well within reach of a confident DIYer:
- Prep the wall. Locate and mark the studs, and snap a level line at your chosen height.
- Acclimate the material in the bathroom for a couple of days if using MDF or wood.
- Install the boards from the bottom up, using construction adhesive plus finish nails into the studs, and check for level frequently.
- Add the cap and base trim to frame the paneling top and bottom.
- Caulk, fill nail holes, prime, and paint with a bathroom-grade semi-gloss or satin enamel that stands up to moisture and scrubbing.
Finishing and Color Choices
Semi-gloss and satin paints are the standard for a shiplap half wall bathroom because they resist moisture and wipe clean, unlike flat finishes that hold stains. Crisp white is the classic farmhouse choice, but soft greens, navy, and warm greige have become popular for a more grounded look. Whatever color you pick, use a mildew-resistant bathroom paint for the longest life.
Horizontal vs. Vertical Shiplap
Traditional shiplap runs horizontally, and that orientation is by far the most common for a half wall. Horizontal boards visually widen a room, which is often welcome in a compact bathroom, and they read as classic farmhouse. The seams also naturally shed water downward when properly caulked.
Vertical shiplap, sometimes called board-and-batten style when trimmed out, draws the eye upward and makes a low ceiling feel taller. It can look more contemporary and is a nice choice in a powder room where you want a bit of drama. The tradeoff is that vertical seams need extra attention at the cap to keep water from running behind the boards. Either direction works for a half wall, so choose based on the proportion you want to emphasize in the room.
Common Mistakes to Avoid
A few errors turn a great project into a maintenance headache:
- Using raw wood or unsealed MDF in wet zones. This is the number one cause of a bathroom shiplap failure. Match the material to the moisture.
- Skipping the acclimation step. MDF and wood need a couple of days in the room so they do not expand or contract after install and open up gaps.
- Nailing between studs. Boards nailed only into drywall will loosen over time. Always hit the studs.
- Using flat paint. Flat finishes absorb moisture and stain. Bathroom half walls need satin or semi-gloss.
- Forgetting to caulk the seams and cap. Uncaulked joints let humidity and splashes reach the vulnerable board edges.
Sidestep these and your half wall will hold up beautifully for years.
Design Pairings and Styling
A shiplap half wall gives you a chance to layer in character. Pair a crisp white lower wall with a bold paint color, wallpaper, or a large-format tile above the cap for contrast. The cap ledge itself is handy for displaying small plants or candles in a powder room. For fixtures, brushed brass, matte black, and oil-rubbed bronze hardware all pop against painted shiplap and reinforce the farmhouse or transitional look most homeowners are after with this feature.
Is It Worth It?
For the money, a shiplap half wall delivers an outsized return in style and durability. Materials for an average bathroom often land in the low hundreds of dollars, and the labor is a manageable weekend project. Choose waterproof PVC in the splash zones, sealed MDF or wood elsewhere, cap it properly, and you get a feature that shrugs off bathroom humidity for years while giving the room genuine character.