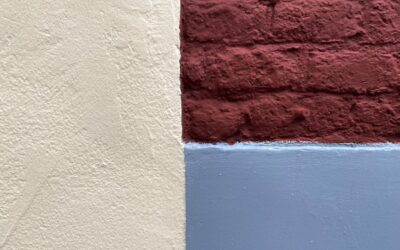
It is the question that starts every interior paint job and sparks a surprising amount of debate. Ask three people and you may get three answers. So should i paint trim or walls first? The short, honest answer that most professional painters live by is this: paint the trim first, then the walls. It feels backward to a lot of homeowners, but there is solid reasoning behind it, and understanding why will give you a cleaner, faster, less stressful result. Let’s walk through the pro order, the logic, and where the few exceptions apply.
Part of our Paint & Walls guide — explore the full guide →
The Professional Order
The sequence most pros follow in a full room repaint is: ceiling first, then trim, then walls last. If you are only doing trim and walls, that becomes trim first, walls second. The trim category here includes baseboards, door and window casings, crown molding, and any built-ins.
The reasoning is all about which surface is easier to cut a clean line against, and where mistakes are easiest to hide. Painting in this order lets you work efficiently without obsessing over perfection on the steps that do not need it, then finishing with the one cut that matters most.
Why Trim Comes First
When you paint the trim first, you do not have to be careful about getting trim paint on the wall. You can paint the baseboards and casings quickly and even a little sloppily, letting paint slop onto the wall surface, because the wall is about to be painted over anyway. This speeds up the trim work enormously, since cutting a perfect edge against an unpainted wall would be slow and pointless.
You also paint the full trim profile without worrying about the wall edge, which means complete, even coverage on the molding. Once the trim is done and fully dry, you move to the walls. That order removes the pressure from the trim stage and shifts all the precision to one step.
Why Walls Come Second (and the Tape Trick)
After the trim has cured, you tape it off and paint the walls. Here is the key insight: it is far easier to cut a clean line, or to apply painter’s tape, onto the hard, smooth, glossy surface of trim than onto a textured wall. Trim is usually painted in a satin, semi-gloss, or gloss finish, and those slick surfaces let tape seal tightly so wall paint does not bleed underneath.
So you wait for the trim to dry hard (give it the manufacturer’s recommended cure time, often a day or more for a crisp tape line), apply painter’s tape along the edge of the trim, then paint the walls right up to the tape. When you peel the tape, you get a sharp, professional line. Taping onto rough wall texture, by contrast, almost always lets paint seep through and leaves a fuzzy line.
Why Not the Other Way?
Plenty of people instinctively paint the walls first, then go back and “cut in” the trim against the finished wall. This can work, and some painters prefer it, but it has real drawbacks. You have to cut a flawless trim line freehand against a finished wall, which demands a steady hand and a quality brush, and any slip shows.
If you try to tape instead, you are taping onto the wall surface to protect it while painting trim, and as noted, tape seals poorly on textured walls and can also pull off fresh wall paint when removed. The trim-first method sidesteps both problems, which is why it is the dominant professional approach.
The Full Room Sequence
For a complete room makeover, here is the order that gives the best results with the least frustration:
- Ceiling first. Paint the ceiling before anything else so any spatter or roller overspray lands on walls and trim you will paint later.
- Prep and prime. Patch, sand, and prime as needed once the ceiling is done.
- Trim second. Paint all trim, baseboards, casings, crown, and built-ins, without worrying about the walls.
- Walls last. Let the trim cure, tape it off, then paint the walls up to the tape for crisp lines.
Working top to bottom and from “least precise” to “most precise” keeps you from undoing finished work.
Choosing the Right Paint and Tape
The trim-first method leans heavily on a good tape line, so the products you choose matter. Use a quality painter’s tape rated for the surface, and apply it only after the trim paint has properly cured, not just dried to the touch. Tape laid on soft, recently painted trim can lift the finish when you peel it. Burnish the tape edge down firmly with a putty knife or your fingernail so paint cannot seep underneath.
Finish choice helps too. Trim is typically painted in semi-gloss or satin, which is durable, wipeable, and gives tape a slick surface to seal against, while walls usually get an eggshell or matte finish. For the crispest line, some pros run a thin bead of the wall color or a clear caulk along the tape edge first to seal it, then paint; this locks the line before the wall color goes on. Peel the tape while the wall paint is still slightly wet, pulling it back on itself at a low angle for the cleanest release.
Honest Exceptions
No rule fits every job. If you are only touching up walls and leaving the existing trim alone, obviously you just paint the walls and cut carefully along the trim. Skilled painters with a great brush sometimes do walls first and free-hand the trim line faster than taping, especially on smooth walls where a clean cut is easier. And some prefer to skip tape entirely and cut both surfaces by hand.
For most DIYers, though, the trim-first, walls-second order delivers the cleanest result with the least skill required, because it puts your one precise cut on the surface where tape works best. So when you find yourself wondering should i paint trim or walls first, go with the pros: ceiling, then trim, then walls, and let painter’s tape on the cured trim give you those sharp, satisfying lines.