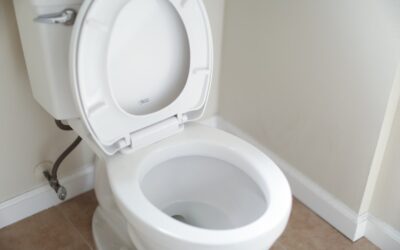
There is a reason most DIY bathroom paint jobs look 90 percent finished: that awkward 4-inch gap between the toilet tank and the wall almost never gets done. Figuring out how to paint behind a toilet without pulling the whole fixture turns a two-day job into a two-hour one. The trick is not a special paintbrush. It is the right roller, a smart taping sequence, and knowing where to cut in first.
Part of our Bathroom Remodeling & Flooring guide — explore the full guide →
Tools You Actually Need
Skip the flimsy foam brush kits sold for this purpose. They leave texture differences you can see from across the room. Grab these instead:
- A 4-inch high-density foam mini roller and frame (Purdy White Dove or similar, around $12)
- A 6-inch or 9-inch corner wand roller frame with a jointed head ($15 to $25)
- A 2-inch angled sash brush (Wooster Shortcut or Purdy Clearcut)
- Frog Tape Multi-Surface or equivalent delicate-surface painter’s tape
- A drop cloth or plastic sheeting cut into strips
- A flashlight or clip-on work light
The jointed corner roller is the real secret. It costs less than a takeout dinner and reaches spaces a rigid roller cannot.
Prep Work: The 15 Minutes That Save Hours
Clean the wall first. Bathrooms accumulate hairspray residue, toothpaste spatter, and steam-driven dust that paint will not bond to. Wipe the wall behind the toilet with a 50/50 solution of water and white vinegar, then dry it with a microfiber cloth.
Turn off the water supply at the angle stop valve under the tank. Flush once to empty the tank partially. This reduces condensation while you work and makes it safer if you bump the supply line. Lay a strip of plastic sheeting across the floor, tucking it under the toilet base.
Taping the Toilet Like a Pro
Good tape work decides how clean your final line looks. Wrap the entire toilet tank lid and sides with plastic sheeting, then tape the edges. Focus taping attention on three specific spots:
- The top rim of the tank where the lid sits (tape around the top edge of the ceramic)
- The water supply line and its chrome escutcheon at the wall
- The toilet bolts at the floor if you are painting base trim too
Press every tape edge with a putty knife or an old credit card. Paint bleeds where tape lifts, and the humid bathroom environment loosens tape adhesion within about an hour.
Cutting In: Start at the Top and Work Down
Load your 2-inch angled sash brush lightly, tapping off excess on the rim of the paint can. Start at the ceiling line directly above the toilet. Cut in a straight 4 to 6 inch band along the top. Then cut in vertically down both sides where the wall meets the adjacent walls.
Next, reach behind the tank with the brush held vertically and cut in a 2-inch band along the water supply pipe and the floor. This is where most DIYers give up, but a sash brush with a 2-inch head slips into that space easily. Use a flashlight angled from the side so you can see dry spots.
Rolling the Wall Behind the Toilet
Now for the main event. Load the 4-inch mini roller and roll the wall above the tank normally. Then switch to the jointed corner roller for the gap. The jointed head bends around the toilet tank and puts paint on the wall that your hand cannot reach.
Work in a W pattern: roll down, over, and up without lifting, then backroll lightly in one direction to even out the texture. Keep the roller at a consistent 15 to 20 degree angle so the paint film stays uniform. Two thin coats look better than one thick coat every time.
The Hidden Trick Pros Use
For really tight installations where even the corner roller will not fit, pros use a trick with a piece of 1/2 inch thick rigid foam insulation cut to size. Wrap the foam in a piece of nap roller cover, dip it in paint, and slide it behind the toilet like a spatula. It sounds ridiculous. It also works when nothing else does.
Another option for ultra-tight spaces is an automotive detailing paint pad on a telescoping handle. Sold for painting behind radiators, these pads are about 1/4 inch thick and reach almost anywhere.
Drying and Second Coat
Most modern latex bathroom paints (Benjamin Moore Aura Bath and Spa, Sherwin-Williams Emerald Urethane, Behr Premium Plus) are recoat-ready in 2 to 4 hours. Keep the bathroom ventilated with the fan on. Do not run a hot shower during the drying window since humidity extends dry times and can cause streaking.
Apply the second coat the same way as the first. Cut in, then roll. Remove tape while the second coat is still slightly tacky, around 30 to 45 minutes after application, pulling tape at a 45 degree angle away from the fresh paint line.
Should You Just Remove the Toilet?
For 90 percent of paint jobs, no. Removing a toilet means new wax ring ($8), the risk of cracking the porcelain base, and 2 hours of extra labor. Only pull the toilet when you are repainting the floor trim behind it, the wall has serious damage needing drywall repair, or you are changing colors dramatically (dark to white especially).
Final Tips for a Flawless Finish
Paint the wall behind the toilet first, before any other wall. If you save it for last, you will rush it and the quality drops. Use a semi-gloss or satin sheen for the whole bathroom to handle moisture and allow easy wipe-down. And when you’ve got the method dialed in for how to paint behind a toilet, the rest of the bathroom is easy. This is the hardest spot. Everything else is just rolling.