A shower that drips after you turn it off or delivers water at the wrong temperature almost always points to a worn cartridge. Shower cartridge replacement is one of those repairs that sounds intimidating but takes most homeowners under an hour with basic tools. The part itself costs $15 to $50 depending on the brand, compared to $150 to $300 for a plumber service call. Understanding how the cartridge works and how to identify your specific model is the hardest part of the job.
Part of our Bathroom Remodeling & Flooring guide — explore the full guide →
What a Shower Cartridge Does
The cartridge sits inside your shower valve body, behind the handle. It controls the flow and temperature of water by directing hot and cold supply lines through internal ports. When you turn the handle, the cartridge rotates or slides to open, close, or mix the water streams.
Over time, the rubber O-rings and seals inside the cartridge degrade from mineral buildup and constant water pressure. Once those seals fail, water leaks past the cartridge even when the handle is off. That constant drip wastes 5 to 10 gallons of water per day and can leave mineral stains in the tub or shower pan.
How to Identify Your Cartridge Model
Shower cartridges are not universal. Moen, Delta, Kohler, Pfister, and other manufacturers each use proprietary designs. Before buying a replacement, you need to identify the exact model.
- Check the handle: Many brands stamp their logo on the escutcheon plate or handle cap. Moen and Delta are the most common in US homes
- Look for a model number: Some valve bodies have a stamped number visible after removing the handle and escutcheon
- Bring the old cartridge to the store: If you cannot find a model number, remove the cartridge first and match it visually at a plumbing supply shop
- Measure the cartridge: Length, diameter, and the number of O-rings help narrow it down. The Danco and BrassCraft websites have cartridge identification tools
Tools and Materials
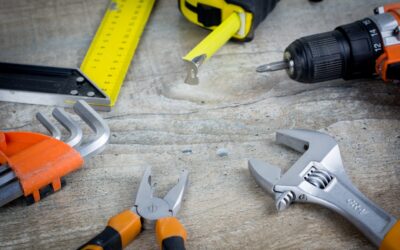
- Adjustable wrench or pliers
- Phillips and flathead screwdrivers
- Allen wrench set (for handle set screws)
- Cartridge puller (Moen sells one for about $10; other brands may need a generic puller)
- Replacement cartridge with new O-rings
- Silicone-based plumber’s grease
- Needle-nose pliers
- Towel and bucket
Step-by-Step Shower Cartridge Replacement
Turn Off the Water
Shut off water to the shower at the dedicated shut-off valves if accessible, or turn off the main water supply. Open the shower valve to release pressure and drain residual water. Confirm the water is off by checking that nothing flows from the showerhead.
Remove the Handle and Trim
Pop off the handle cap with a flathead screwdriver to expose the set screw. Remove the set screw with a Phillips screwdriver or Allen wrench, then pull the handle straight off. Next, unscrew the escutcheon plate (the decorative cover around the valve). Some escutcheons are held by a single screw; others thread off counterclockwise.
Extract the Old Cartridge
With the trim removed, you will see the cartridge stem protruding from the valve body. Some cartridges are held in place by a retaining clip, a small U-shaped metal pin near the top. Pull the clip out with needle-nose pliers and set it aside.
Grip the cartridge stem with pliers and pull straight out. If it is stuck from mineral deposits, use a cartridge puller tool. For Moen 1222 and 1225 cartridges, the Moen cartridge puller threads onto the stem and gives you the leverage to extract it cleanly. Wiggle slightly while pulling to break the seal.
Install the New Cartridge
Apply a thin coat of silicone plumber’s grease to the O-rings on the new cartridge. This helps it slide into the valve body and extends the life of the seals. Align the cartridge with the valve body notches and push it in firmly until it seats fully. Reinsert the retaining clip.
Make sure the hot and cold orientation is correct. Most cartridges have an alignment tab or flat spot that matches a corresponding slot in the valve body. If installed backwards, the handle will deliver hot when turned to cold and vice versa.
Reassemble and Test
Replace the escutcheon, handle, and set screw in reverse order. Turn the water supply back on slowly and check for leaks around the valve body. Run the shower and test both hot and cold to confirm proper temperature control. A successful shower cartridge replacement should eliminate the drip completely and restore smooth handle operation.
Common Problems and Fixes
If the new cartridge still leaks, the valve body seat may be corroded or scored. A valve seat wrench can remove and replace the seat for about $5. Alternatively, a seat grinding tool can resurface a damaged brass seat in place.
Handle stiffness after replacement usually means the cartridge was not greased enough or is slightly misaligned. Remove the handle and recheck the cartridge seating before forcing it.
When to Replace vs. Rebuild
Some cartridges, especially Moen’s 1225 model, can be rebuilt with a new O-ring kit for $5 to $8 instead of buying a full replacement at $25 to $40. Rebuilding makes sense if the cartridge body is not cracked or corroded. However, if the cartridge is more than 10 years old, a full replacement is the safer bet. The cost difference is small, and a new cartridge comes with a manufacturer warranty.
Bath Cartridge Replacement: Identifying the Cartridge Type in Your Tub or Shower Valve
Before any bath cartridge replacement, confirm that your valve actually uses a cartridge and figure out which kind. The trim tells you more than you might expect, and getting it right up front avoids pulling the wrong part or buying a cartridge that will not seat.
| What You See | What Is Inside | Notes |
|---|---|---|
| One handle that pulls out or lifts, turns for temperature | Single-handle cartridge, often pressure-balancing | Most common in U.S. homes since the 1990s |
| One handle with a separate volume knob or lever | Thermostatic or dual-function cartridge | Usually brand- and series-specific; model number matters |
| Two handles (hot and cold) | Individual stems: compression washers or quarter-turn ceramic discs | Often called “stems,” not cartridges; one per side |
| Three handles (hot, cold, diverter) | Two valve stems plus a diverter stem | Diverter stem wears too if water keeps running from the spout in shower mode |
Changing a shower faucet cartridge from a pressure-balancing valve restores both the seal and the anti-scald function, so always replace with the matching model rather than a “close enough” part. Many brands also stamp the brand name or series on the cartridge cap, visible once the trim is off.
Leaking Tap Cartridge or Broken Stem?
A leaking tap cartridge usually drips from the spout or showerhead with the handle off. A shower cartridge broken at the stem is different: the handle spins without changing flow, or the stem snaps during removal. For shower cartridge removal with a snapped stem, use a puller designed for your brand, which grips the cartridge body rather than the stem. Avoid hammering or prying against the valve body, since damaging the brass means opening the wall.
Safety and When to Call a Plumber
Shut off water to the shower. Many tub and shower valves have built-in stops behind the trim or an access panel; if yours does not, close the home’s main supply and open a lower faucet to drain the lines. Call a licensed plumber if the cartridge will not budge with a proper puller, the valve body is cracked or corroded, the old valve is obsolete with no parts available, or water appears inside the wall. Replacing the valve body itself involves soldering or crimping inside the wall and, in many areas, a permit.