A dripping showerhead, a handle that spins without changing the temperature, or water that never gets hot usually points to a failing valve, and a shower water valve replacement is often the fix that restores smooth, leak-free operation. Before you touch a single fitting, understand the most important safety rule of the entire job: you must shut off the water supply first. Many shower valves have no local shutoff, so you will likely need to close your home’s main water shutoff before starting. Skip this step and you will get a face full of pressurized water the moment you pull the cartridge.
Part of our Bathroom Remodeling & Flooring guide — explore the full guide →
This guide covers the two levels of the job. The first, swapping a worn cartridge inside an existing valve body, is a realistic DIY project for a confident homeowner. The second, replacing the entire valve body behind the wall, involves soldering copper pipe or working with hidden connections, and that work belongs to a licensed plumber. Knowing which situation you are in is the key to a good outcome.
Shut Off the Water Before You Do Anything
This point deserves its own section because it is where people get hurt and flood their bathrooms. Look under or near the shower for a local shutoff; some newer valves include integral stops you can close with a screwdriver behind the trim plate. If yours has them, close both hot and cold stops. If it does not, and many showers have no local shutoff at all, go to your home’s main water shutoff, usually near the water meter, in the basement, or where the main line enters the house, and turn it fully clockwise to close.
After the supply is off, open the shower faucet to relieve residual pressure and let the lines drain. Place a towel over the drain so small screws and clips cannot escape down it. Only when water has stopped flowing and pressure is fully released should you begin disassembly.
Tools and Materials You Will Need
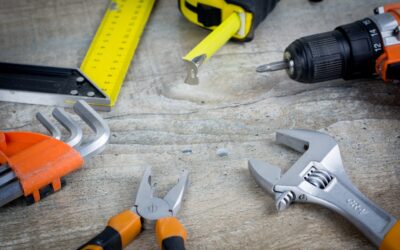
- Replacement cartridge or valve matched to your brand and model (Moen, Delta, Kohler, and Pfister each use different parts)
- Adjustable wrench and a set of Allen keys
- Phillips and flat-head screwdrivers
- Needle-nose pliers and a cartridge puller tool if your brand requires one
- Plumber’s grease and plumber’s tape (PTFE thread tape)
- A rag, small bucket, and a flashlight or work light
- Penetrating oil for a corroded cartridge
A replacement cartridge costs $15 to $60 depending on brand. A full valve body runs $40 to $120 for the part alone. Bring your old cartridge or your valve’s model number to the hardware store, because an almost-right part will leak.
How to Replace a Shower Valve Cartridge
For most single-handle showers where the valve body itself is sound, replacing the internal cartridge cures drips and temperature problems. Follow these steps once the water is off.
Step 1: Remove the Handle and Trim
Pry off the handle cap to expose the set screw, loosen it with an Allen key, and pull the handle straight off. Remove the escutcheon or trim plate, which may be held by screws or threaded onto the valve. Set all hardware in a cup so nothing rolls away.
Step 2: Remove the Retaining Clip or Nut
Most cartridges are held by a small brass or plastic retaining clip that lifts out with needle-nose pliers, or by a threaded retaining nut you unscrew with a wrench. Note exactly how it sits so you can reinstall the new one in the same orientation.
Step 3: Pull the Old Cartridge
Grip the cartridge stem with pliers and pull it straight out. Older cartridges corrode in place; a cartridge puller made for your brand, or a spray of penetrating oil and a few minutes of patience, frees a stubborn one. Note the orientation of the notches or tabs before it comes out, since installing a cartridge rotated 180 degrees reverses hot and cold.
Step 4: Install the New Cartridge
Coat the new cartridge O-rings with plumber’s grease, slide it in with the same orientation as the old one, and reinstall the retaining clip or nut. Do not overtighten a threaded nut, since that can crack the plastic and cause leaks.
Step 5: Reassemble and Test
Reinstall the trim plate, handle, and cap. Turn the water supply back on slowly, then run the shower and check for leaks and correct hot and cold operation. Watch the valve for several minutes and feel behind the wall access panel if you have one.
When to Replace the Entire Valve Body
If the valve body itself is cracked, corroded through, or leaking behind the wall rather than at the cartridge, a cartridge swap will not fix it. Replacing the whole valve means opening the wall, disconnecting the supply lines, and often soldering new copper connections or fitting PEX. This is where the job crosses out of DIY territory.
Be clear-eyed here: if the work involves soldering copper pipe or any work behind the wall, call a licensed plumber. A sweated joint that leaks inside a wall cavity can rot framing and grow mold for months before you notice, and an improperly supported valve can fail under pressure. A professional also brings the skill to protect surrounding tile and to pressure-test the finished connection. Paying a pro $250 to $600 for a valve-body replacement is far cheaper than repairing water damage.
Cost of Shower Valve Replacement
A DIY cartridge swap costs only the price of the part, $15 to $60, plus a few dollars for grease and tape. Hiring a plumber to replace a cartridge runs $150 to $300 including labor. A full valve-body replacement, which usually requires wall access and soldering, typically costs $300 to $800 depending on your region, the wall finish, and whether tile must be cut and repaired afterward. Factor in that a tiled shower wall often needs a matching replacement tile and grout work once the valve is in, so keep a few spare tiles from the original installation if you have them.
Preventing Future Valve Problems
Once your new cartridge or valve is in, a little maintenance keeps it working smoothly for years. Hard water is the biggest enemy of a shower valve, since mineral scale builds up on the cartridge and stiffens the O-rings. If your water is hard, cycling the handle through its full range every few weeks helps keep the cartridge from seizing. Exercising a shutoff or main valve once or twice a year also keeps it from freezing in place, so it actually works the next time you need it in a hurry.
Watch for early warning signs too. A handle that grows stiff, a slight drip that starts and stops, or a faint temperature swing are all cues that a cartridge is beginning to wear. Addressing them early, while the valve body is still sound, keeps you in easy DIY territory and out of a costly wall-opening repair down the road.
Frequently Asked Questions
Do I really have to shut off the main water supply?
Yes, unless your valve has integral local stops you can close. Many showers have no local shutoff, so you must close the home’s main water shutoff. Never open a valve under pressure, because water will spray out forcefully the moment the cartridge is removed.
How do I know if I need a new cartridge or a whole new valve?
Drips, hard-to-turn handles, and lost temperature control almost always mean a worn cartridge. Water leaking behind the wall, a cracked valve body, or corrosion on the body itself means the valve needs full replacement, which is a plumber’s job.
Can I replace a shower valve myself?
You can replace the cartridge yourself if you are comfortable with basic tools and you shut off the water first. Replacing the entire valve body, especially if it requires soldering copper or opening the wall, should be left to a licensed plumber.
Why does my new cartridge still leak?
The most common causes are a mismatched part, a cartridge installed in the wrong orientation, dry or pinched O-rings, or an overtightened retaining nut that cracked the housing. Confirm the model number matches and that the O-rings are greased and seated properly.
Done right, a shower water valve replacement restores quiet, leak-free, temperature-stable showers for years. Start every job by shutting off the water, match your replacement part exactly, and know your limits: a cartridge swap is a satisfying afternoon project, but anything involving soldering or work behind the wall is a job for a licensed plumber who can guarantee the connection and protect your home from hidden water damage.