A leaking, sputtering, or temperature-bouncing shower almost always traces back to one part: the cartridge inside the shower valve. The good news is that replacing a cartridge is one of the most accessible plumbing repairs a DIYer can tackle. The bad news is that cartridges fuse themselves into the valve body over years of mineral deposit buildup, turning a 20-minute job into a 4-hour battle. Knowing how to remove shower valve components, in the right order with the right tools, separates the homeowner who saves $300 from the one who calls a plumber after stripping the cartridge head.
Part of our Bathroom Remodeling & Flooring guide — explore the full guide →
Two Different Jobs: Cartridge vs. Full Valve
Most “remove the shower valve” tasks really mean “replace the cartridge.” The valve body itself – the brass housing soldered into the wall – rarely needs replacing. It typically lasts 30 to 50 years. The cartridge, the moving part inside it, fails every 8 to 15 years with normal use, faster in hard-water areas.
This guide focuses primarily on cartridge removal, with notes on full valve replacement at the end since that’s a much larger project requiring wall opening.
Tools You’ll Need
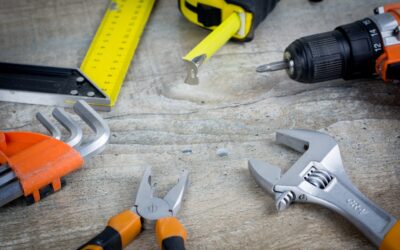
- Phillips and flathead screwdrivers
- Allen wrench set (most modern handles use 1/8 inch hex)
- Adjustable wrench or channel-lock pliers
- Cartridge puller (Moen, Delta, and Kohler each sell brand-specific pullers, $25 to $40)
- Plumber’s grease (silicone, not petroleum)
- Shop vacuum and old towels
- White vinegar for soaking mineral-encrusted parts
The cartridge puller is non-negotiable for stuck cartridges. Using vise-grip pliers or makeshift tools strips the cartridge stem and creates a much harder removal problem.
Step 1: Shut Off the Water
This sounds obvious but homeowners skip it constantly and end up with flooded bathrooms. Shut off the dedicated shower stops if your valve has them (look for screws on the trim plate that turn integral stops). Otherwise shut off the main house water supply at the meter or main shutoff.
Run a hot tap somewhere in the house to drain residual pressure from the lines, then open the shower valve to release any remaining water.
Step 2: Remove the Handle and Trim
The handle attaches with either a small set screw on the underside (Moen, Delta) or a Phillips screw under a decorative plug (Kohler, Symmons). Remove the screw, pull the handle straight off the stem. If the handle is stuck from corrosion, gently pry with a flat blade behind the base – never strike it with a hammer (bends the cartridge stem).
Behind the handle is the escutcheon (the round trim plate against the wall). Most pop off with a gentle pry. Some are threaded – turn counterclockwise.
Step 3: Remove the Retaining Clip
Now you can see the cartridge. A small horseshoe-shaped retaining clip holds it in place. Use needle-nose pliers to pull the clip straight out (do not twist – it’ll break). Set the clip aside in a magnetic tray; losing it adds a hardware-store trip to your day.
Some valves use a threaded retaining nut instead of a clip. Use a deep-well socket or specialty wrench to back it off counterclockwise.
Step 4: Pull the Cartridge
This is where the procedure for how to remove shower valve cartridges gets challenging. With a fresh cartridge, you can grip the stem with channel locks and pull it straight out. With a stuck cartridge, you need the brand-specific puller tool.
The puller threads onto the cartridge stem, then a slide hammer or T-handle pulls the cartridge straight out of the valve body. Pull straight – any side load will bend the stem and lock the cartridge in place permanently. If straight pulling fails after 2 or 3 attempts, soak the cartridge with white vinegar for 30 to 60 minutes. The acid dissolves mineral buildup that’s gluing the cartridge to the brass valve body.
Stuck Cartridge Tactics
For truly fused cartridges, escalate in this order:
- Vinegar soak with the cartridge still in place (saturate a cloth and pack it around the stem for 1 hour)
- CLR or Lime-A-Way for 30 minutes if vinegar fails
- Apply heat from a heat gun (not a torch – too risky around plumbing) to expand the brass body
- Use the cartridge puller with controlled, increasing force
- If all else fails, drill out the cartridge with a 1/4 inch bit through the center, then break it apart with a screwdriver
Drilling is the last resort because debris can fall into the valve body and require flushing.
Inspecting the Valve Body
With the cartridge out, shine a flashlight into the valve body. Check for:
- Corrosion or pitting on the brass interior – light buildup is fine, deep pitting means valve replacement
- Mineral deposits in the seat areas – clean with a dental pick and vinegar
- Damage to the sealing surfaces where O-rings will land
Wipe the inside with a clean rag and apply a thin film of plumber’s grease to the cartridge contact surfaces before installing the new one.
Installing the New Cartridge
Match the new cartridge exactly to the brand and model of the old one. Moen 1225 cartridges fit Moen 1225 valves only – not Moen 1255 or Moen Posi-Temp. Push the new cartridge straight in, ensuring the alignment notch lines up with the corresponding tab in the valve body. Install the retaining clip, escutcheon, handle, and set screw in reverse order.
Turn the water back on slowly while watching for leaks. Test hot, cold, and mixed flow at full pressure for 5 minutes before declaring the job done.
When to Replace the Full Valve
If the valve body is corroded, leaks at the soldered connections, or uses a discontinued cartridge that’s no longer manufactured, replace the full valve. This requires opening the wall behind the shower (or the wall on the other side, often a closet or guest bedroom). Cut out the existing valve with copper-pipe cutters, sweat in a new valve, and patch the wall. Plan on a full day and basic soldering skill, or hire a plumber for $400 to $700 including parts.